If you are craving a delightful treat that brings together the crispness of fresh apples and the luscious sweetness of caramel, you have to try this Simple Homemade Caramel Apples Recipe. It’s a perfect blend of tender, juicy fruit wrapped in a silky, buttery caramel coating that melts in your mouth. This recipe captures all the magic of fall flavors or any time you want a comforting, nostalgic snack with a modern homemade touch. Once you master this recipe, you’ll wonder why you ever thought caramel apples were complicated, because this one is downright achievable, fun to make, and absolutely irresistible.
Ingredients You’ll Need
Gathering the right ingredients is key to nailing the perfect balance of flavor, texture, and that beautiful golden caramel color. Each component plays a special role in turning simple apples into a much-loved treat.
- 6 medium Apples: Choose firm varieties like Granny Smith or Honeycrisp for crispness and tangy sweetness that stands up to the caramel.
- 2 cups Granulated Sugar: This is the foundation for your caramel’s rich sweetness and glossy finish.
- 1 cup Water: Helps dissolve the sugar smoothly as it heats up, ensuring even caramelization.
- 0.5 cup Unsalted Butter: Adds creaminess and depth, preventing the caramel from becoming too sticky or tough.
- 1 cup Heavy Cream: Key for that luscious, silky texture that makes the caramel coat perfectly.
- 1 teaspoon Vanilla Bean Paste: Brings warmth and fragrant complexity to the caramel’s flavor.
- 0.5 teaspoon Sea Salt: Balances the sweetness with a subtle hint of saltiness, enhancing every bite.
How to Make Simple Homemade Caramel Apples Recipe
Step 1: Prepare Your Apples and Workspace
Start by washing and drying the apples thoroughly. Then, insert wooden sticks firmly into the top of each apple; this makes dipping and eating so much easier and more fun. Having your ingredients measured and equipment ready sets you up for a smooth caramel-making process.
Step 2: Dissolve Sugar in Water
In a medium saucepan, combine the granulated sugar with the water and gently stir until the sugar dissolves. Bring the mixture to a gentle boil without stirring, as stirring can cause crystallization and ruin your caramel’s texture.
Step 3: Monitor the Temperature
Using a candy thermometer, watch the sugar syrup closely until it reaches 240°F, known as the soft ball stage. This usually takes about 10 to 15 minutes and is when the sugar syrup will transform into caramel after the next steps.
Step 4: Add Butter and Stir
Remove the saucepan from heat and immediately add the unsalted butter, stirring until it completely melts and blends into the syrup. This step enriches the caramel, giving it that unbeatable creaminess.
Step 5: Incorporate Heavy Cream Carefully
Slowly pour in the heavy cream while stirring constantly. Expect some bubbling—that’s natural! Keep stirring until all the cream is fully incorporated and your caramel has a smooth, glossy sheen.
Step 6: Flavor with Vanilla and Salt
Mix in the vanilla bean paste and sea salt. These simple flavor enhancers take your caramel from good to unforgettable by adding depth and balancing sweetness beautifully. Let it simmer for an extra 2 to 3 minutes.
Step 7: Cool Slightly Before Dipping
Remove the caramel from heat and let it sit for a minute or two so it thickens to the perfect dipping consistency. Too hot, and it runs off the apples too quickly; too cool, and it won’t coat properly.
Step 8: Dip Your Apples
One at a time, dip each apple into the warm caramel. Swirl to coat evenly, then lift and allow any excess caramel to drip off before placing each apple on a lined baking sheet for setting.
Step 9: Chill to Set
Once all apples are dipped, pop them into the refrigerator for at least 30 minutes to let the caramel harden just enough for handling without losing that soft chewiness.
Step 10: Ready to Enjoy or Store
Your caramel apples are now ready to be enjoyed immediately or stored in an airtight container to maintain freshness for later snacking.
How to Serve Simple Homemade Caramel Apples Recipe
Garnishes
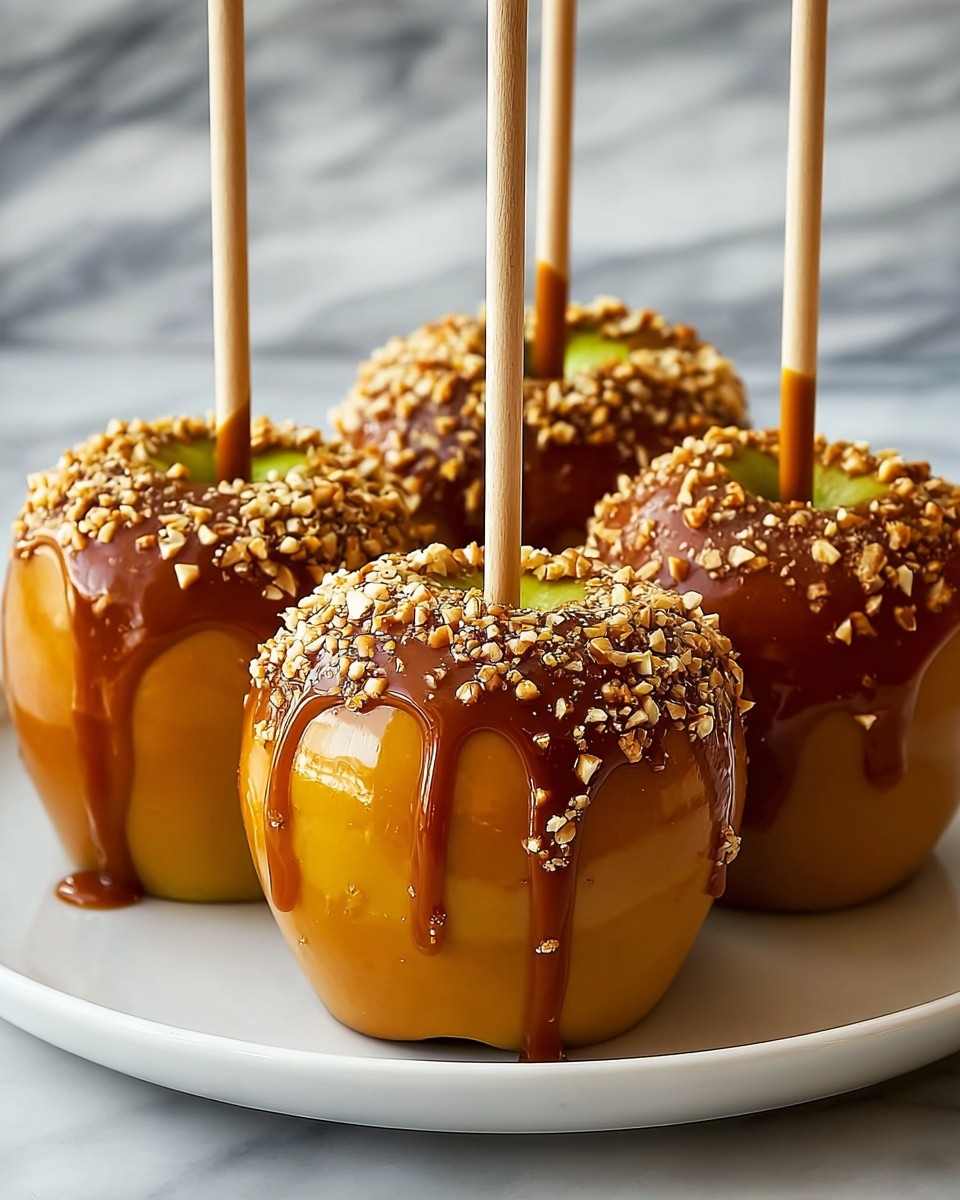
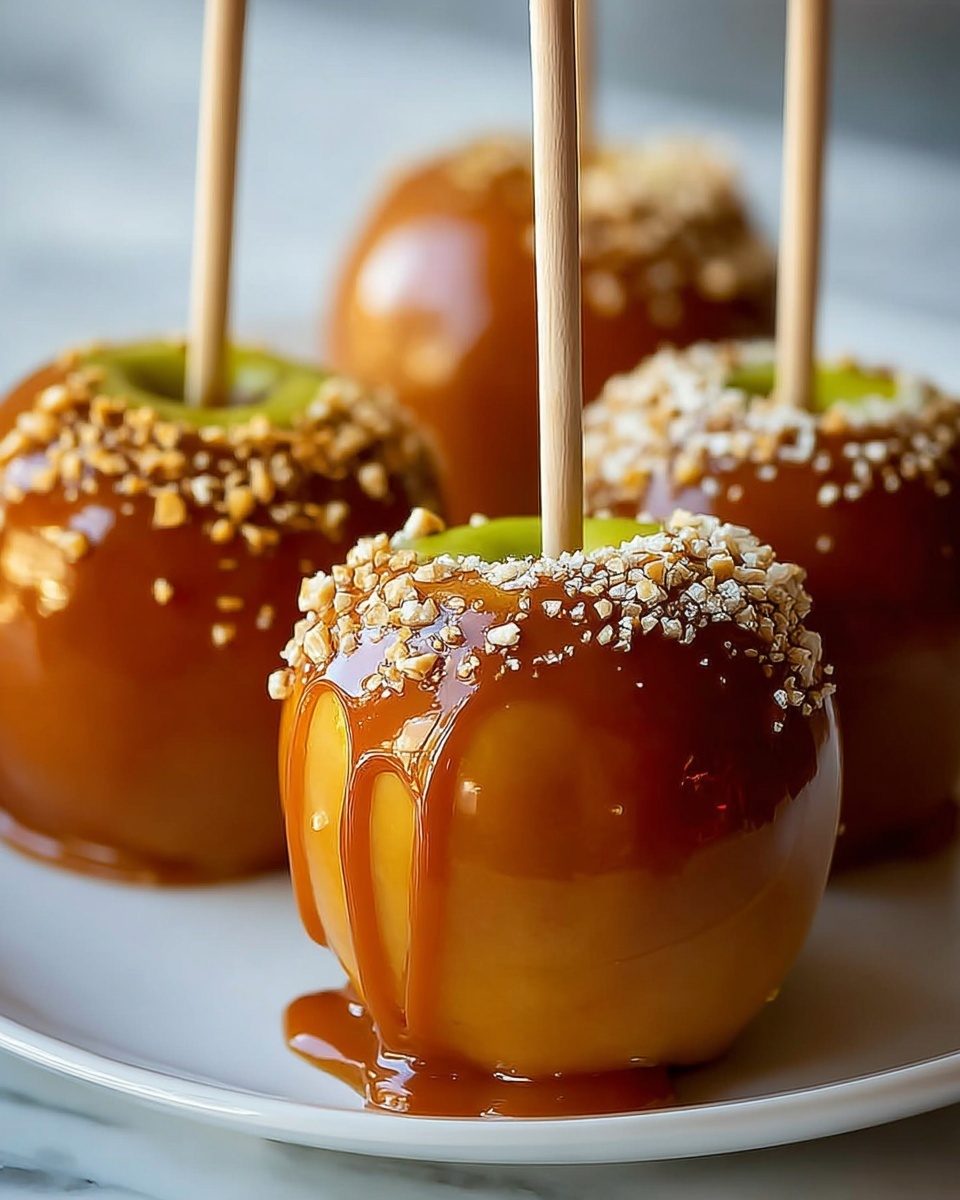
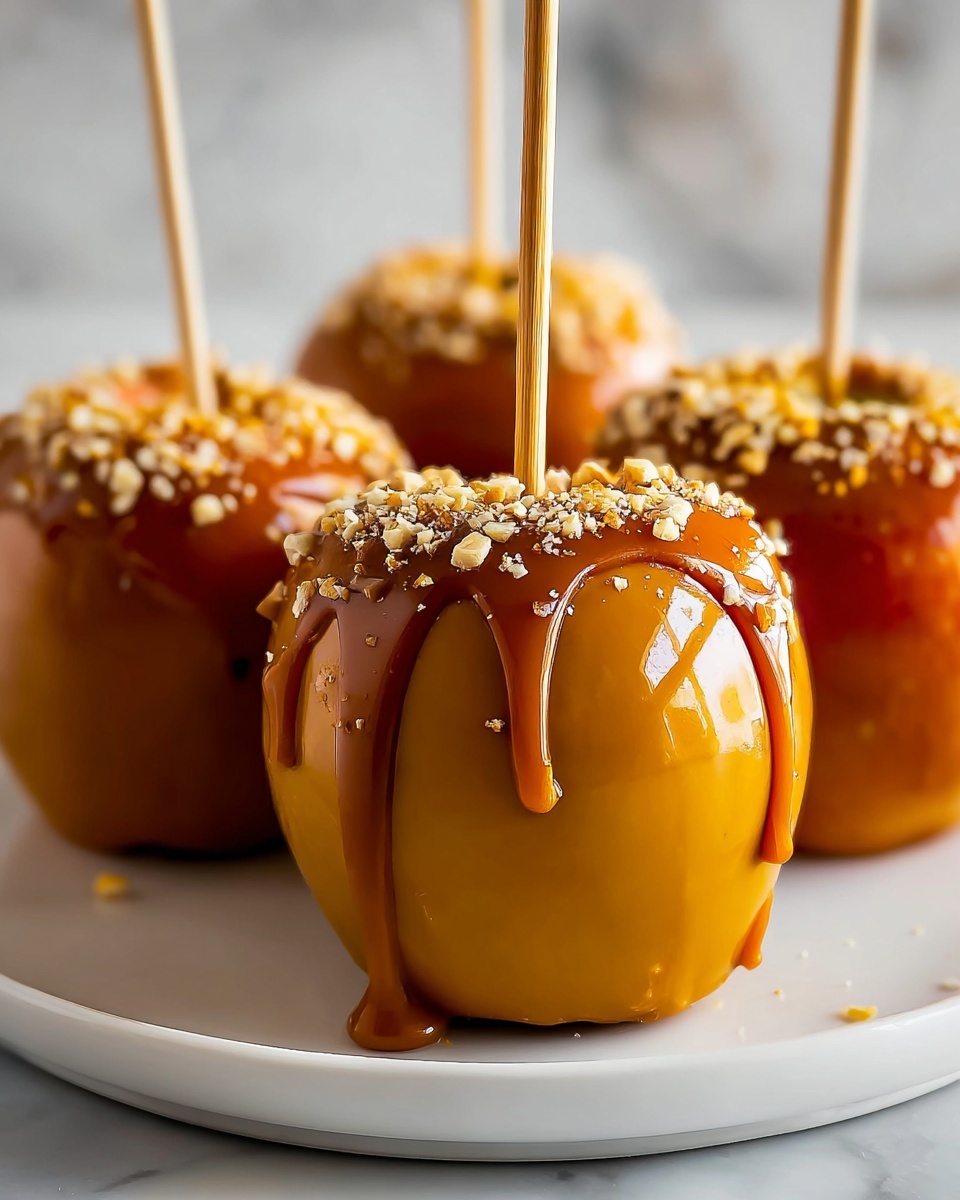
Add some extra flair to your caramel apples by rolling them in toppings like crushed nuts, colorful sprinkles, mini chocolate chips, or shredded coconut before chilling. Garnishes provide contrasting textures and elevate both the look and taste, making every bite a party in your mouth.
Side Dishes
These caramel apples pair wonderfully with warm beverages like spiced apple cider, hot chocolate, or even a mug of coffee. For more indulgence, add a bowl of whipped cream or soft vanilla ice cream on the side for dipping or savoring alongside every bite.
Creative Ways to Present
Display your caramel apples on a rustic wooden board or in a festive basket lined with parchment paper for a charming look. You can also arrange them with colorful autumn leaves or edible flowers for a gorgeous centerpiece perfect for gatherings or gifting.
Make Ahead and Storage
Storing Leftovers
Wrap each caramel apple individually in wax paper or plastic wrap and store them in an airtight container in the refrigerator. They stay fresh for up to 3 days, ensuring you can enjoy this treat beyond your initial craving.
Freezing
While freezing caramel apples is possible, it’s not always recommended because the texture of the apple and caramel can change. If you do freeze them, wrap tightly and thaw in the fridge before eating to help maintain the best texture.
Reheating
If your caramel has hardened too much or you want that soft gooey effect again, gently warm the caramel-covered apple in the microwave for 5 to 10 seconds. Just be careful not to overheat, or the apple might get too soft.
FAQs
Can I use other types of apples for this Simple Homemade Caramel Apples Recipe?
Absolutely! While Granny Smith and Honeycrisp are ideal for their balance of tartness and firmness, you can experiment with Fuji, Gala, or Pink Lady apples. Just make sure the apples are firm to get that perfect crunch with the caramel.
What if I don’t have a candy thermometer?
You can use the cold water test to check for the soft ball stage: drop a small amount of boiling sugar syrup into cold water and see if it forms a soft, pliable ball. However, a candy thermometer is the most reliable method and worth investing in if you plan to make such recipes often.
Can I add flavors to the caramel?
Yes! Beyond vanilla bean paste, you can stir in cinnamon, nutmeg, or even a splash of bourbon to give your caramel extra character. Just add these after removing from heat for the best flavor retention.
How do I prevent the caramel from sticking to the apples?
Make sure your apples are completely dry and wax-free. Sometimes, washing with warm water and a little vinegar helps remove any residue. Additionally, chilling the apples before dipping can help the caramel stick better.
Can I make caramel apples without sticks?
While you can dip apples without sticks, the sticks make it easier to handle and eat the caramel apples without mess. If you don’t have sticks, consider cutting the apples into slices and drizzling caramel over them instead.
Final Thoughts
There’s something truly special about making caramel apples from scratch, especially with this Simple Homemade Caramel Apples Recipe. It’s approachable, rewarding, and tastes like a warm hug on a crisp day. Don’t hesitate to try this at home—you’ll soon discover that homemade caramel apples bring so much joy and a little bit of magic to any occasion.
Print
Simple Homemade Caramel Apples Recipe
- Prep Time: 15 minutes
- Cook Time: 30 minutes
- Total Time: 45 minutes
- Yield: 6 caramel apples
- Category: Dessert
- Method: Stovetop
- Cuisine: American
Description
This Simple Homemade Caramel Apples recipe combines crisp, fresh apples with a rich, creamy homemade caramel. Perfect for a festive treat or a sweet snack, these caramel apples are coated in a luscious caramel made from sugar, butter, and cream, finished with a hint of sea salt and vanilla for a balanced, irresistible flavor.
Ingredients
Apples
- 6 medium Apples (Firm varieties like Granny Smith or Honeycrisp, washed and dried)
Caramel
- 2 cups Granulated Sugar
- 1 cup Water
- 0.5 cup Unsalted Butter
- 1 cup Heavy Cream
- 1 teaspoon Vanilla Bean Paste
- 0.5 teaspoon Sea Salt
Instructions
- Prepare the Apples: Set up your workspace by gathering all ingredients and equipment. Insert wooden sticks firmly into the top center of each apple to serve as handles for dipping.
- Combine Sugar and Water: In a medium saucepan, mix granulated sugar and water. Stir gently just to dissolve sugar, then bring the mixture to a gentle boil without stirring to ensure a clear syrup.
- Cook to Soft Ball Stage: Using a candy thermometer, monitor the syrup’s temperature closely. Let it boil for about 10-15 minutes until it reaches 240°F (soft ball stage), which is crucial for proper caramelization.
- Add Butter: Remove the pan from heat briefly and add the unsalted butter. Stir continuously until the butter is fully melted and incorporated into the syrup, creating a smooth base.
- Incorporate Heavy Cream: Slowly pour in the heavy cream while stirring constantly. Be careful as the mixture will bubble vigorously. Continue stirring until the caramel is uniform and creamy.
- Add Flavorings: Stir in the vanilla bean paste and sea salt thoroughly to enhance the caramel’s depth of flavor. Return to low heat and simmer gently for 2-3 more minutes to meld the flavors.
- Cool Slightly: Remove the caramel from heat and allow it to cool for a few minutes so it thickens slightly, perfect for coating the apples.
- Dip Apples: Holding the sticks, dip each apple into the warm caramel, swirling to coat evenly. Let excess caramel drip off before placing the apples on a lined baking sheet to set.
- Set the Caramel: Repeat the dipping process for all apples. Optionally, add toppings like nuts or sprinkles before setting. Refrigerate the caramel apples for at least 30 minutes to allow the caramel to harden.
- Serve or Store: Once set, serve fresh or store in an airtight container at room temperature or refrigerated for up to 3 days for best freshness.
Notes
- Choose firm apples like Granny Smith or Honeycrisp for the best texture and flavor contrast with the caramel.
- Use a candy thermometer for precise temperature control to avoid burnt or undercooked caramel.
- Be cautious when adding heavy cream as the hot caramel will bubble vigorously.
- Caramel apples are best enjoyed within a few days to maintain freshness and crispness of the apple.
- Optional toppings such as chopped nuts, crushed cookies, or colorful sprinkles can be added immediately after dipping for extra texture and flavor.

