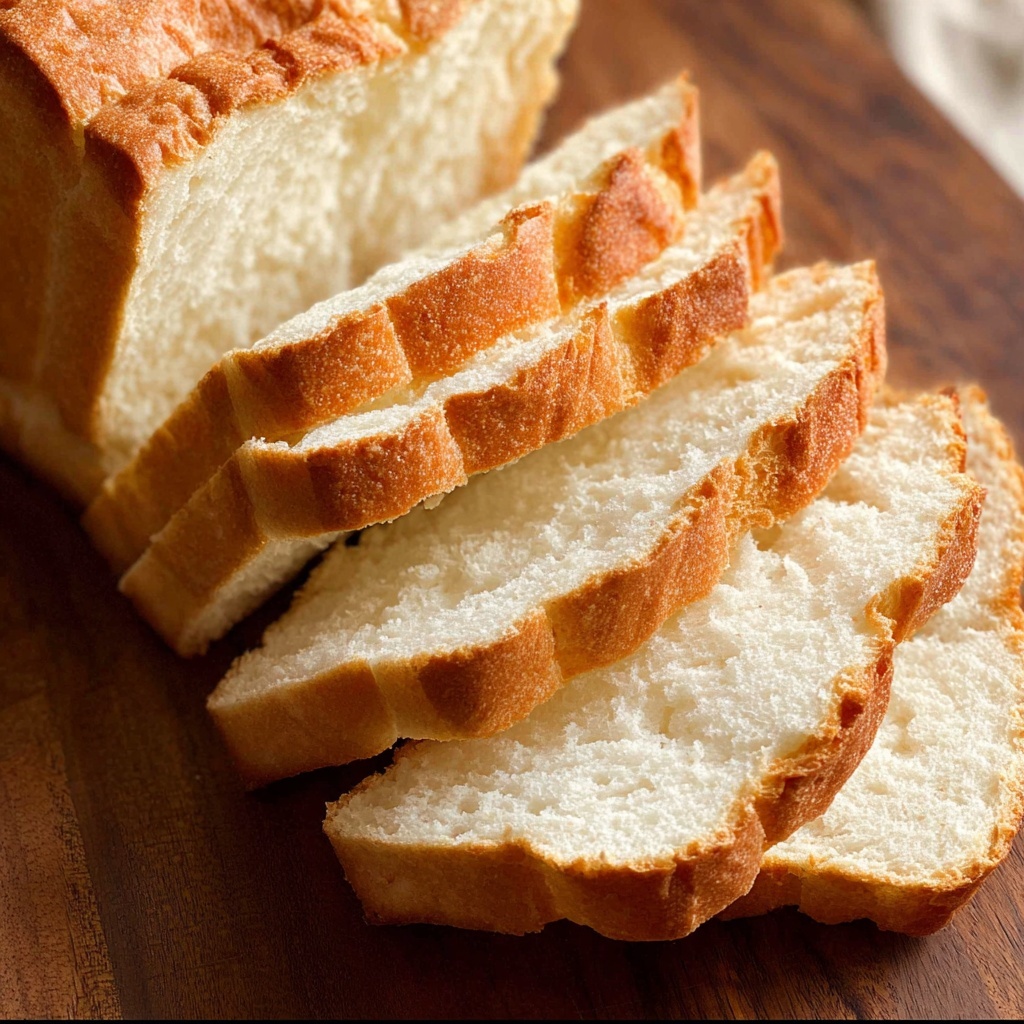
If you’ve ever dreamed of making your own sandwich bread but thought yeast was a must-have, then I have some fantastic news for you! This Sandwich Bread WITHOUT Yeast! (Dead easy) Recipe is a total game-changer. It delivers soft, fluffy slices with a tender crumb, all without the fuss of waiting for dough to rise. You’ll love how quick and straightforward it is, and how perfectly it fills your kitchen with that irresistible fresh-baked aroma. Let’s dive into this no-yeast bread adventure that’s bound to become your new favorite staple.
Ingredients You’ll Need
This recipe is beautifully simple, relying on a handful of everyday ingredients that combine to create bread that’s soft yet sturdy enough for all your favorite sandwiches. Each element plays a crucial role, whether it’s tenderizing the crumb, providing lift, or adding just the right touch of flavor.
- 4 cups flour (plain/all purpose): The base of your bread that gives it structure and texture.
- 8 tsp baking powder: The star ingredient replacing yeast, responsible for the bread’s rise and fluffiness.
- 3 tsp white sugar: Adds a subtle sweetness and helps in browning for a golden crust.
- 1 1/2 tsp cooking/kosher salt: Essential for flavor balance; reduce to 1 tsp if using table salt to avoid over-salting.
- 2 1/4 cups milk (warmed): Moistens the dough and contributes to tenderness; warming it helps activate the baking powder better.
- 1/4 cup oil (any plain): Adds richness and softness, keeping the bread moist for days.
How to Make Sandwich Bread WITHOUT Yeast! (Dead easy) Recipe
Step 1: Preheat and Prep
Start by heating your oven to 220°C (430°F) – use 200°C if you have a fan oven. This high heat jumpstarts the rising process, giving the bread that lovely initial lift. Meanwhile, grease your loaf pan well and line it with parchment paper, leaving some overhang on the sides. Trust me, this little step makes it so easy to lift out your bread without breaking it.
Step 2: Combine Dry Ingredients
Mix the flour, baking powder, sugar, and salt together in a large bowl. Make sure everything is evenly combined to ensure your bread rises beautifully and the flavor is distributed well. This dry mix is the foundation of your bread’s texture and taste, so give it a good whisk.
Step 3: Add Wet Ingredients
Create a small well in the center of your dry ingredients, then pour in the warmed milk and oil. Stir everything together until fully incorporated. The consistency will be thick but still stirrable – that’s exactly what you want. No kneading required here, so don’t stress about making it perfect.
Step 4: Transfer and Smooth the Batter
Scrape the batter into your prepared loaf pan, using a rubber spatula to get every bit out of the bowl. Smooth the top so the bread bakes evenly. A smooth surface helps develop an even crust, which is such a delight when slicing later.
Step 5: First Bake and Tent with Foil
Bake your bread for 30 minutes initially. After this, carefully remove it and cover the loaf loosely with foil. This step helps control browning while the bread finishes baking inside, preventing it from drying out or burning.
Step 6: Lower Heat and Finish Baking
Reduce the oven temperature to 200°C (or 180°C for fan ovens) and bake the bread for another 20 minutes. This slower finish bakes the bread through without a crust that’s too hard, leaving you with a tender, sturdy loaf perfect for slicing.
Step 7: Cooling and Removing From Pan
Once out of the oven, allow the bread to cool in the pan for 5 minutes before using the parchment overhang to lift it out onto a wire rack. Cooling completely before slicing is key, as this bread is a bit more delicate than traditional yeast bread but rewards patience with perfect slices, especially on day two or later.
How to Serve Sandwich Bread WITHOUT Yeast! (Dead easy) Recipe
Garnishes
Enhance your sandwiches by toasting slices lightly and adding a smear of butter or a drizzle of olive oil and herbs. A pinch of sea salt or some fresh cracked pepper on top can elevate your simple sandwich to something really special.
Side Dishes
This bread pairs beautifully with classic sides like homemade soup, chunky salads, or even a rich cheese platter. Its mild flavor and soft texture complement a wide range of dishes without overpowering them, making it incredibly versatile.
Creative Ways to Present
Try using this bread for garlic bread by brushing slices with garlic butter and toasting until golden. It also works impressively in layered dishes like bread and butter pudding or as French toast for brunch, transforming everyday meals into moments of delight.
Make Ahead and Storage
Storing Leftovers
Keep your bread wrapped tightly in cling film or in an airtight container at room temperature for up to three days. Because it lacks yeast, it tends to be a little fresher on day two and slices more neatly, so don’t be discouraged if day one feels delicate.
Freezing
You can freeze sliced loaf in a freezer bag for up to two months. Freeze slices with baking paper between them if you like, so you can grab a slice or two without defrosting the whole loaf at once.
Reheating
To warm up frozen or leftover bread, toast slices directly or reheat gently in a low oven wrapped in foil. This restores that fresh-out-of-the-oven softness and keeps your bread tasting like homemade heaven.
FAQs
Why does this bread use baking powder instead of yeast?
Baking powder acts as a chemical leavening agent that creates air pockets quickly without needing time to rise. This makes the recipe dead easy and perfect for when you want homemade bread in under an hour.
Can I use gluten-free flour to make this bread?
You can, but results may vary as gluten-free flour blends behave differently. It’s best to use a blend designed for baking bread and be prepared for a slightly different texture.
Why does the bread taste different on day two?
Unlike yeast bread, which improves with time, this bread is at its best sliced after cooling fully and even better on day two as the crumb firms up, allowing cleaner slices without crumbling.
Is there a substitute for milk in this recipe?
Yes, you can swap milk for plant-based milks like almond or oat milk. Just make sure it’s warmed to help activate the baking powder for the best rise.
Why does the recipe recommend lowering the oven temperature midway?
Starting at a higher temperature helps the bread rise quickly and develop a crust, while lowering the temperature ensures the inside cooks evenly without over-browning the crust.
Final Thoughts
This Sandwich Bread WITHOUT Yeast! (Dead easy) Recipe stands out as a brilliant, fuss-free way to enjoy fresh homemade bread anytime you want. It’s perfect for busy days or when you’re out of yeast but craving that soft, sandwich-perfect loaf. I really hope you give this recipe a try and fall in love with the simplicity and deliciousness it brings to your kitchen table. Happy baking!
Print
Sandwich Bread WITHOUT Yeast! (Dead easy) Recipe
- Prep Time: 5 minutes
- Cook Time: 50 minutes
- Total Time: 55 minutes
- Yield: 16 to 18 slices
- Category: Bread
- Method: Baking
- Cuisine: Western
Description
This easy sandwich bread recipe is perfect for those who want a yeast-free option that still delivers soft, fluffy, and sliceable bread. Made with simple pantry ingredients and baking powder as a leavening agent, it requires no rising time and produces a quick homemade loaf ideal for sandwiches, toast, grilled cheese, and more.
Ingredients
Dry Ingredients
- 4 cups plain/all-purpose flour
- 8 tsp baking powder
- 3 tsp white sugar
- 1 1/2 tsp cooking/kosher salt (reduce to 1 tsp if using table salt)
Wet Ingredients
- 2 1/4 cups warmed milk (any type)
- 1/4 cup oil (vegetable, canola, sunflower, rapeseed, grapeseed, or light olive oil)
Instructions
- Preheat the Oven: Preheat your oven to 220°C (430°F) or 200°C if using a fan-forced oven.
- Prepare the Loaf Pan: Grease a 22 x 13 cm (9 x 5 inch) loaf pan and line it with parchment or baking paper, leaving overhang on the sides for easy removal of the loaf.
- Combine Dry Ingredients: In a large mixing bowl, whisk together the flour, baking powder, salt, and sugar until well combined.
- Add Wet Ingredients: Create a well in the center of the dry ingredients and pour in the warmed milk and oil. Stir gently but thoroughly until the flour is fully incorporated. The batter will be thick but still stirrable.
- Fill the Loaf Pan: Transfer the batter into the prepared loaf pan, using a rubber spatula to scrape out the bowl completely and smooth the surface.
- Bake in Initial High Heat: Place the pan in the preheated oven and bake for 30 minutes at 220°C/430°F.
- Lower Temperature and Continue Baking: Remove the loaf from the oven, cover it loosely with foil, lower the oven temperature to 200°C/390°F (180°C fan), and bake for an additional 20 minutes.
- Cool in Pan: Once baked, remove the bread from the oven and let it cool in the pan for 5 minutes.
- Remove Bread and Cool Completely: Use the overhanging parchment paper to lift the bread out of the pan and transfer it to a cooling rack. Allow it to cool completely for at least 45 minutes before slicing to ensure better texture and sliceability.
- Serve and Enjoy: Use this loaf for sandwiches, toasting, grilled cheese, French toast, or bread and butter pudding. The bread is more delicate than yeast breads but holds together well and slices better than typical no-yeast breads, especially after the first day.
Notes
- Note 1: Use plain or all-purpose flour for best results.
- Note 2: Baking powder is the key leavening agent—no yeast is required.
- Note 3: Adjust salt depending on type; use less if using table salt to avoid over-salting.
- Note 4: Warm milk helps activate the baking powder and blends better with other ingredients.
- The bread is more delicate than yeast breads and slices best after it has rested overnight.
- Store in an airtight container to keep freshness for up to 3 days or freeze slices for longer storage.


