
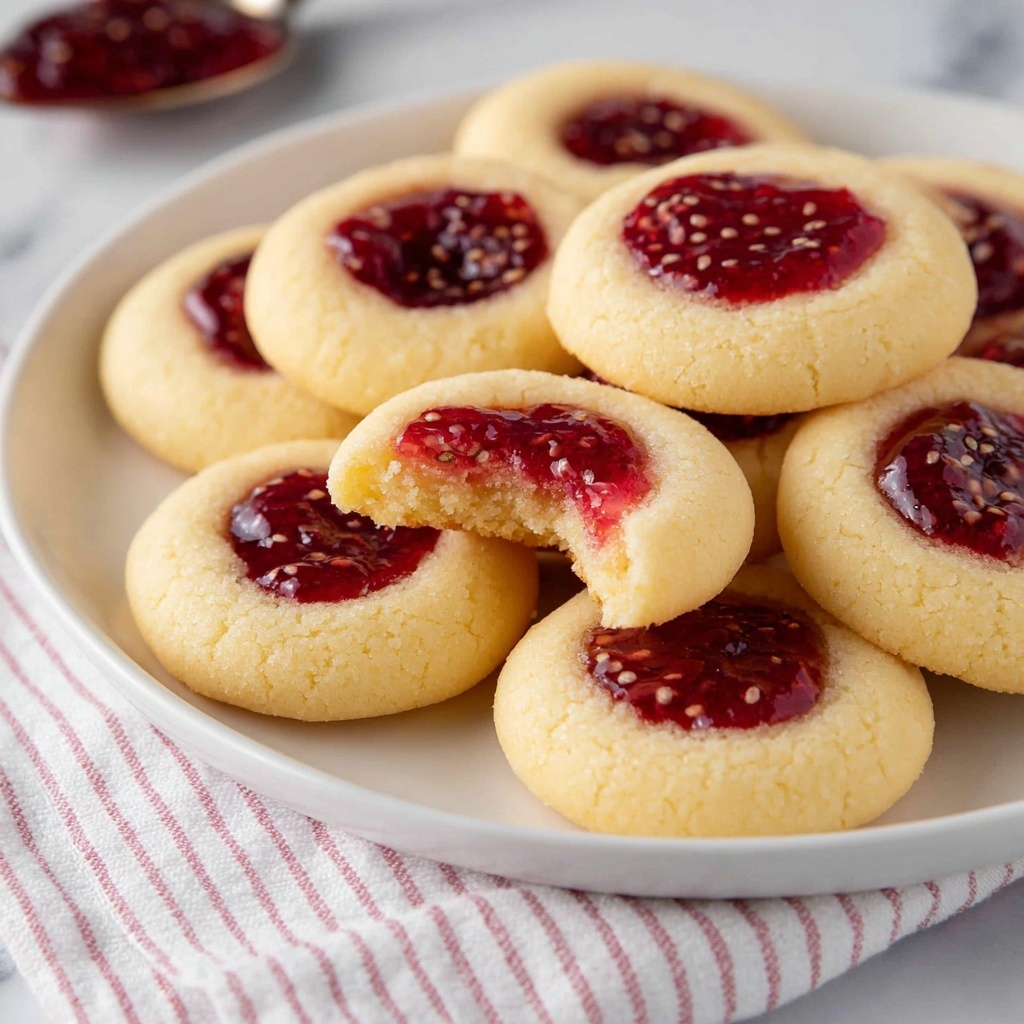
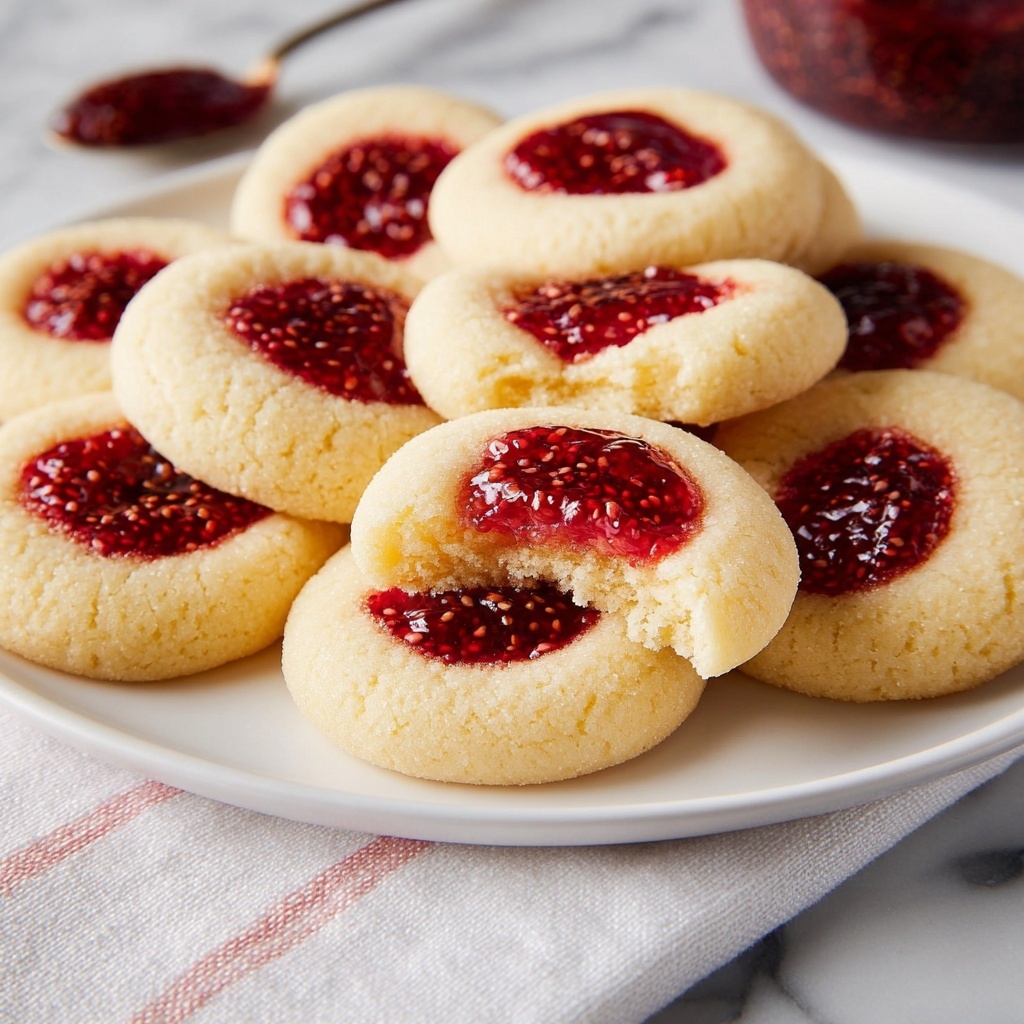
If you have a soft spot for cookies that are both nostalgic and bursting with fruity goodness, this Raspberry Thumbprint Cookies Recipe is an absolute must-try. These buttery, tender cookies cradle a sweet and tangy raspberry jam center, creating a perfect harmony of texture and flavor that will have you reaching for seconds (and thirds!). The simplicity of the ingredients combined with the delicate almond and vanilla notes makes these cookies a standout in any cookie jar or festive spread. This is one recipe you’ll want to bookmark and share because it feels like a warm, homemade hug in every bite.
Ingredients You’ll Need
Gathering your ingredients is a breeze with this Raspberry Thumbprint Cookies Recipe. Each item plays a crucial role, whether it’s lending buttery richness, a tender crumb, or that vibrant pop of raspberry color and flavor that makes these cookies unforgettable.
- 2 & 1/4 cups (270g) all-purpose flour: Provides the structure and base for the cookies, ensuring just the right crumb.
- 1/2 teaspoon kosher salt: Balances the sweetness perfectly and enhances the overall flavor.
- 1 cup unsalted butter, room temperature: Adds richness and gives the cookies a tender, melt-in-your-mouth texture.
- 1 cup (200g) granulated sugar, divided: Sweetens the cookies, with a portion used for coating to add a delightful crunch.
- 1 large egg: Binds everything together and adds moisture for the perfect cookie consistency.
- 1/2 teaspoon almond extract: Introduces a subtle nutty aroma that pairs beautifully with the raspberry jam.
- 1/2 teaspoon vanilla extract: Enhances the buttery base and balances the tartness of the jam.
- 1/2 cup raspberry jam or raspberry preserve: The star ingredient that adds sweetness, color, and that irresistibly fruity center.
How to Make Raspberry Thumbprint Cookies Recipe
Step 1: Combine Dry Ingredients
Start by whisking the flour and kosher salt together in a medium bowl. This mixes the salt evenly throughout the flour, setting up a balanced foundation for the dough without any pockets of saltiness.
Step 2: Cream Butter and Sugar
Using a stand mixer with a whisk or a hand mixer, beat the unsalted butter and 3/4 cup of sugar on medium speed until the mixture is light and fluffy. This step is essential for incorporating air into the dough, which helps your cookies have that soft, tender bite we all adore.
Step 3: Add Egg and Extracts
Next, mix in the egg, almond extract, and vanilla extract. These add moisture and complex, sweet notes that will infuse the dough with irresistible aroma and depth.
Step 4: Incorporate Flour Mixture
With the mixer on low speed, gradually add half of the flour mixture and blend just until combined, then repeat with the remaining flour. It’s important not to overmix here to keep your cookies tender instead of tough.
Step 5: Chill the Dough
Gather your dough into a large ball and wrap it tightly in plastic wrap or place it in an airtight container. Refrigerate for at least one hour, or preferably overnight. This chilling step helps solidify the butter again and allows flavors to meld, making the dough easier to handle and the cookies more flavorful.
Step 6: Prepare for Baking
Preheat your oven to 350 degrees Fahrenheit and line two cookie sheets with parchment paper to prevent sticking. When ready, remove the dough from the fridge and let it rest at room temperature for about 10 minutes if it’s been chilled overnight. This makes rolling the dough smooth and manageable.
Step 7: Shape and Sugar the Cookies
Divide the dough into 24 equal pieces, then roll each piece into a 1-inch ball. Roll each ball in the reserved 1/4 cup of sugar to coat the outside, creating a sweet and slightly crunchy exterior that beautifully contrasts the soft interior.
Step 8: Make the Thumbprint Indents
Using the back of a 1/2 teaspoon measuring spoon or your thumb, gently press an indentation into the center of each dough ball. This little thumbprint is what will hold the luscious raspberry jam, so be careful not to press too hard or too shallow.
Step 9: Add Raspberry Jam
Spoon raspberry jam into each indent, mounding it slightly to allow for spreading during baking. Be cautious not to overfill as the jam can bubble over, but you want a generous dollop for that perfect jammy surprise in every bite.
Step 10: Bake Until Golden
Bake your cookies for 11 to 12 minutes or until the edges just start turning a light golden brown. Don’t worry if the jam looks a little glossy or soft—that means it’s delightfully gooey and ready to enjoy. Transfer the cookies to a wire rack to cool completely before serving.
How to Serve Raspberry Thumbprint Cookies Recipe
Garnishes
These cookies are already a star on their own, but if you want to elevate them for a special occasion, consider a light dusting of powdered sugar right before serving. Fresh raspberries or a small mint leaf on top add a fresh, elegant touch that will impress guests and friends alike.
Side Dishes
While Raspberry Thumbprint Cookies Recipe shines solo, they are also perfectly paired with a cup of hot tea, a creamy latte, or even a glass of cold milk. For a dessert platter, serve alongside other buttery shortbread or lemon bars to create a variety of sweet flavors and textures.
Creative Ways to Present
Try arranging these cookies in a pretty tin or a decorative plate lined with doilies for gifting. You can also sandwich two cookies together with a layer of raspberry jam in the middle for an indulgent twist. Another fun idea is to dip one edge of the cookie in melted white or dark chocolate for a fancy finish.
Make Ahead and Storage
Storing Leftovers
You can store any leftover Raspberry Thumbprint Cookies in an airtight container at room temperature for up to 4 days. Keeping them in a single layer with parchment paper between layers prevents sticking and ensures they maintain their perfect texture without becoming soggy or stale.
Freezing
These cookies freeze wonderfully! For best results, freeze them in a single layer on a baking sheet and then transfer to a zip-top freezer bag or airtight container. Frozen cookies can keep well for up to 3 months. Thaw them at room temperature and enjoy as if freshly baked.
Reheating
If you prefer a warm cookie, simply pop one or two in the microwave for 10 to 15 seconds. This will soften the butter slightly and warm the raspberry jam center, making it even more heavenly. Avoid overheating as this can make the cookie crumbly.
FAQs
Can I use other types of jam for the thumbprints?
Absolutely! While raspberry jam has a lovely balance of sweet and tart, you can substitute with strawberry, apricot, or even blueberry jam depending on your taste preferences.
Do I have to chill the dough?
Chilling the dough is highly recommended as it helps the cookies hold their shape during baking and improves the flavor, but if you’re short on time, 30 minutes in the fridge can still produce good results.
Can I make these cookies gluten-free?
Yes! You can substitute the all-purpose flour with a gluten-free flour blend that measures cup-for-cup. Make sure your blend contains xanthan gum or a similar binder for the best texture.
Why are my cookies spreading too much?
If your cookies are flattening more than you’d like, it could be because the butter is too soft or the dough wasn’t chilled long enough. Try chilling the dough longer and ensure your butter is just room temperature, not melted.
How long do these cookies stay fresh?
Stored in an airtight container at room temperature, Raspberry Thumbprint Cookies stay fresh for about 4 days. For longer freshness, freezing is your best friend.
Final Thoughts
This Raspberry Thumbprint Cookies Recipe is one of those timeless treats that never fails to delight. Whether you’re baking for a holiday, a cozy afternoon snack, or gifting to friends, these cookies bring so much joy in their buttery texture and sweet, jammy centers. Don’t hesitate to get your apron on and create a batch — your cookie jar will thank you!
Print
Raspberry Thumbprint Cookies Recipe
- Prep Time: 20 minutes
- Cook Time: 11 minutes
- Total Time: 1 hour 31 minutes (including chilling time)
- Yield: 24 cookies
- Category: Dessert
- Method: Baking
- Cuisine: American
Description
Raspberry Thumbprint Cookies are delightful buttery cookies with a sweet and tangy raspberry jam center. These classic cookies have a soft, tender texture and an irresistible jam-filled indentation that makes them perfect for any occasion. Easy to prepare and bake, they bring a charming homemade touch to your dessert table.
Ingredients
Dry Ingredients
- 2 & 1/4 cups (270g) all-purpose flour
- 1/2 teaspoon kosher salt
Wet Ingredients
- 1 cup unsalted butter, room temperature
- 1 cup (200g) granulated sugar, divided
- 1 large egg
- 1/2 teaspoon almond extract
- 1/2 teaspoon vanilla extract
Filling
- 1/2 cup raspberry jam or raspberry preserve
Instructions
- Prepare dry ingredients: In a medium bowl, combine the all-purpose flour and kosher salt. Mix well and set aside to be incorporated later.
- Cream butter and sugar: Using a stand mixer with a whisk attachment or hand mixer, beat the unsalted butter and 3/4 cup of the granulated sugar at medium speed until light and fluffy, roughly 3 to 4 minutes. Scrape down the sides of the bowl as necessary to ensure even mixing.
- Add egg and extracts: Mix in the large egg, vanilla extract, and almond extract until fully incorporated into the butter-sugar mixture.
- Incorporate flour mixture: On low speed, gradually stir in half of the flour and salt mixture until just combined. Repeat with the remaining half. Be careful not to overmix the dough to keep it tender.
- Chill dough: Shape the dough into a large ball, wrap it tightly with plastic wrap, or place it in an airtight container. Refrigerate for at least 1 hour or ideally overnight to firm up the dough.
- Preheat and prepare baking sheets: Preheat your oven to 350° F (175° C) and line two baking sheets with parchment paper. Remove the dough from the refrigerator; if it rested overnight, allow it to come to room temperature for about 10 minutes.
- Shape cookies: Divide the dough into 24 equal pieces. Roll each piece into a smooth 1-inch ball, roll it in the reserved 1/4 cup granulated sugar, and place on prepared baking sheets spaced about 1 inch apart.
- Create indents: Using a 1/2 teaspoon measuring spoon or your thumb, gently press an indentation into the center of each cookie ball.
- Fill cookies: Spoon raspberry jam into each indentation, mounding slightly on top as the jam will flatten during baking. Avoid overfilling to prevent the jam from spilling over.
- Bake and cool: Bake the cookies for 11 to 12 minutes, or until the edges are lightly golden. Remove from oven and transfer cookies to a wire rack to cool completely.
Notes
- For best texture, avoid overmixing the dough once the flour is added.
- Chilling the dough overnight enhances the flavor and helps prevent spreading during baking.
- Use a high-quality raspberry jam for the best flavor.
- If you prefer, you can substitute raspberry jam with other fruit preserves such as strawberry or apricot.
- Make sure cookies are evenly spaced on the baking sheets for uniform baking.
- Store cooled cookies in an airtight container at room temperature for up to a week.


