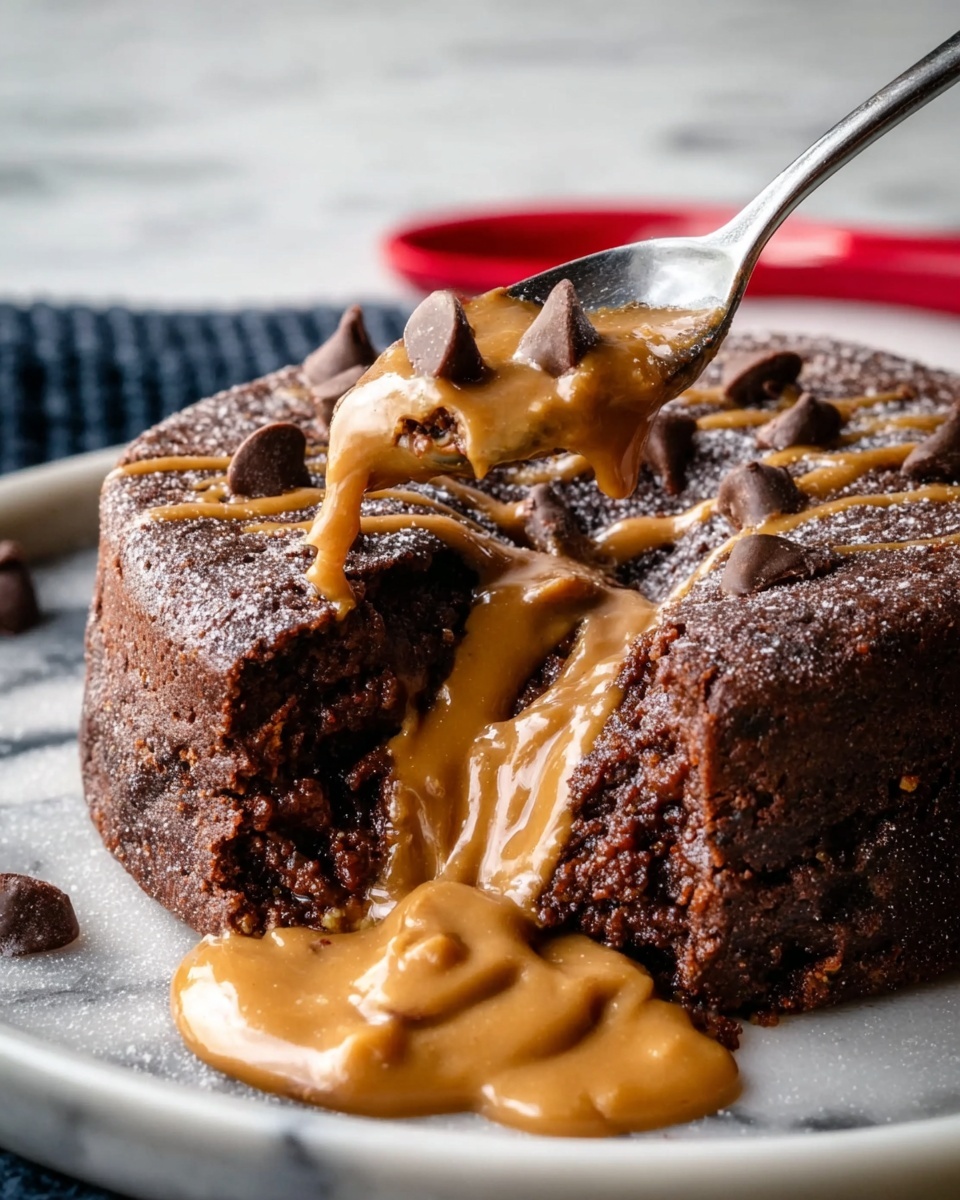
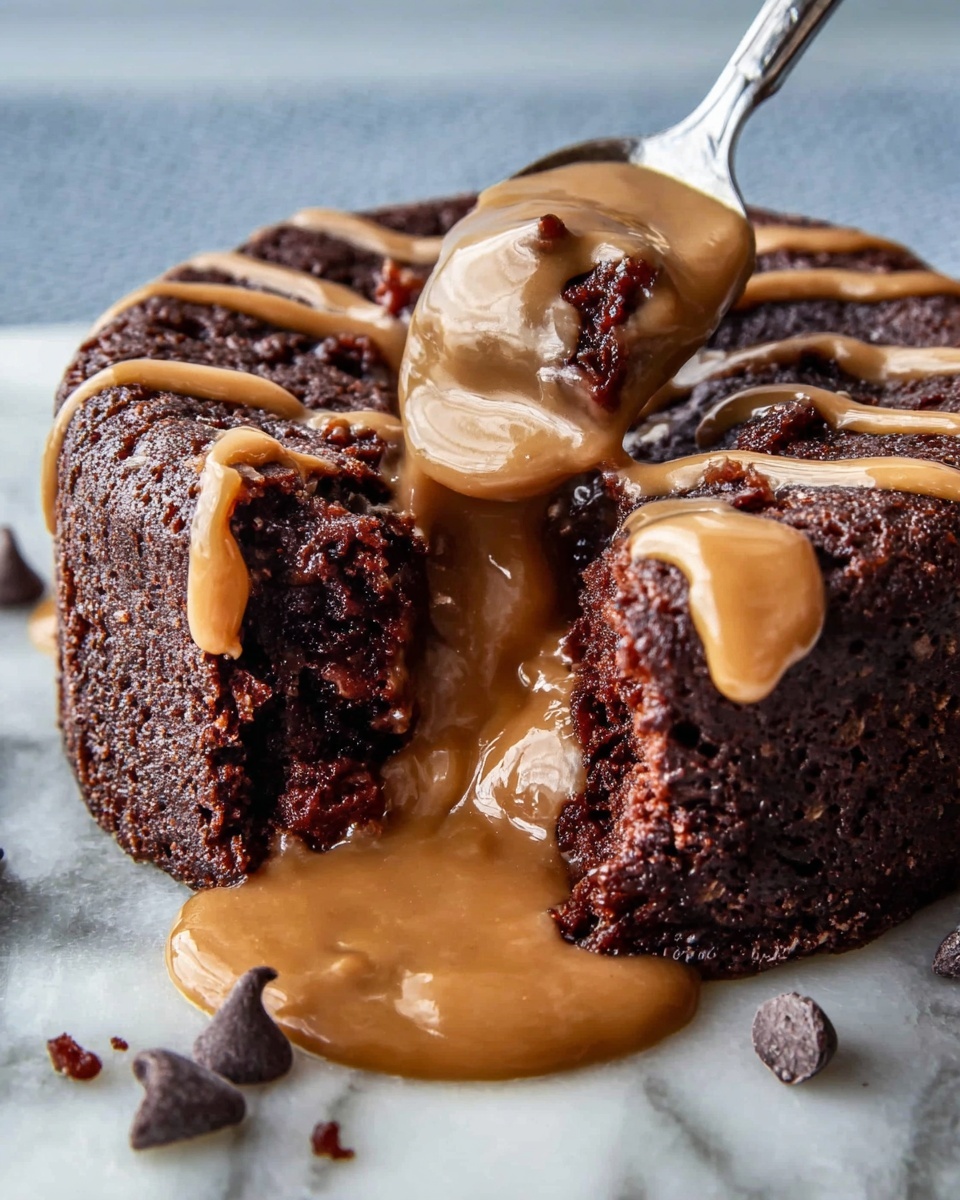
If you’ve ever craved a quick, satisfying dessert that feels indulgent but still supports your fitness goals, then this Protein Chocolate Peanut Butter Mug Cake Recipe is about to become your new best friend. Imagine a warm, single-serving cake that combines the rich goodness of chocolate with the creamy delight of peanut butter, all packed with protein to keep you fueled and satisfied. It’s fast, fuss-free, and so comforting—perfect for when you want something sweet without the wait or the guilt.
Ingredients You’ll Need
This Protein Chocolate Peanut Butter Mug Cake Recipe requires just a handful of simple, pantry-friendly ingredients that each play a crucial role. From the smooth peanut butter bringing moisture and flavor, to the chocolate powering your sweet tooth, every component contributes to making this mug cake wonderfully tender, fluffy, and perfectly balanced.
- Protein powder: Choose your favorite chocolate or vanilla protein powder to add that nutrient boost and structure.
- Peanut butter: Natural, creamy peanut butter enhances flavor and keeps the cake moist.
- Unsweetened cocoa powder: Adds deep chocolate richness without extra sugar.
- Baking powder: Makes the cake rise nicely, keeping it light and fluffy.
- Milk: Any kind works, dairy or plant-based, to bind everything together.
- Sweetener: A touch of honey, maple syrup, or your preferred sugar alternative to satisfy your sweet cravings.
- Egg or flax egg: Provides structure and binds ingredients for the perfect mug cake texture.
- Optional mix-ins: Mini chocolate chips or chopped peanuts for extra fun and crunch.
How to Make Protein Chocolate Peanut Butter Mug Cake Recipe
Step 1: Mix Dry Ingredients
Start by grabbing a medium bowl and combining your protein powder, cocoa powder, and baking powder. Sifting them together helps avoid lumps and ensures your mug cake will be smooth and airy.
Step 2: Add Wet Ingredients
In the same bowl, stir in the peanut butter, milk, sweetener, and egg until everything is just blended. The peanut butter melts slightly and mingles with the cocoa, creating a rich, inviting batter that’s ready to shine.
Step 3: Prepare Your Mug
Lightly grease your favorite microwave-safe mug with a bit of oil or non-stick spray. This simple step means your mug cake will come out clean and intact, making your dessert experience even more enjoyable.
Step 4: Cook Your Mug Cake
Pour the batter into the prepared mug, then microwave on high for 60 to 90 seconds. Keep an eye on it; microwave powers vary, but the cake is done when it has risen and springs back lightly when touched.
Step 5: Add Toppings and Enjoy!
Once cooked, feel free to top your Protein Chocolate Peanut Butter Mug Cake Recipe with any extras you like—maybe a dollop of Greek yogurt or a drizzle of melted peanut butter for that perfect finishing touch.
How to Serve Protein Chocolate Peanut Butter Mug Cake Recipe

Garnishes
Sprinkle chopped peanuts for crunch, or add a few fresh berries on top for a fruity contrast that brightens the chocolate and peanut butter flavors. A dusting of powdered sugar or a tiny scoop of vanilla ice cream also elevates this simple dessert to something special.
Side Dishes
Consider enjoying your mug cake alongside a warm latte or your favorite herbal tea to create a cozy experience. If you want a bit more substance, a small bowl of mixed nuts or fruit salad pairs beautifully without overpowering the rich cake.
Creative Ways to Present
Serve your mug cake in a clear glass mug to show off its layers or pile on colorful toppings like coconut flakes or dark chocolate shavings for a café-style dessert at home. You can even stir in some espresso powder before cooking for a hint of mocha flavor—talk about a grown-up treat!
Make Ahead and Storage
Storing Leftovers
While this Protein Chocolate Peanut Butter Mug Cake Recipe is best enjoyed fresh and warm, if you happen to have leftovers, cover your mug tightly with plastic wrap and refrigerate. It’ll be good for up to 2 days, though the texture may firm up slightly.
Freezing
If you want to prep in advance, you can freeze the batter in a small container (not the mug) for about a month. Thaw it overnight in the fridge, then microwave as usual for a quick, homemade dessert anytime.
Reheating
To reheat, pop the refrigerated mug cake back in the microwave for 20 to 30 seconds or until warm. Avoid overheating to keep it moist and tender—nobody wants a rubbery mug cake!
FAQs
Can I use any type of protein powder?
Absolutely! Whey, plant-based, or any flavor you prefer works well. Just keep in mind that unflavored protein powders might need a little extra sweetener.
Is it okay to substitute peanut butter with another nut butter?
Definitely. Almond butter, cashew butter, or even sunflower seed butter can be great alternatives and add their own unique taste.
What if I don’t have a microwave?
No worries! You can bake the batter in a small ramekin in a preheated oven at 350°F (175°C) for about 12-15 minutes, or until cooked through.
Can I make this recipe vegan?
Yes! Use a flax egg instead of a regular egg and plant-based milk. Just double-check your protein powder is also vegan-friendly.
How can I make the mug cake less dense?
Be careful not to overmix the batter and ensure your baking powder is fresh. Adding a splash more milk can also help lighten the texture.
Final Thoughts
This Protein Chocolate Peanut Butter Mug Cake Recipe is genuinely a game changer for quick, nutritious indulgence. It perfectly balances convenience with flavor, making it easy to satisfy sweet cravings while keeping your protein goals on track. I can’t wait for you to whip up a mug cake and discover how this little chocolate-peanut butter miracle can brighten your day in just minutes!
Print
Protein Chocolate Peanut Butter Mug Cake Recipe
- Prep Time: 10 minutes
- Cook Time: 25 minutes
- Total Time: 35 minutes
- Yield: 4 servings
- Category: Soup
- Method: Stovetop
- Cuisine: American
- Diet: Vegan
Description
A hearty and healthy vegetable soup packed with fresh carrots, celery, spinach, and flavorful herbs simmered in a savory vegetable broth. This comforting dish is perfect for a nutritious meal that is easy to prepare and full of natural vitamins and minerals.
Ingredients
Vegetables
- 2 cups carrots, chopped
- 1 cup celery, chopped
- 1 onion, chopped
- 2 cloves garlic, minced
- 1 cup spinach leaves
Liquids and Canned Goods
- 4 cups vegetable broth
- 1 can diced tomatoes (approximately 14.5 oz)
Seasonings and Oils
- 1 tsp salt
- 1/2 tsp pepper
- 1/2 tsp thyme
- 1/4 tsp basil
- 1 tbsp olive oil
Instructions
- Heat the oil: Warm the olive oil in a large pot over medium heat to prepare for sautéing the vegetables.
- Sauté aromatics: Add chopped carrots, celery, onion, and minced garlic to the pot and sauté for about 5 minutes until the vegetables begin to soften and become fragrant.
- Add broth and seasonings: Pour in the vegetable broth and canned diced tomatoes, then stir in salt, pepper, thyme, and basil. Increase heat to bring the mixture to a boil.
- Simmer the soup: Lower the heat to maintain a gentle simmer and cook for 20 minutes, or until all the vegetables are tender and flavors have melded together.
- Add spinach: Stir in the fresh spinach leaves and cook for an additional 5 minutes to wilt the spinach and finish the soup.
- Serve: Ladle the hot vegetable soup into bowls and enjoy immediately for a warm and nourishing meal.
Notes
- You can substitute fresh herbs like thyme and basil with dried variants if needed, adjusting the quantity accordingly.
- For a creamier texture, blend a portion of the soup before adding the spinach.
- Add other vegetables like zucchini or bell peppers for variation.
- Leftovers keep well in the refrigerator for up to 3 days or freeze for up to 1 month.


