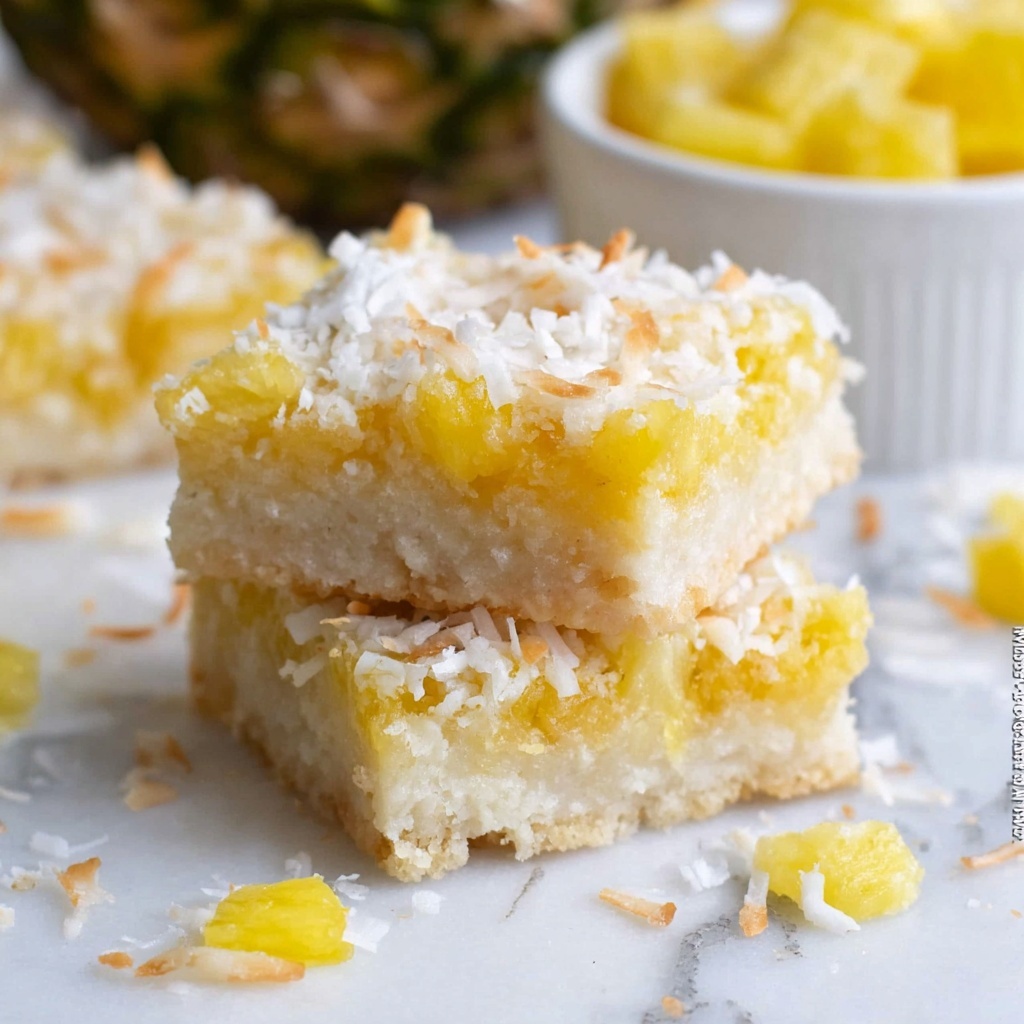
If you’re craving a tropical getaway in every bite, this Piña Colada Bars Recipe is just the sweet treat you need. Combining the buttery crumbly goodness of shortbread with juicy pineapple and toasted coconut, these bars perfectly capture the essence of that classic beachside cocktail in a delightful, handheld dessert. Whether you’re baking for a crowd or just treating yourself, these bars bring vibrant flavors and a tender, moist texture that will have everyone asking for seconds.
Ingredients You’ll Need
Ingredients You’ll Need
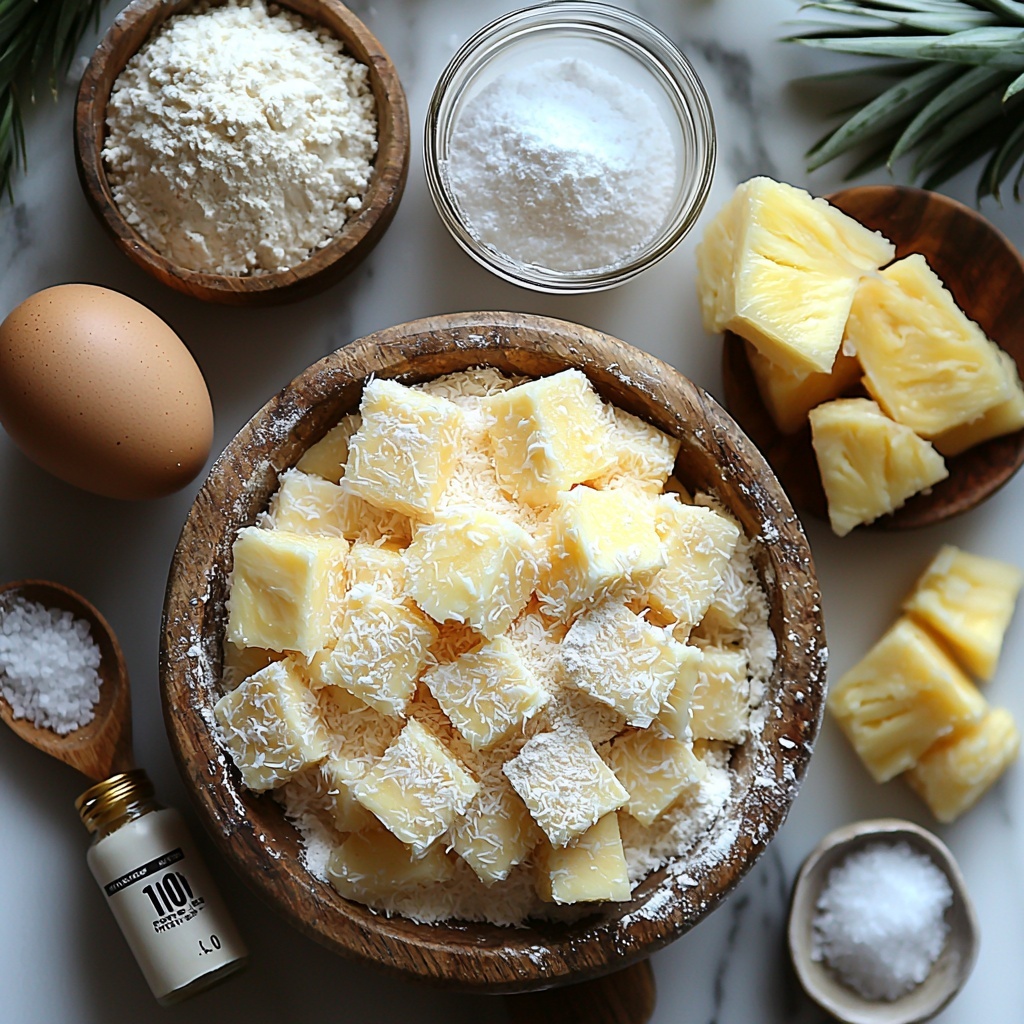
No fuss, all flavor: these ingredients are straightforward but essential, creating that perfect balance of buttery, fruity, and nutty notes that make Piña Colada Bars so memorable. Each one plays a crucial role in building the texture, sweetness, and tropical vibes.
- 1 ½ cups flour (gluten-free): A great base that keeps the crust tender and holds everything together.
- 10 Tbsp. butter (melted): Adds richness and moisture to the crust, helping it crisp beautifully as it bakes.
- ⅓ cup sugar: Sweetens the crust just right without overpowering the tropical flavors.
- ½ tsp. baking powder: Gives a slight lift to the crust for a delicate crumb.
- 1 tsp. vanilla: Enhances the flavors with its sweet, aromatic warmth.
- ¼ tsp. salt: Balances all the sweetness and deepens the overall flavor.
- ⅓ cup sugar: Used again to sweeten the pineapple topping perfectly.
- 1 large egg: Binds the filling ingredients for a soft, cohesive texture.
- 2 Tbsp. butter (melted): Enriches the pineapple mixture, adding a lovely silkiness.
- 2 cups pineapple (finely diced): The star of the show, bringing fresh, juicy bursts of tropical flavor.
- ¾ cup shredded coconut (divided): Offers a chewy texture and nutty taste that complements the pineapple beautifully.
How to Make Piña Colada Bars Recipe
Step 1: Prepare the Oven and Crust
Start by preheating your oven to 350°F so it’s ready once your crust is mixed. In a large bowl, combine all the crust ingredients — flour, melted butter, sugar, baking powder, vanilla, and salt. Use a pastry cutter to gently blend them until a coarse crumb forms. This crumbly texture is exactly what gives the crust its perfect buttery crunch. Spray an 8×8-inch baking dish with non-stick spray, then press the mixture evenly into the dish, packing it down firmly to create a sturdy base.
Step 2: Bake the Crust
The crust needs a head start in the oven, so pop it in for 15 minutes. This initial bake helps it set up and creates a lovely golden color and delightful crispiness that contrasts beautifully with the soft pineapple topping we’ll add next.
Step 3: Mix the Pineapple Filling
While the crust bakes, reuse the large bowl (no need for extra cleanup!) and beat together the remaining sugar, egg, and melted butter on medium speed for one minute until fluffy and combined. This mixture will be the glue that holds the juicy pineapple and coconut together. Fold in the finely diced pineapple and half of the shredded coconut by hand, making sure the fruit and coconut are evenly coated without overmixing. The filling should look vibrant and inviting.
Step 4: Assemble and Bake the Bars
Once your crust has cooled slightly from its initial bake, pour the pineapple filling over it and spread evenly with a spatula. Sprinkle the remaining shredded coconut on top for an extra layer of texture and flavor. Bake everything in the oven for 35 to 40 minutes — you’ll know they’re done when the edges turn a lovely golden brown and the filling no longer jiggles when gently shaken. This slow bake melds all those tropical flavors together perfectly.
Step 5: Cool and Cut
Cooling is key to keeping these bars intact, so resist the urge to dive in right away! Let them come to room temperature before slicing into 16 squares. This allows the filling to firm up nicely and makes cutting clean pieces much easier. Once cooled, your Piña Colada Bars are ready to share or savor all to yourself.
How to Serve Piña Colada Bars Recipe
Garnishes
To elevate your Piña Colada Bars, consider a dusting of powdered sugar or a light drizzle of coconut cream on top before serving. Fresh pineapple chunks or toasted coconut flakes add gorgeous texture and visual appeal, making each bar feel like a little tropical vacation on a plate.
Side Dishes
These bars shine wonderfully as a sweet finish to any summer meal. Pair them with a scoop of vanilla ice cream or a dollop of whipped cream for a rich contrast, or alongside a fresh green salad to balance the sweetness with something crisp and light. They also pair beautifully with a chilled cup of pineapple or coconut tea.
Creative Ways to Present
For parties, arrange your Piña Colada Bars on a rustic wooden board with tropical flowers scattered around or serve them in mini cupcake liners for easy grab-and-go snacking. You can even create layered parfaits by crumbling these bars into glasses and layering with whipped coconut cream and fresh pineapple for a fun twist.
Make Ahead and Storage
Storing Leftovers
These bars keep wonderfully in an airtight container at room temperature for up to two days, but to maintain freshness and the perfect texture, refrigeration is best if you won’t eat them all quickly. They’ll stay moist without getting soggy.
Freezing
If you want to enjoy this Piña Colada Bars Recipe any time, freezing is a smart option. Wrap individual bars tightly in plastic wrap and store them in a freezer-safe container. They’ll keep well for up to two months. When you’re ready, thaw overnight in the fridge for best results.
Reheating
To warm your bars, pop them in a 300°F oven for about 10 minutes or microwave individual portions for 20-30 seconds. This reheating brings back the buttery softness and slightly melts the coconut topping, making each bite just as delicious as fresh.
FAQs
Can I make this recipe with regular flour instead of gluten-free?
Absolutely! Using regular all-purpose flour will work just as well and may give slightly more structure to the crust, but the texture difference is subtle. Just swap it 1:1 with the gluten-free flour if gluten is not a concern.
Is there a way to make the bars less sweet?
Yes, you can reduce the sugar in both the crust and filling by about ⅓ without dramatically affecting taste. Keep in mind the pineapple adds natural sweetness, so balance is key!
Can I use canned pineapple instead of fresh?
Fresh pineapple delivers the best texture and brightness, but if you use canned, choose pineapple packed in juice (not syrup), drain well, and pat dry to prevent the bars from becoming too soggy.
What if I don’t have shredded coconut? Can I substitute it?
Shredded coconut is pretty essential for that classic texture and flavor, but if you’re out, finely chopped toasted almonds can add a similarly nutty crunch, though the taste will differ.
How do I know when the bars are fully baked?
Look for golden edges and a filling that set without jiggle in the middle. The top should be lightly browned on the coconut. If you gently shake the pan and the center moves, give it a few more minutes.
Final Thoughts
This Piña Colada Bars Recipe is such a joyful way to capture sunshine in a dessert. It’s wonderfully simple to make, full of tropical flavors, and perfect for sharing with friends or keeping all to yourself. Give it a try the next time you want a little taste of paradise at home—you’ll be amazed how quickly it disappears!
Print
Piña Colada Bars Recipe
- Prep Time: 15 minutes
- Cook Time: 40 minutes
- Total Time: 55 minutes
- Yield: 16 servings
- Category: Dessert
- Method: Baking
- Cuisine: American
- Diet: Gluten Free
Description
These Piña Colada Bars combine the tropical flavors of pineapple and coconut with a buttery shortbread crust for a delicious and easy-to-make dessert. Perfectly baked to a golden finish, these bars are a delightful treat inspired by the classic piña colada cocktail.
Ingredients
Shortbread Crust
- 1 ½ cups gluten-free flour
- 10 Tbsp. melted butter
- ⅓ cup sugar
- ½ tsp. baking powder
- 1 tsp. vanilla extract
- ¼ tsp. salt
Filling
- ⅓ cup sugar
- 1 large egg
- 2 Tbsp. melted butter
- 2 cups finely diced pineapple
- ¾ cup shredded coconut, divided
Instructions
- Preheat Oven: Preheat your oven to 350°F (175°C) to prepare for baking the bars.
- Make the Shortbread Crust: In a large bowl, combine gluten-free flour, sugar, baking powder, vanilla extract, salt, and melted butter. Use a pastry cutter to mix until a coarse crumb forms.
- Prepare Baking Dish: Spray an 8×8-inch square baking dish with non-stick cooking spray to prevent sticking.
- Press Crust Mixture: Press the crumb mixture evenly into the bottom of the prepared baking dish, ensuring it is firmly packed down for a solid crust.
- Bake Crust: Bake the crust in the preheated oven for 15 minutes until set and lightly golden.
- Prepare Filling: While the crust bakes, in the same large bowl, combine remaining sugar, egg, and melted butter. Beat using a mixer on medium speed for 1 minute until well blended.
- Add Pineapple and Coconut: Fold in the finely diced pineapple and ½ cup of shredded coconut by hand until just combined, ensuring the filling is evenly mixed.
- Assemble Bars: Pour the pineapple-coconut filling over the pre-baked crust and spread it out evenly. Sprinkle the remaining ¼ cup shredded coconut on top for added texture.
- Bake Bars: Return the baking dish to the oven and bake for 35-40 minutes, or until the edges are golden brown and the center is set without jiggling.
- Cool and Serve: Allow the bars to cool completely at room temperature before cutting into 16 servings and enjoying.
Notes
- Ensure the pineapple is finely diced for even texture.
- Use gluten-free flour to keep these bars gluten-free.
- Letting the bars cool completely ensures clean, neat slices.
- Store leftovers in an airtight container at room temperature for up to 3 days or refrigerate for up to a week.


