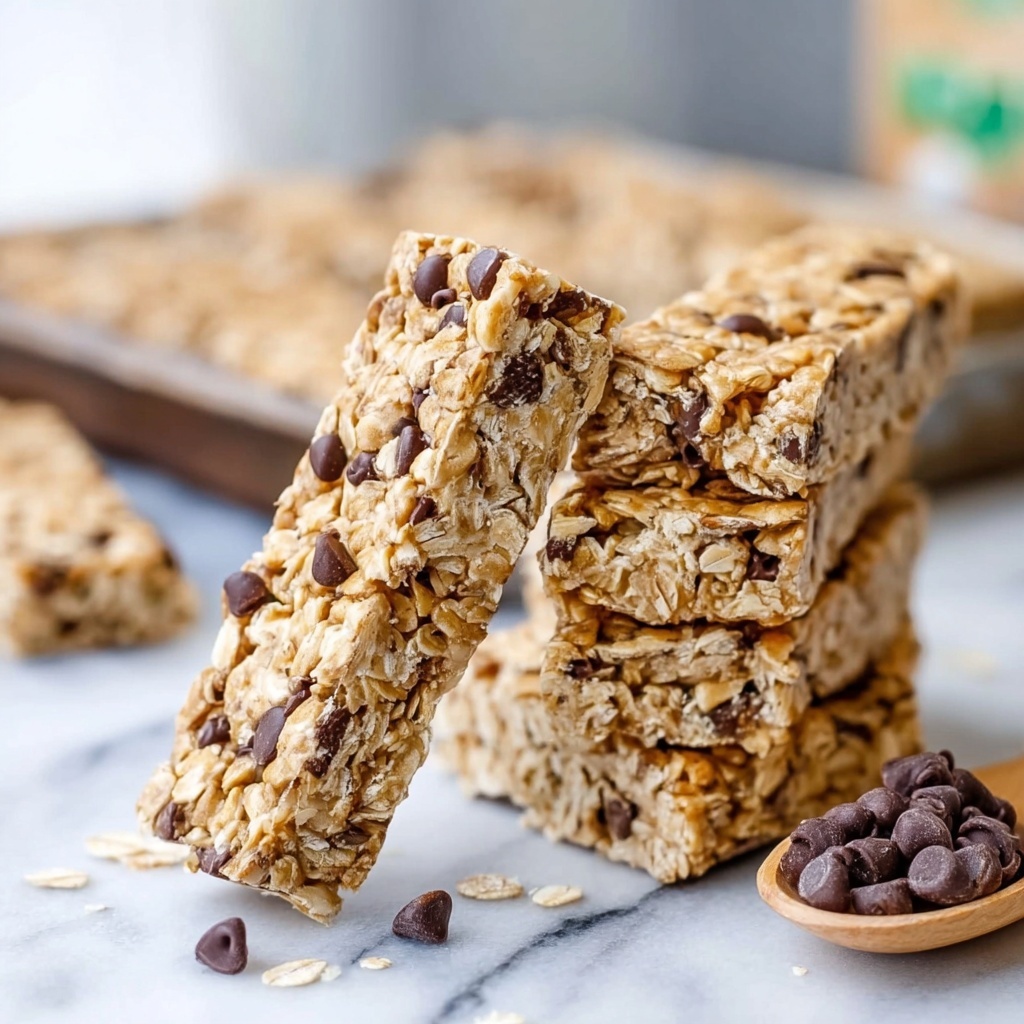
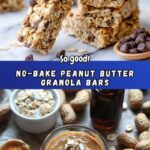
If you are a fan of wholesome snacks that marry rich flavors with a quick and easy prep, this No-Bake Peanut Butter Granola Bars Recipe is about to become your new favorite go-to. Bursting with the comforting richness of peanut butter, the natural sweetness of maple syrup, and the satisfying crunch of oats and peanuts, these bars come together effortlessly without turning on the oven. They strike the perfect balance between chewy and crunchy, plus they’re customizable, making them ideal for a grab-and-go breakfast or an energizing afternoon treat. Let me take you step-by-step through making these delicious bars that your whole family will adore!
Ingredients You’ll Need
Every ingredient here plays a vital role in crafting the perfect texture and taste. From the creamy peanut butter binding everything together to the mini chocolate chips adding just the right hint of indulgence, these simple staples elevate the bars into something truly irresistible.
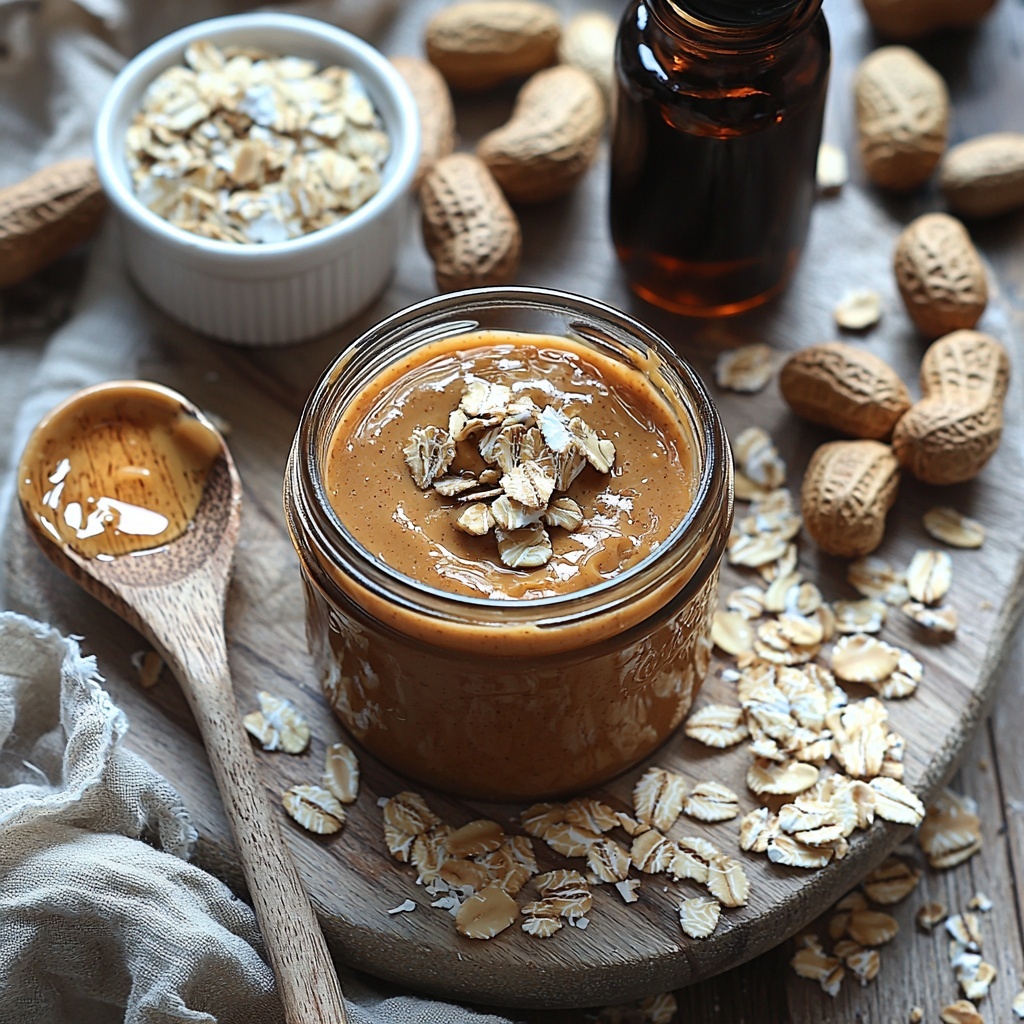
- 6 Tbsp. pure maple syrup: Acts as a natural sweetener and a sticky binder, giving the bars their chewy texture with a subtle caramel note.
- ⅓ cup peanut butter (smooth): Provides rich, nutty creaminess and holds the mixture together beautifully—choose a good quality one for best flavor.
- ⅓ cup coconut oil (or butter): Adds smoothness and enhances the mouthfeel while helping the bars set firmly in the fridge.
- 1 tsp. vanilla extract: A little splash to brighten all the flavors with a fragrant depth.
- 2 cups oats (old-fashioned, gluten-free if needed): The hearty base ingredient bringing wholesome fiber and a satisfying bite.
- ⅔ cup peanuts (salted, finely chopped): Adds a delightful crunch and balance of saltiness to complement the sweet and creamy notes.
- ⅓ cup mini chocolate chips: Melts softly into the bars, creating little pockets of sweet, melty joy in every bite.
How to Make No-Bake Peanut Butter Granola Bars Recipe
Step 1: Make the Base
Begin by warming your key ingredients in a small saucepan over medium-low heat. Combine the pure maple syrup, smooth peanut butter, and coconut oil, stirring gently for about 2 to 3 minutes until the mixture becomes velvety and well blended. This warm, luscious base is exactly what will hold all the dry ingredients together once combined. Turn off the heat and stir in the vanilla extract to infuse a delicate aroma that lifts the entire recipe.
Step 2: Stir in Oats and Nuts
In a large mixing bowl, toss together the hearty oats and finely chopped salted peanuts. Pour the warm peanut butter base over the dry ingredients and mix thoroughly to coat every flake and nut in that sticky, flavorful sauce. Here’s a little trick: allow this mixture to cool down to room temperature before adding the mini chocolate chips to avoid melting them completely. Once cooled, gently fold the chocolate chips in, keeping their wonderful texture intact.
Step 3: Add to Pan
Prepare a 9-inch square baking dish by lining it with parchment paper. Now, press your granola bar mixture firmly but evenly into the dish to ensure the bars hold together well when sliced. This pressing step is key for a neat, sturdy bar. Pop the entire dish into the refrigerator and chill for at least 4 hours or, even better, overnight. This chilling time lets the bars set perfectly, making them easy to cut and ready to enjoy.
Step 4: Slice and Store
Once chilled, carefully cut your granola bars right in the dish. Keeping them stored in the refrigerator between servings ensures they stay fresh and firm. Each bar will be bursting with nutty, chocolaty goodness that’s impossible to resist.
How to Serve No-Bake Peanut Butter Granola Bars Recipe
Garnishes
To add a touch of whimsy and extra flavor, sprinkle a handful of toasted coconut flakes or a drizzle of melted peanut butter over the bars before serving. Chopped dried fruit, like cranberries or apricots, can also add a lovely contrast of flavor and color here.
Side Dishes
Pair these granola bars with a refreshing fruit smoothie or a creamy yogurt parfait for a well-rounded snack or breakfast. They also complement a hot cup of coffee or chai tea beautifully, making your snack time feel extra special.
Creative Ways to Present
For a fun twist, wrap individual bars in parchment paper tied with a twine bow for an adorable homemade gift or lunchbox surprise. You could also serve the bars alongside a small bowl of nut butter or chocolate sauce for dipping – turning a simple snack into an interactive treat.
Make Ahead and Storage
Storing Leftovers
These bars keep best when stored in an airtight container in the refrigerator. This preserves their firmness and keeps them tasting fresh for up to one week, making them perfect for prepping snacks ahead for busy days.
Freezing
If you’d like to make a larger batch, these bars freeze wonderfully. Wrap them individually or keep them in an airtight container with parchment paper separating layers, and pop them in the freezer for up to three months. Just thaw at room temperature when you’re ready to snack.
Reheating
There’s usually no need to reheat these bars, but if you prefer them slightly softened, leave them out at room temperature for 10–15 minutes. Avoid microwaving, as it can make the texture overly soft or cause the chocolate to melt too much.
FAQs
Can I use crunchy peanut butter instead of smooth?
Absolutely! Crunchy peanut butter will add even more texture to the bars, enhancing the nutty crunch alongside the chopped peanuts. Just mix as usual and enjoy the added bite.
Is it possible to substitute the peanuts for other nuts?
Yes, feel free to swap peanuts for almonds, cashews, or walnuts depending on your preference or dietary needs. Just be mindful of chopping them finely to keep the right texture.
Can I make these bars vegan?
Definitely! Using maple syrup instead of honey and opting for a plant-based butter or coconut oil keeps this recipe vegan-friendly without sacrificing taste.
What if I don’t have coconut oil?
You can substitute coconut oil with butter or even a neutral vegetable oil. Butter will add richness while oils might slightly change the setting texture but still work well.
How do I make these bars gluten-free?
Simply ensure you use certified gluten-free oats. Oats themselves are gluten-free, but cross-contamination can occur, so buying gluten-free labeled oats is key.
Final Thoughts
This No-Bake Peanut Butter Granola Bars Recipe is the epitome of easy, wholesome snacking done right. Once you give them a try, you’ll appreciate how fast they come together and how satisfying they taste. Whether you’re meal-prepping for the week or looking for a quick energy boost, these bars have your back. Go ahead and treat yourself—you deserve this delicious little bite of peanut butter paradise!
Print
No-Bake Peanut Butter Granola Bars Recipe
- Prep Time: 10 minutes
- Cook Time: 3 minutes
- Total Time: 4 hours 13 minutes
- Yield: 12 servings
- Category: Snack
- Method: No-Cook
- Cuisine: American
- Diet: Gluten Free
Description
These No-Bake Peanut Butter Granola Bars are a quick and easy snack made with wholesome ingredients like oats, peanuts, and peanut butter, sweetened naturally with maple syrup. Ready in under 15 minutes, they require no oven and are perfect for a healthful treat or on-the-go breakfast.
Ingredients
Wet Ingredients
- 6 Tbsp pure maple syrup (or honey)
- ⅓ cup smooth peanut butter
- ⅓ cup coconut oil (or butter)
- 1 tsp vanilla extract
Dry Ingredients
- 2 cups old-fashioned oats (gluten-free if needed)
- ⅔ cup salted peanuts, finely chopped
- ⅓ cup mini chocolate chips
Instructions
- Make the Base: In a small saucepan over medium-low heat, combine the maple syrup, peanut butter, and coconut oil. Stir the mixture continuously for 2-3 minutes until smooth and well incorporated. Remove from heat and stir in the vanilla extract until combined.
- Stir in Oats and Nuts: In a large bowl, combine the oats and finely chopped salted peanuts. Pour the warm peanut butter sauce over the oat mixture and mix well to coat all ingredients evenly. Let the mixture cool to room temperature, then fold in the mini chocolate chips gently until just combined.
- Add to Pan: Line a 9-inch square baking dish with parchment paper. Transfer the granola mixture into the dish and press it firmly and evenly to compact the bars. Refrigerate for at least 4 hours or overnight to set.
- Cut and Store: Once set, remove from the refrigerator and cut the granola into bars directly in the dish for best results. Store the bars in an airtight container in the refrigerator between servings to maintain freshness.
Notes
- Use gluten-free oats if you require a gluten-free version.
- Substitute coconut oil with butter for a slightly different flavor and texture.
- For vegan variation, use maple syrup instead of honey and ensure chocolate chips are dairy-free.
- Press granola mixture very firmly into the pan to ensure bars hold together well.
- Store bars refrigerated for up to one week or freeze for longer storage.