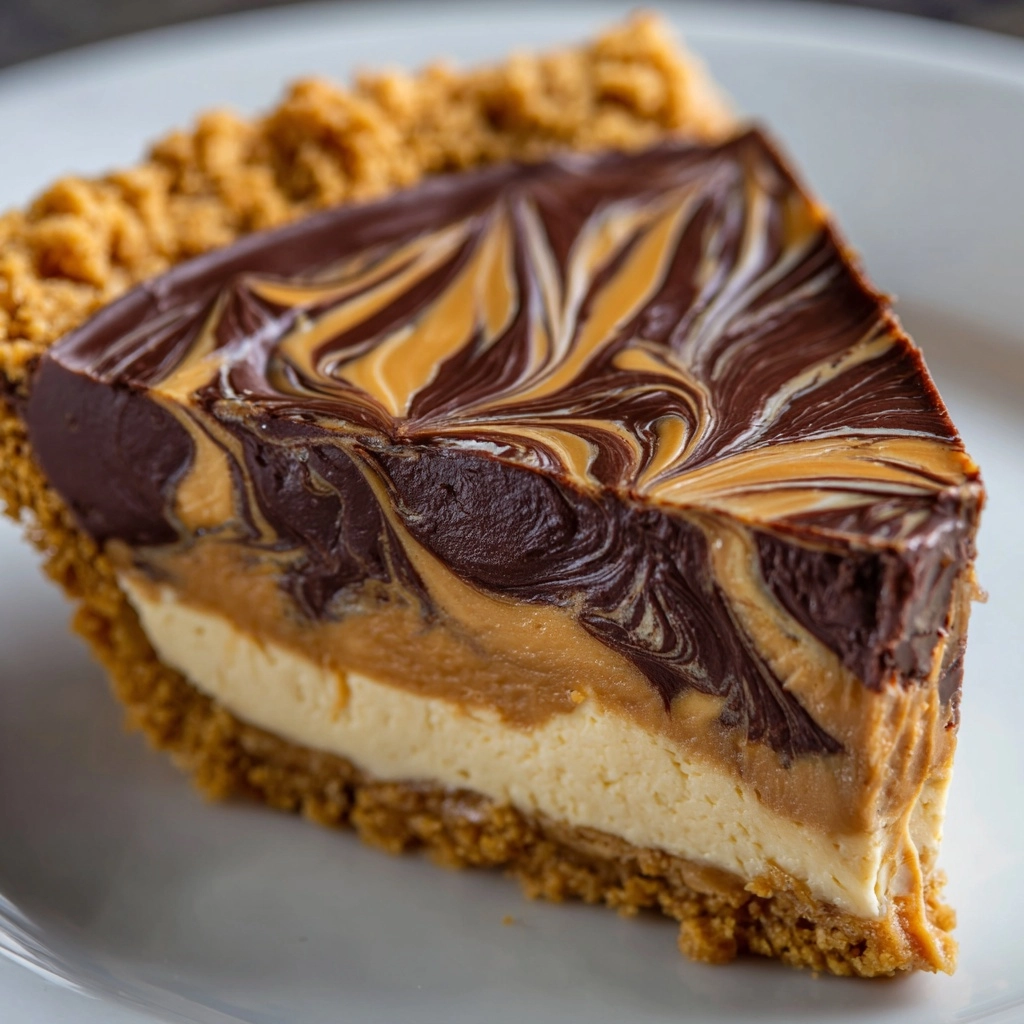
If you’re searching for a dessert that’s jaw-droppingly delicious, fuss-free, and a total showstopper at any gathering, look no further than this No-Bake Chocolate Peanut Butter Swirl Pie. This dreamy treat takes everything you love about silky peanut butter and rich chocolate, then swirls them together in a cloud-like pie that requires absolutely zero baking. Smooth, decadent, and boasting that eye-catching swirled top, it’s pure dessert magic—without ever needing to turn on the oven!
Ingredients You’ll Need
The beauty of the No-Bake Chocolate Peanut Butter Swirl Pie is how its handful of ingredients work harmoniously to create layers of flavor and indulgence. Each item brings its own charm to the table, ensuring a pie that’s rich, creamy, and packed with crave-worthy contrasts.
- Chocolate cookie crust: Delivers a crunchy, chocolatey base that beautifully supports the luscious filling.
- Creamy peanut butter: The star of the show— opt for classic creamy for that unmistakable nutty richness.
- Cream cheese (softened): Adds just the right amount of tang and structure to help the pie hold its dreamy shape.
- Powdered sugar: Sweetens things up and fine-tunes the texture without any grittiness.
- Whipped topping (like Cool Whip): Folds airiness into the filling so every bite is light as a feather.
- Semi-sweet chocolate chips: Melted into a ribbon of decadence for swirling over the top.
- Heavy cream: Ensures the chocolate melts into a creamy, pourable (and swoon-worthy) drizzle.
How to Make No-Bake Chocolate Peanut Butter Swirl Pie
Step 1: Prepare the Peanut Butter Filling
In a large mixing bowl, beat together the creamy peanut butter and softened cream cheese until everything is perfectly smooth. This step is key for achieving that ultra-creamy texture—so don’t cut corners! It’s worth taking your time here to create a decadent, mousse-like base for the No-Bake Chocolate Peanut Butter Swirl Pie.
Step 2: Sweeten and Fluff
Next, add the powdered sugar to the bowl and mix until the sugar has fully disappeared into the peanut butter mixture. Then, gently fold in the whipped topping. Your goal is to keep things as airy as possible, so use a spatula and a light touch. By the end, you should have a silky-smooth, cloud-like filling just begging to be nestled into a crust.
Step 3: Assemble the Pie Base
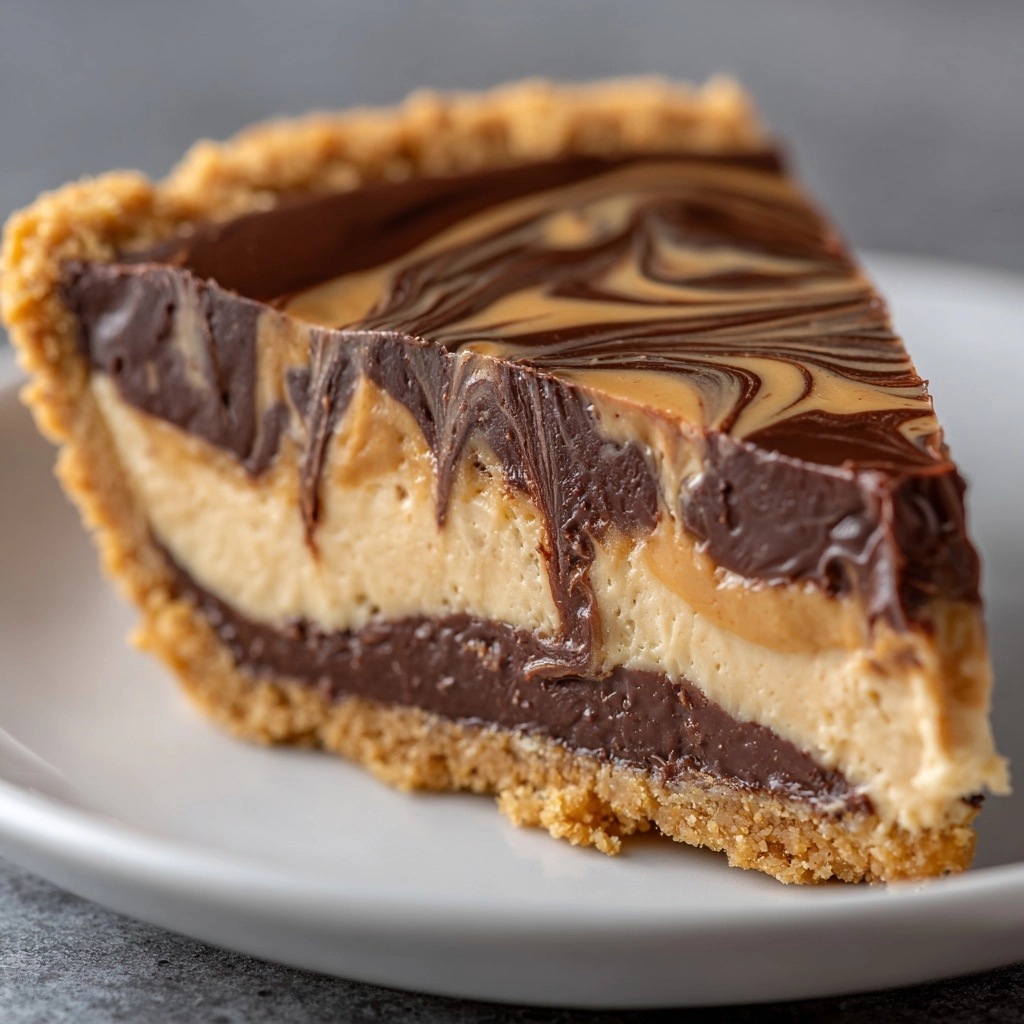
Spoon the peanut butter filling into the ready-made chocolate cookie crust, smoothing the top with an offset spatula or the back of a spoon. Be sure to level it out evenly so every slice of this No-Bake Chocolate Peanut Butter Swirl Pie boasts that classic uniform swirl when sliced.
Step 4: Make the Chocolate Swirl
In a microwave-safe bowl, combine the semi-sweet chocolate chips and heavy cream. Microwave in 20-second bursts, stirring in between, until the chocolate is just melted and silky smooth. Let it cool slightly, then drizzle generously over the peanut butter layer. Take a toothpick or butter knife and gently swirl the chocolate into the top for those mesmerizing marbled patterns that make this pie so special!
Step 5: Chill and Set
Lightly cover the pie and pop it in the refrigerator for at least 4 hours (overnight is even better) to allow the flavors to meld and the filling to firm up. This is the hardest part—waiting! Once it’s set, slice into wedges and serve up your gorgeous, irresistible No-Bake Chocolate Peanut Butter Swirl Pie.
How to Serve No-Bake Chocolate Peanut Butter Swirl Pie

Garnishes
Go all out with garnishes to make your No-Bake Chocolate Peanut Butter Swirl Pie even more irresistible! Try a sprinkle of chopped roasted peanuts, a handful of mini chocolate chips, or even a dollop of extra whipped topping for flair. Each one adds a fun twist of texture and presentation that your guests will absolutely love.
Side Dishes
To round out your dessert table, pair slices of your pie with a mug of hot coffee, a chilled glass of milk, or even a scoop of vanilla ice cream. The cold, creamy flavors of the pie work beautifully alongside these classics, letting each element shine while not overpowering your main event.
Creative Ways to Present
Transform your No-Bake Chocolate Peanut Butter Swirl Pie into mini desserts by using individual tart pans or mason jars for single-serve portions. If you’re feeling artsy, drizzle extra chocolate in unique patterns or arrange peanut butter chips and chocolate shavings on top in a playful design. Let your creativity shine as bright as that marbled top!
Make Ahead and Storage
Storing Leftovers
Leftover slices of No-Bake Chocolate Peanut Butter Swirl Pie store like a dream! Simply cover the pie (or individual slices) tightly with plastic wrap or foil and place in the refrigerator. It will keep beautifully for up to 4 days, making it a great option for make-ahead entertaining.
Freezing
If you’d like to extend the pie’s shelf life even further, freezing is totally doable. Wrap the entire pie, or cut slices, in plastic wrap and a layer of foil. Store in a freezer-safe container and freeze for up to three months. Thaw overnight in the fridge before serving to ensure that magical creamy texture returns.
Reheating
This No-Bake Chocolate Peanut Butter Swirl Pie is best enjoyed chilled straight from the fridge, so there’s no need to reheat! If freezing, simply let the pie come to fridge temperature for a few hours before serving. That way, every slice tastes as freshly dreamy as the day it was made.
FAQs
Can I use natural peanut butter instead of regular creamy peanut butter?
While you can use natural peanut butter, keep in mind it may be a bit oilier and less sweet, which can affect the filling’s texture and stability. For best results and that classic pie flavor, stick with regular creamy peanut butter.
Is it possible to make this pie dairy-free?
Absolutely! Swap in dairy-free cream cheese, plant-based whipped topping, and dairy-free chocolate chips to craft a No-Bake Chocolate Peanut Butter Swirl Pie that everyone can enjoy. You’ll be amazed how wonderfully it adapts to different dietary needs.
What’s the best way to get clean, picture-perfect slices?
For clean slices, dip a sharp knife in hot water, wipe it dry between cuts, and glide through the pie. That gentle heat will help you achieve flawless wedges that show off every gorgeous swirl.
Can I prepare this pie a day in advance?
Yes, and in fact, it’s highly recommended! The flavors mingle and meld so beautifully after resting overnight in the fridge, making your No-Bake Chocolate Peanut Butter Swirl Pie taste even better the next day.
How can I make the swirl on top look extra fancy?
After drizzling the melted chocolate, use a toothpick or thin skewer to drag intricate designs or even lettering across the surface. Take your time and have fun with it—the pie is your culinary canvas!
Final Thoughts
If you’re craving a dessert that’s foolproof, outrageously decadent, and a guaranteed crowd-pleaser, this No-Bake Chocolate Peanut Butter Swirl Pie is your answer. Its blend of creamy, chocolatey, and nutty flavors will win over any guest (and maybe even a few lifelong fans). Don’t wait—whip it up and enjoy every luscious, no-bake bite!
Print
No-Bake Chocolate Peanut Butter Swirl Pie Recipe
- Prep Time: 15 minutes
- Cook Time: 0 minutes
- Total Time: 4 hours 15 minutes
- Yield: 8 servings
- Category: Dessert
- Method: No-Bake
- Cuisine: American
- Diet: Vegetarian
Description
Indulge in a decadent yet effortless dessert with this No-Bake Chocolate Peanut Butter Swirl Pie. Creamy peanut butter and cream cheese filling swirled with rich chocolate on a chocolate cookie crust, chilled to perfection.
Ingredients
For the Crust:
- 1 9-inch chocolate cookie crust
For the Filling:
- 1 cup creamy peanut butter
- 8 oz cream cheese (softened)
- 1 cup powdered sugar
- 8 oz whipped topping (like Cool Whip)
For the Chocolate Swirl:
- 1/2 cup semi-sweet chocolate chips
- 2 tablespoons heavy cream
Instructions
- Prepare Filling: Beat peanut butter and cream cheese until smooth. Add powdered sugar, mix well. Fold in whipped topping.
- Fill Crust: Spread filling into crust.
- Add Chocolate Swirl: Melt chocolate with cream, drizzle over pie, swirl to marble.
- Chill: Refrigerate for at least 4 hours.
- Serve: Slice and enjoy!
Notes
- For a richer flavor, use dark chocolate chips.
- Top with chopped peanuts or mini chocolate chips for extra texture.
Nutrition
- Serving Size: 1 slice
- Calories: 430
- Sugar: 22g
- Sodium: 280mg
- Fat: 30g
- Saturated Fat: 12g
- Unsaturated Fat: 15g
- Trans Fat: 0g
- Carbohydrates: 34g
- Fiber: 2g
- Protein: 7g
- Cholesterol: 25mg
