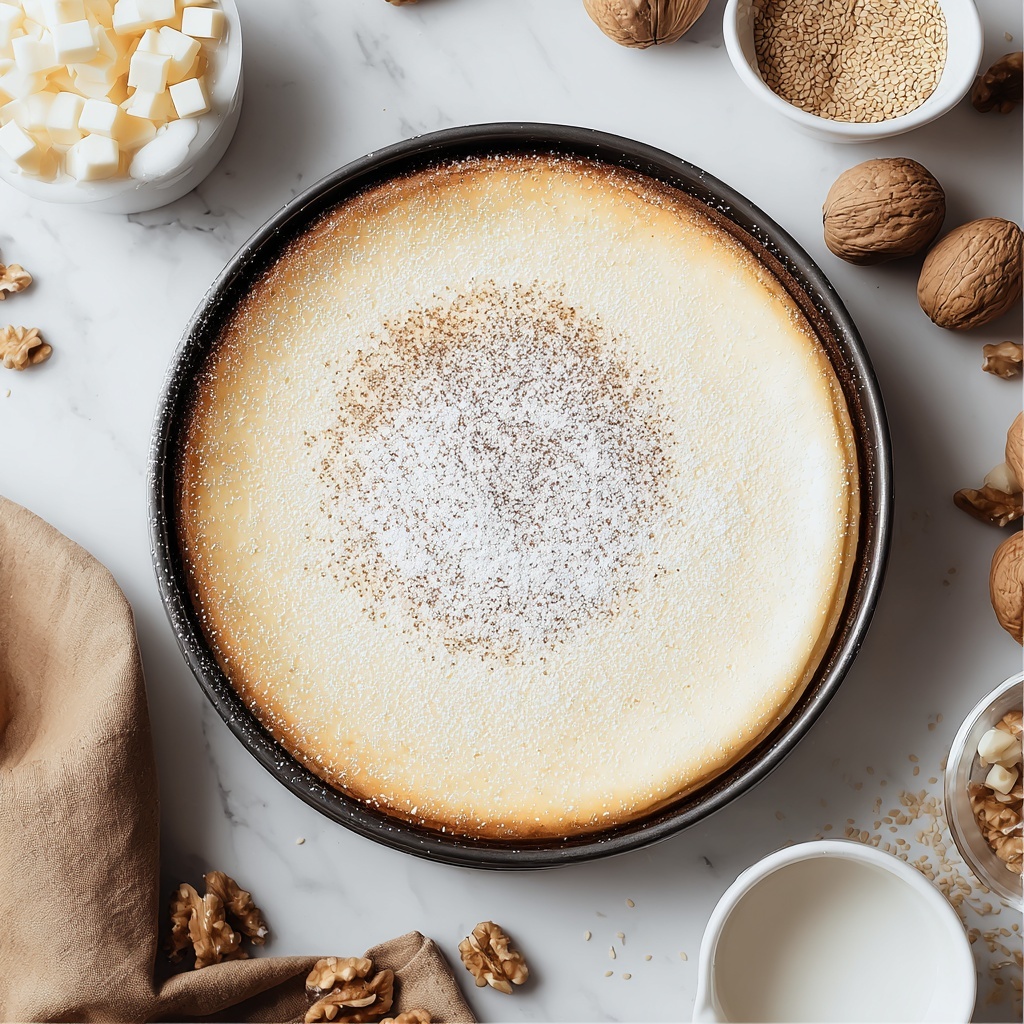
There is nothing quite as delightful as mastering a Fluffy Japanese Cheesecake Recipe to brighten up your baking repertoire. This cheesecake is a magical treat, delicate and airy with a subtle sweetness that will simply melt in your mouth. Unlike traditional cheesecakes that can be dense and heavy, this one feels like a cloud of soft, creamy bliss, making it a perfect dessert to share with friends and family. Once you try this Fluffy Japanese Cheesecake Recipe, it might just become your go-to for special occasions or a lovely afternoon indulgence.
Ingredients You’ll Need

Ingredients You’ll Need
Getting the ingredients right is key to achieving the perfect texture and flavor for this cheesecake. Each ingredient in this Fluffy Japanese Cheesecake Recipe plays a vital role in delivering that signature softness and subtle richness.
- Cream cheese: Use full-fat cream cheese for a rich, creamy base that balances the cake’s lightness.
- Whole milk: Adds moisture and smoothness to the batter, helping to keep the cheesecake tender.
- Large eggs: Essential for structure and volume, separated to maximize fluffiness.
- Granulated sugar: Sweetens the cake evenly while helping to stabilize the egg whites.
- Unsalted butter: Enriches the batter with a gentle buttery flavor without overpowering it.
- Cake flour: Provides a lighter texture compared to all-purpose flour, perfect for delicate cakes.
- Cornstarch: Helps keep the cake tender and adds to the smooth crumb.
- Salt: Enhances the overall flavors, balancing sweetness and richness.
- Cream of tartar: Stabilizes the egg whites so they whip up fluffy and hold their shape.
- Vanilla extract: Adds a subtle aroma and depth of flavor that complements the cheesecake beautifully.
How to Make Fluffy Japanese Cheesecake Recipe
Step 1: Preheat and Prepare
Begin by heating your oven to 320°F (160°C). Prepare your 9-inch round cake pan by lining the bottom with parchment paper. This setup helps ensure your cheesecake bakes evenly and releases easily afterward.
Step 2: Melt the Cream Cheese Mixture
In a small saucepan over low heat, melt together the cream cheese, whole milk, and unsalted butter. Stir continuously until the mixture is perfectly smooth and combined. Then, set it aside to cool slightly, so it doesn’t curdle when mixed with the eggs later.
Step 3: Separate the Eggs
Carefully separate the egg whites from the yolks, placing each in its own mixing bowl. This step is crucial for whipping the whites to stiff peaks, which gives the cheesecake its airy texture.
Step 4: Combine Yolks and Half Sugar
Add half of the granulated sugar to the egg yolks and whisk until creamy and pale. Then, stir in the cooled cream cheese mixture, mixing well until silky and smooth. This step forms the rich foundation of your batter.
Step 5: Sift and Mix Dry Ingredients
Next, sift together the cake flour, cornstarch, and salt into the egg yolk mixture. Whisk gently but thoroughly until everything is just combined, ensuring no lumps remain. Set this batter aside while you prepare the meringue.
Step 6: Whip Egg Whites with Cream of Tartar
Using a clean, dry bowl, beat the egg whites until they become frothy. Add the cream of tartar, which will help stabilize the foam, then continue to beat until soft peaks start to form.
Step 7: Add Remaining Sugar and Beat to Stiff Peaks
Gradually sprinkle in the remaining granulated sugar while continuously beating. Keep going until the meringue holds stiff, glossy peaks that stand firm when you lift the whisk – this is the secret to that incredible fluffiness!
Step 8: Fold Meringue into Batter
Gently fold the egg white mixture into the yolk batter in three parts. Use a spatula and carefully incorporate, preserving as much air as possible. Stop folding once no white streaks remain to maintain the light, airy texture.
Step 9: Transfer Batter and Remove Air Bubbles
Pour the combined batter into your prepared cake pan. Tap the pan lightly on the countertop a few times to release any trapped air bubbles. This helps create a smooth surface and even bake.
Step 10: Bake in a Water Bath
Place the cake pan inside a larger baking dish. Pour hot water into the larger dish until it reaches halfway up the sides of your cake pan. This water bath ensures gentle, even heating so the cheesecake sets without cracking.
Step 11: Bake Until Golden and Set
Slide your setup into the preheated oven and bake for approximately 1 hour. You’ll know it’s done when the top turns a lovely golden brown and a toothpick poked into the center comes out clean.
Step 12: Cool Gradually in Oven
Turn the oven off but leave the cheesecake inside with the door slightly open. Let it rest like this for about an hour; this gradual cooling prevents the cake from collapsing and helps keep it fluffy.
Step 13: Chill Thoroughly
Remove the cheesecake from the oven and let it reach room temperature. Then, refrigerate for at least 4 hours, or ideally overnight. This chilling step allows the flavors to meld beautifully and the cake to firm up just right.
Step 14: Slice and Serve
When ready to enjoy, slice your fluffy Japanese cheesecake into gentle pieces. Notice how tender and airy each slice feels—this is the hallmark of a perfected Fluffy Japanese Cheesecake Recipe!
How to Serve Fluffy Japanese Cheesecake Recipe
Garnishes
The beauty of this Fluffy Japanese Cheesecake Recipe is its subtle flavor, which pairs wonderfully with light garnishes. Fresh berries or a dusting of powdered sugar add an elegant touch without overpowering the delicate cake. A drizzle of fruit coulis or a dollop of whipped cream can also elevate your presentation.
Side Dishes
Since this cheesecake is lighter than traditional versions, pairing it with a small cup of green tea or jasmine tea provides a perfect balance. You might also enjoy it alongside fresh fruit salad or a refreshing sorbet for a delightful contrast in textures and temperatures.
Creative Ways to Present
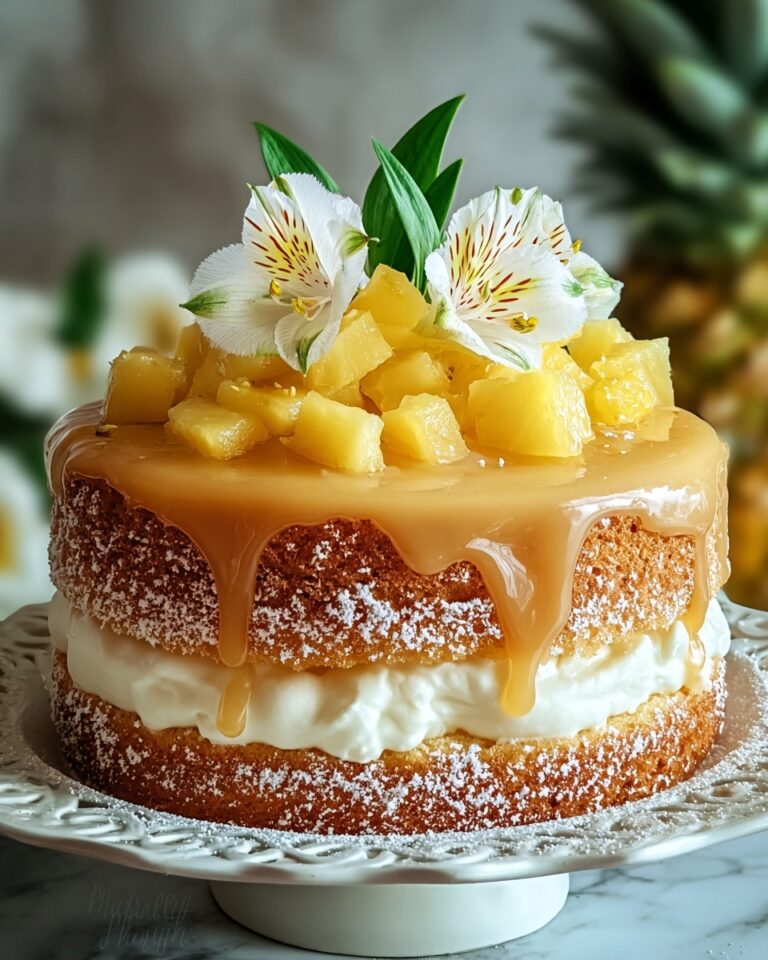
For a fancy gathering, serve individual portions in clear glasses layered with fruit compote. Another fun idea is to add edible flowers on top for a romantic, eye-catching effect. Turning this Fluffy Japanese Cheesecake Recipe into mini cheesecakes in ramekins is a crowd-pleaser that’s both charming and convenient.
Make Ahead and Storage
Storing Leftovers
After serving, keep any leftover cheesecake wrapped tightly in plastic wrap or stored in an airtight container in the refrigerator. It will stay fresh and moist for up to 3 days while maintaining its signature fluffiness.
Freezing
You can freeze the cheesecake, though texture might soften slightly after thawing. For best results, wrap it carefully in plastic wrap and then in foil or place it in a freezer bag. Freeze for up to 1 month and thaw overnight in the fridge to enjoy later.
Reheating
Reheat your chilled cheesecake slices at room temperature for about 15-20 minutes before serving, or enjoy it cold if you prefer. Avoid microwaving, as that can cause the texture to become dense and lose that lovely fluffiness.
FAQs
What makes this cheesecake different from traditional cheesecakes?
The Fluffy Japanese Cheesecake Recipe uses whipped egg whites folded into the batter, making it lighter, airier, and less dense than traditional cheesecakes, which are usually richer and creamier.
Can I use a different type of cheese?
Cream cheese is essential here for the right balance of flavor and texture. While some recipes might use mascarpone or ricotta, the classic Fluffy Japanese Cheesecake Recipe specifically relies on cream cheese for its signature taste.
Why do I need a water bath during baking?
The water bath gently steams the cheesecake to prevent cracking and uneven baking. It keeps the cake moist and helps it bake slowly, which is key to its soft, fluffy texture.
How important is separating the eggs?
Separating the eggs is crucial because the yolks add richness while the whites provide volume and lightness when whipped. This separation ensures the perfect airy consistency that defines the Fluffy Japanese Cheesecake Recipe.
Can I make this cheesecake gluten-free?
To make this cheesecake gluten-free, substitute the cake flour with a gluten-free flour blend suitable for baking. Just be mindful that the texture might slightly vary, but the cake will still be delicious and fluffy.
Final Thoughts
I wholeheartedly encourage you to try this Fluffy Japanese Cheesecake Recipe. It’s a remarkable dessert that brings joy to both the baker and those lucky enough to take a bite. With its delicate texture and subtle sweetness, it’s bound to become a treasured classic in your kitchen. So grab your ingredients and get ready to experience a slice of pure happiness!
Print
Fluffy Japanese Cheesecake Recipe
- Prep Time: 0h 30m
- Cook Time: 1h 0m
- Total Time: 5h 30m
- Yield: 8 servings
- Category: Dessert
- Method: Baking
- Cuisine: Japanese
- Diet: Vegetarian
Description
This Fluffy Japanese Cheesecake offers a light and airy texture that melts in your mouth. Combining the richness of cream cheese with the silkiness of whipped egg whites, this delicately baked cake is a perfect balance of sweet and creamy, ideal for dessert lovers seeking a soft, soufflé-like treat.
Ingredients
Main Ingredients
- 4 oz cream cheese
- 1/4 cup whole milk
- 6 large eggs
- 3/4 cup granulated sugar
- 1/4 cup unsalted butter
- 1/2 cup cake flour
- 2 tbsp cornstarch
- 1/4 tsp salt
- 1/4 tsp cream of tartar
- 1 tsp vanilla extract
Instructions
- Preheat and prepare pan: Preheat your oven to 320°F (160°C) and line the bottom of a 9-inch round cake pan with parchment paper to prevent sticking and ensure even baking.
- Melt cream cheese mixture: In a small saucepan over low heat, gently melt the cream cheese, whole milk, and unsalted butter, stirring until smooth and fully combined. Remove from heat and let cool slightly.
- Separate eggs: Divide the eggs into two bowls, separating the whites from the yolks carefully to avoid mixing.
- Mix egg yolks and sugar: Add half of the granulated sugar to the egg yolks and whisk until creamy and pale. Incorporate the melted cream cheese mixture and whisk until smooth.
- Add dry ingredients: Sift the cake flour, cornstarch, and salt into the egg yolk mixture, then whisk gently to combine without lumps.
- Beat egg whites: In a clean bowl, beat the egg whites until frothy. Add the cream of tartar and beat until soft peaks form, which helps stabilize the meringue.
- Add sugar to whites: Gradually add the remaining sugar while continuing to beat the egg whites until stiff, glossy peaks form, indicating proper aeration.
- Fold mixtures: Carefully fold the egg white mixture into the egg yolk batter in three additions to maintain the airiness without deflating the batter.
- Transfer to pan: Pour the combined batter into the prepared cake pan. Tap the pan lightly on the countertop to release any trapped air bubbles for smooth texture.
- Prepare water bath: Place the cake pan inside a larger baking dish and pour hot water halfway up the sides of the cake pan to create a bain-marie for gentle baking.
- Bake: Bake in the preheated oven for about 1 hour, or until the top turns a light golden brown and a toothpick inserted in the center comes out clean.
- Cool in oven: Turn off the oven and leave the cheesecake inside with the door slightly ajar for one hour to cool gradually, preventing cracks.
- Room temperature cool: Remove the cheesecake from the oven and let it cool completely to room temperature on a wire rack.
- Chill: Refrigerate the cooled cheesecake for at least 4 hours or overnight to firm up and enhance flavors.
- Serve: Slice the fluffy Japanese cheesecake into portions and serve chilled for the best experience.
Notes
- Using a water bath prevents the cake from drying out and helps it bake evenly.
- Be gentle when folding the meringue into the batter to keep the cake light and fluffy.
- Allowing the cake to cool slowly in the oven reduces the chance of cracks on the surface.
- Refrigerating the cake overnight improves texture and flavor.
- Make sure egg whites are at room temperature for better volume when beaten.


