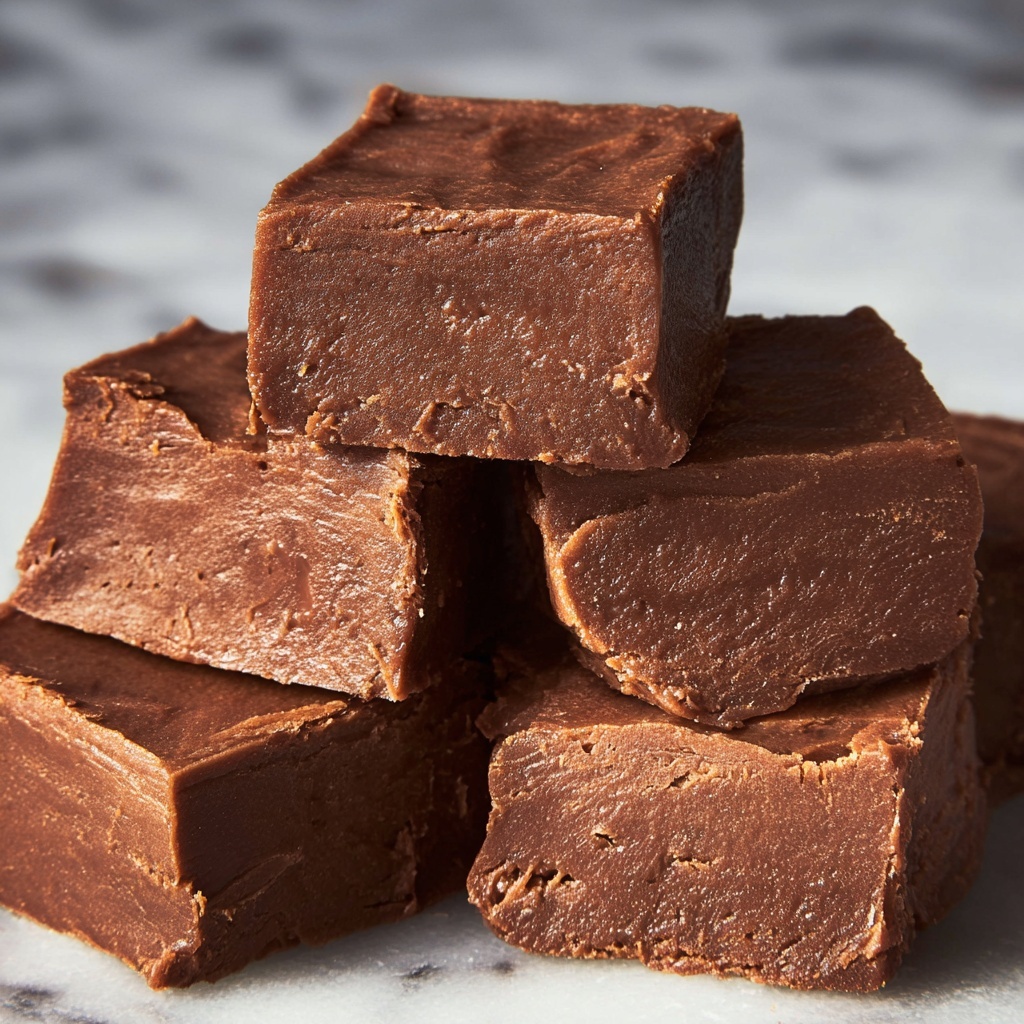
If you have ever dreamed of creating the perfect, melt-in-your-mouth treat that will have everyone begging for more, then my Fantasy Fudge Recipe is exactly what you need. This decadent, velvety fudge combines rich semi-sweet chocolate, marshmallow creme, and a buttery sweetness that is utterly irresistible. Each bite is a dreamy symphony of creamy texture and just the right amount of sweetness, making it the ultimate homemade confection to share with family or to simply indulge in yourself.
Ingredients You’ll Need
Getting ready to make this Fantasy Fudge Recipe is so simple because the ingredients are straightforward but pack a powerful punch in flavor and texture. Each element plays its own role—from the smoothness of butter to the fluffiness of marshmallow creme, and the crunch of walnuts, if you choose to add them.
- Granulated sugar: Provides the perfect level of sweetness and structure essential for fudge.
- Unsalted butter: Adds creamy richness and helps achieve that luscious, smooth fudge texture.
- Evaporated milk: Gives body and a subtle depth to the mixture, making it silky.
- Semi-sweet chocolate: The star ingredient that delivers rich, chocolaty flavor with balanced sweetness.
- Marshmallow creme: Adds fluffiness and helps the fudge to set with the perfect chewiness.
- Vanilla extract: Enhances all the flavors and gives the fudge a warm, inviting aroma.
- Chopped walnuts (optional): For a delightful crunch and nutty contrast to the creamy fudge.
How to Make Fantasy Fudge Recipe
Step 1: Prepare Your Ingredients
Start by gathering all your ingredients and prepping them. Chop the semi-sweet chocolate if it comes in a large block, and if you’re including walnuts, chop them up to bite-sized pieces. Scoop the marshmallow creme into a bowl to have it ready for quick mixing later. This preparation step ensures everything moves quickly and smoothly when you begin cooking.
Step 2: Prepare the Pan
Line a 9×13-inch baking pan with foil and lightly butter the inside surface. This ensures your fudge won’t stick and you can easily lift the whole batch out once it’s set, making serving a breeze.
Step 3: Boil the Sugar Mixture
In a large, thick-bottomed saucepan (around 3 quarts), combine the evaporated milk, granulated sugar, and butter. Heat over medium heat until it reaches a rolling boil. Once boiling starts, stir constantly to prevent burning and ensure even cooking.
Step 4: Timing the Boil
Start timing once the mixture rolls to a boil. You want to boil it for exactly 4 minutes, or until it reaches 234°F on a candy thermometer. This step is crucial because it sets the fudge’s texture — too little or too much, and you won’t get that perfect creamy bite.
Step 5: Add Marshmallow Creme and Chocolate
After the 4 minutes or reaching the desired temperature, remove the pan from heat. Immediately add the marshmallow creme and chocolate pieces. Allow them to melt into the hot mixture naturally before stirring to combine into a silky, glossy fudge base.
Step 6: Mix in Remaining Ingredients
Stir the melted chocolate and marshmallow creme until smooth and uniform. Next, add the vanilla extract for that extra flavor boost. If you’re including walnuts, fold them in now to distribute them evenly throughout.
Step 7: Pour into Prepared Pan
Transfer the fudge mixture to your buttered, foil-lined pan. Spread it evenly for consistent thickness. This is where your fudge will begin to transform into the rich, soft delight it is.
Step 8: Let it Set
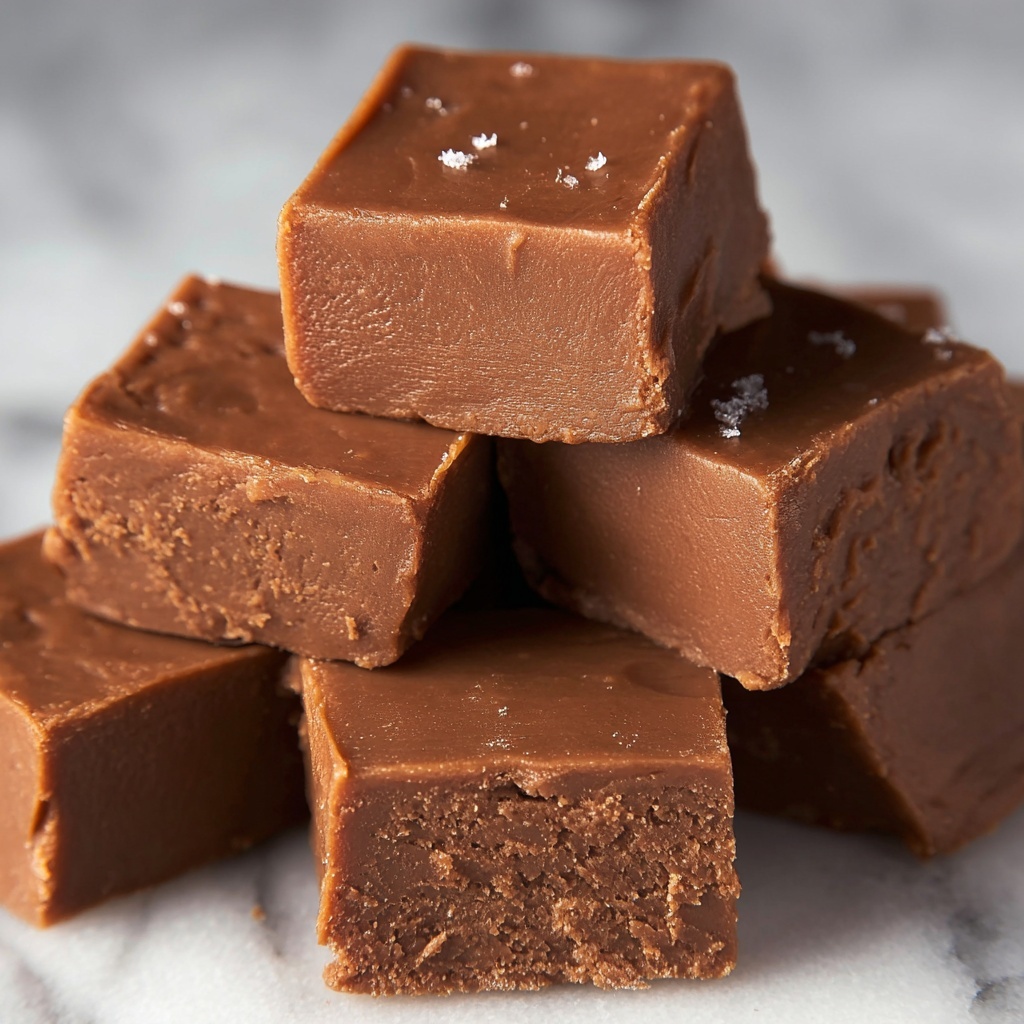
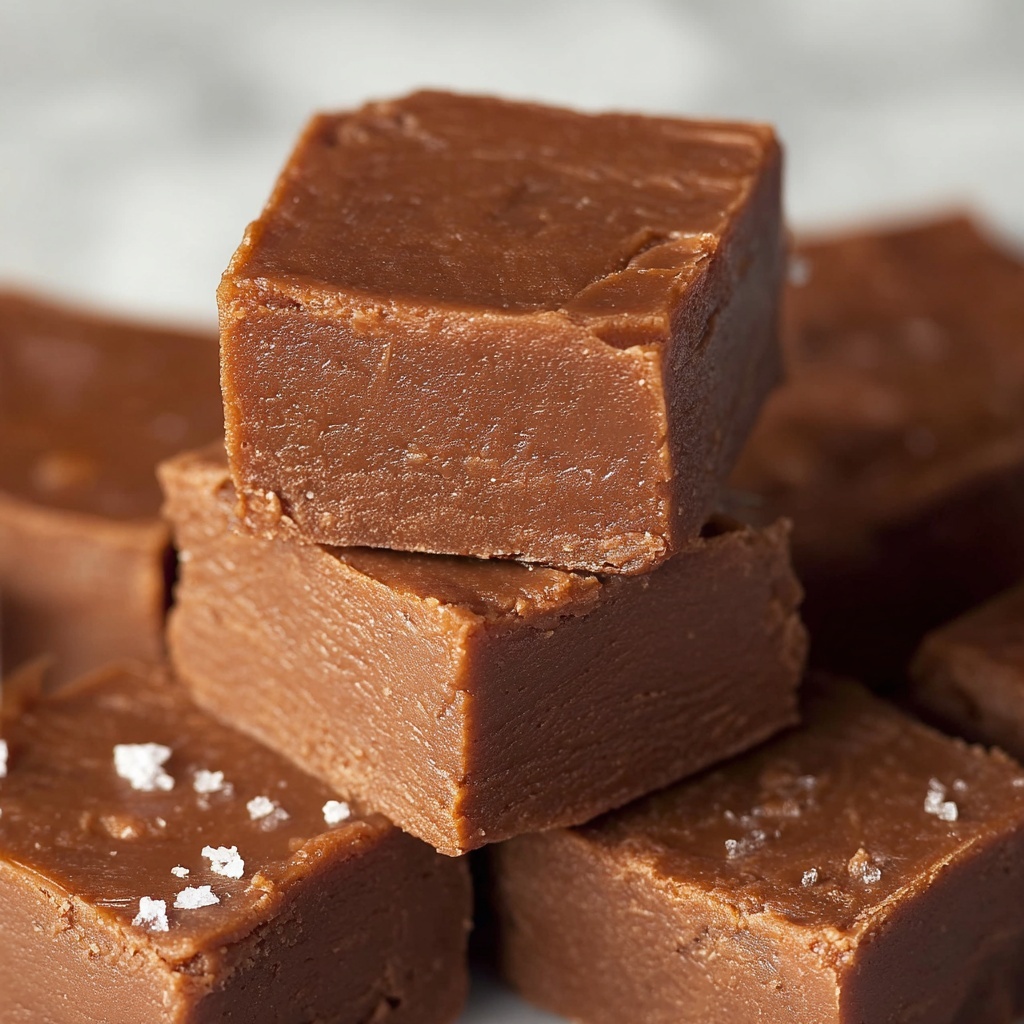
Allow the fudge to cool at room temperature for a bit before placing it in the refrigerator. Let it chill for at least 4 hours until it’s firm enough to cut into clean, beautiful squares.
How to Serve Fantasy Fudge Recipe
Garnishes
While the fudge is rich enough on its own, you can elevate your presentation with light garnishes. Consider sprinkling finely chopped walnuts or a dusting of cocoa powder on top before it sets. For a festive touch, crushed peppermint or colorful sprinkles can add a playful look and a burst of flavor harmony.
Side Dishes
Fantasy fudge pairs beautifully with warm beverages like coffee, hot cocoa, or tea to balance its sweetness. A scoop of vanilla ice cream on the side or fresh seasonal berries can complement the fudge’s richness, turning your indulgence into a delightful dessert experience.
Creative Ways to Present
Cut your fudge into bite-sized cubes and serve them on a decorative platter with festive toothpicks for parties. You can also layer pieces between wax paper squares and wrap them in colorful ribbons for a charming homemade gift that anyone would adore.
Make Ahead and Storage
Storing Leftovers
Place any leftover fudge in an airtight container and store it in the refrigerator. It will stay fresh and delicious for up to two weeks. Keep the container sealed tightly to avoid any absorption of fridge odors and to maintain its soft texture.
Freezing
You can freeze your Fantasy Fudge Recipe by wrapping individual pieces in plastic wrap and then placing them in a freezer-safe container or bag. When properly wrapped, fudge can last in the freezer for up to three months without losing its creamy texture.
Reheating
If you prefer softer fudge, thaw frozen pieces at room temperature and give them a few minutes before eating. Reheating isn’t usually necessary, but if you want a warmed treat, microwave for just a few seconds—be careful not to melt it completely.
FAQs
Can I use different types of chocolate in the Fantasy Fudge Recipe?
Absolutely! You can swap semi-sweet chocolate for milk or dark chocolate depending on your preference. Just keep in mind that darker chocolate will yield a less sweet, more intense fudge, while milk chocolate will make it sweeter and creamier.
Is it necessary to use a candy thermometer?
While not mandatory, a candy thermometer is very helpful to ensure you hit the precise temperature for the perfect fudge texture. If you don’t have one, following the four-minute boil time closely should still yield delicious results.
Can I omit walnuts if I have an allergy?
Yes, walnuts are optional in this Fantasy Fudge Recipe. The fudge tastes incredible even without nuts. You can also substitute with other nuts like pecans or leave them out entirely if allergies or preferences dictate.
How long does it take for fudge to set properly?
Fudge should be allowed to cool and then refrigerated for at least 4 hours to achieve the ideal firm and sliceable consistency. Rushing this step may result in fudge that is too soft or sticky.
Can I add other flavors to the fudge?
Definitely! You can experiment by adding flavors like almond extract, peppermint extract, or even swirl in caramel or peanut butter before setting. Just remember to adjust amounts so the flavors don’t overpower the chocolate base.
Final Thoughts
There’s something truly magical about making your own fudge from scratch, and this Fantasy Fudge Recipe captures that magic perfectly. With simple ingredients and straightforward steps, you’ll create a luscious treat that feels like a special occasion every time you take a bite. I encourage you to try it out and share the joy it brings—once you taste it, you’ll understand why it quickly becomes a favorite dessert for all seasons.
Print
Fantasy Fudge Recipe
- Prep Time: 15 minutes
- Cook Time: 4 minutes
- Total Time: 4 hours 19 minutes
- Yield: 13 pieces
- Category: Dessert
- Method: Stovetop
- Cuisine: American
Description
Fantasy Fudge is a rich, creamy, and indulgent homemade fudge recipe that combines the smoothness of melted chocolate and marshmallow creme with a buttery, sweet base. Perfectly textured with optional crunchy walnuts, this classic treat is easy to make on the stovetop and ideal for festive gatherings or sweet cravings.
Ingredients
Fudge Base
- 3 cups granulated sugar
- ¾ cup unsalted butter
- ⅔ cup evaporated milk
Chocolate Mixture
- 1 pound semi-sweet chocolate, chopped
- 7 oz. jar marshmallow creme
- 1 teaspoon vanilla extract
Optional
- 1 cup chopped walnuts
Instructions
- Prepare Ingredients: Chop the semi-sweet chocolate if using a large block. Chop walnuts if you plan to include them. Remove marshmallow creme from its jar and place it into a bowl for easy access.
- Prepare Baking Pan: Line a 9×13-inch baking pan with foil, ensuring it covers the bottom and sides. Lightly butter the foil to prevent sticking.
- Combine and Boil Fudge Base: In a large 3-quart saucepan with a thick bottom, combine granulated sugar, unsalted butter, and evaporated milk. Place over medium heat and bring the mixture to a rolling boil, stirring constantly once boiling to prevent burning.
- Boil for Designated Time: As soon as the mixture reaches a rolling boil, start a 4-minute timer. If using a candy thermometer, continue boiling until the temperature reaches 234°F (the soft-ball stage).
- Add Chocolate and Marshmallow: Once the timer ends or temperature is reached, remove the saucepan from heat. Add the marshmallow creme and chopped chocolate to the hot mixture.
- Mix Until Smooth: Allow the chocolate and marshmallow to melt completely, then stir vigorously until the mixture is uniform. Stir in vanilla extract and, if using, fold in the chopped walnuts.
- Pour and Cool: Pour the smooth fudge mixture evenly into the prepared pan, spreading as needed. Let it cool at room temperature initially.
- Set and Chill: Allow the fudge to set for about 4 hours. To speed up firming and improve texture, refrigerate the fudge before slicing into 13 pieces.
Notes
- Use a heavy-bottomed saucepan to prevent scorching the sugar mixture.
- Stir constantly during boiling to avoid burning.
- Wrapping the pan with foil helps to remove fudge easily after setting.
- Walnuts are optional for added crunch and flavor.
- For a firmer fudge, refrigerate overnight instead of 4 hours.
- Use a candy thermometer for best results and consistent texture.

