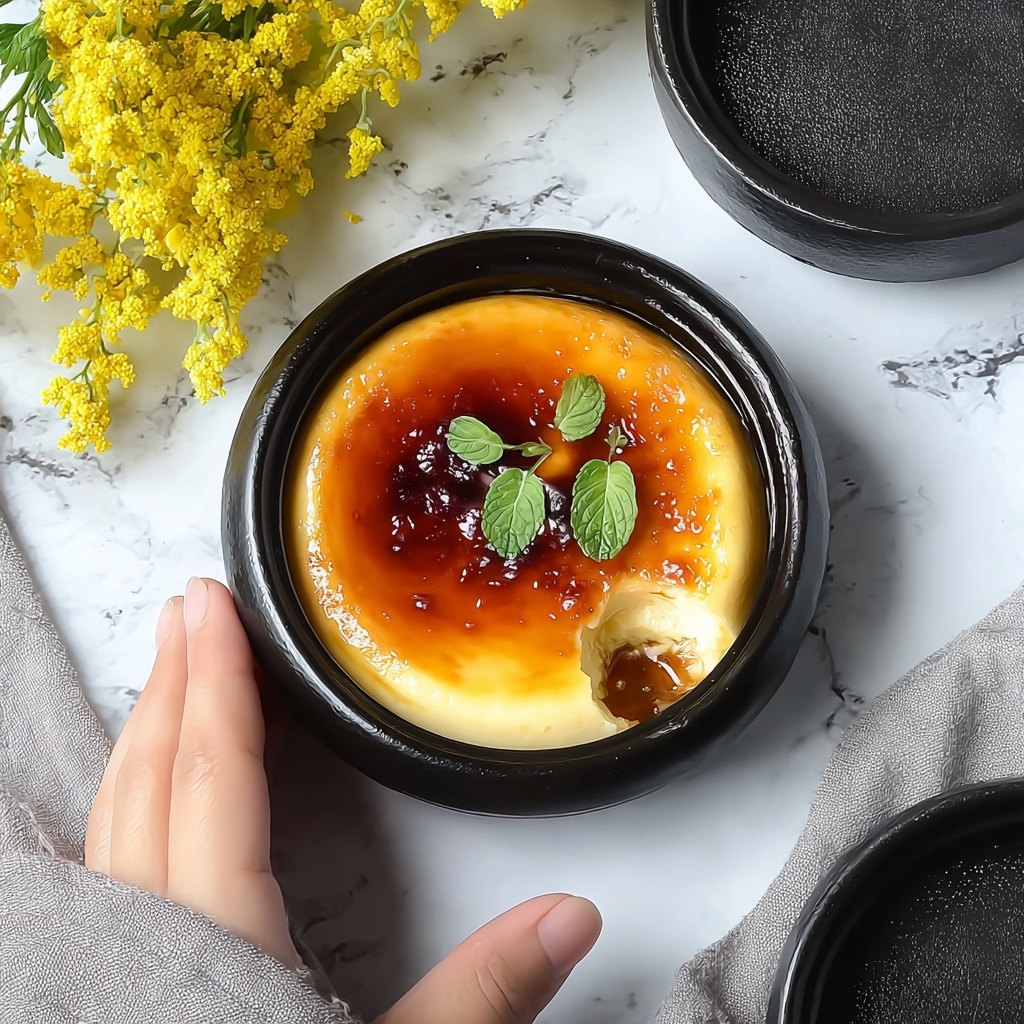
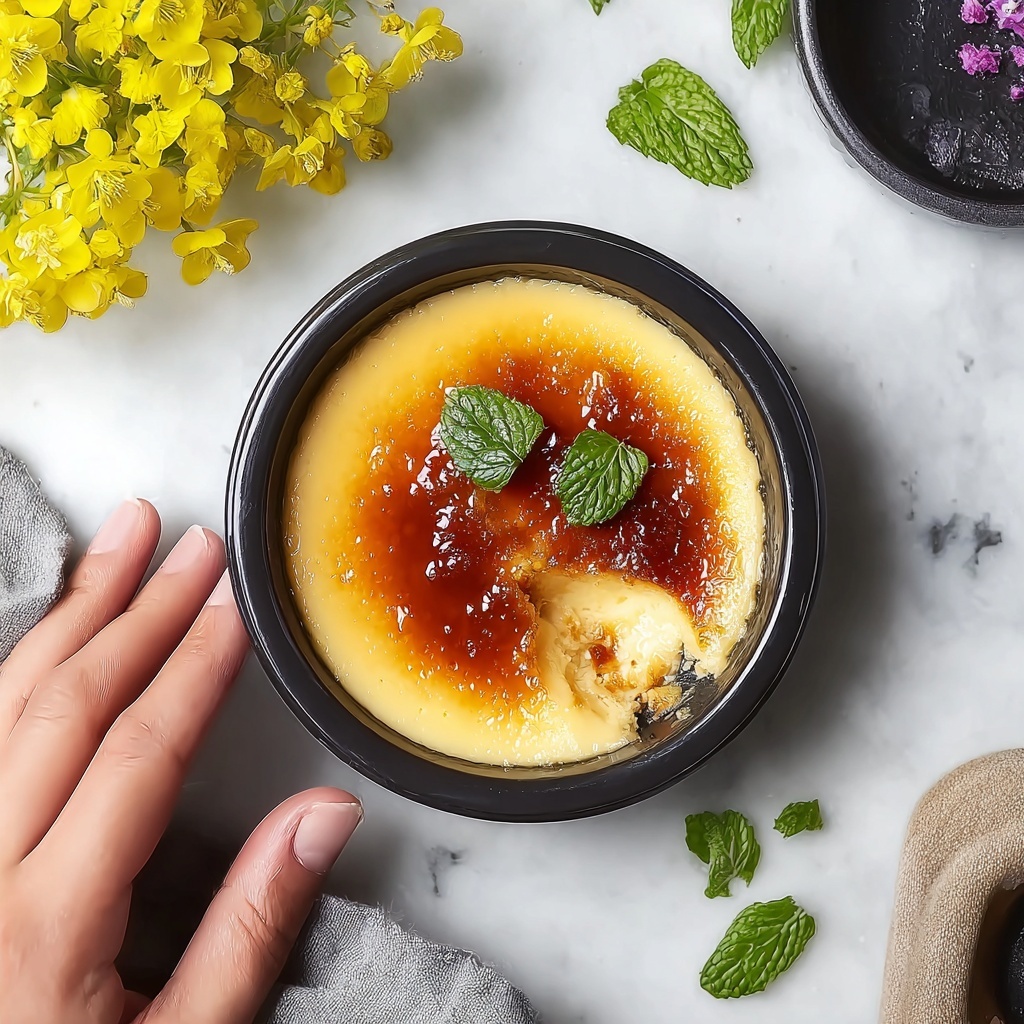
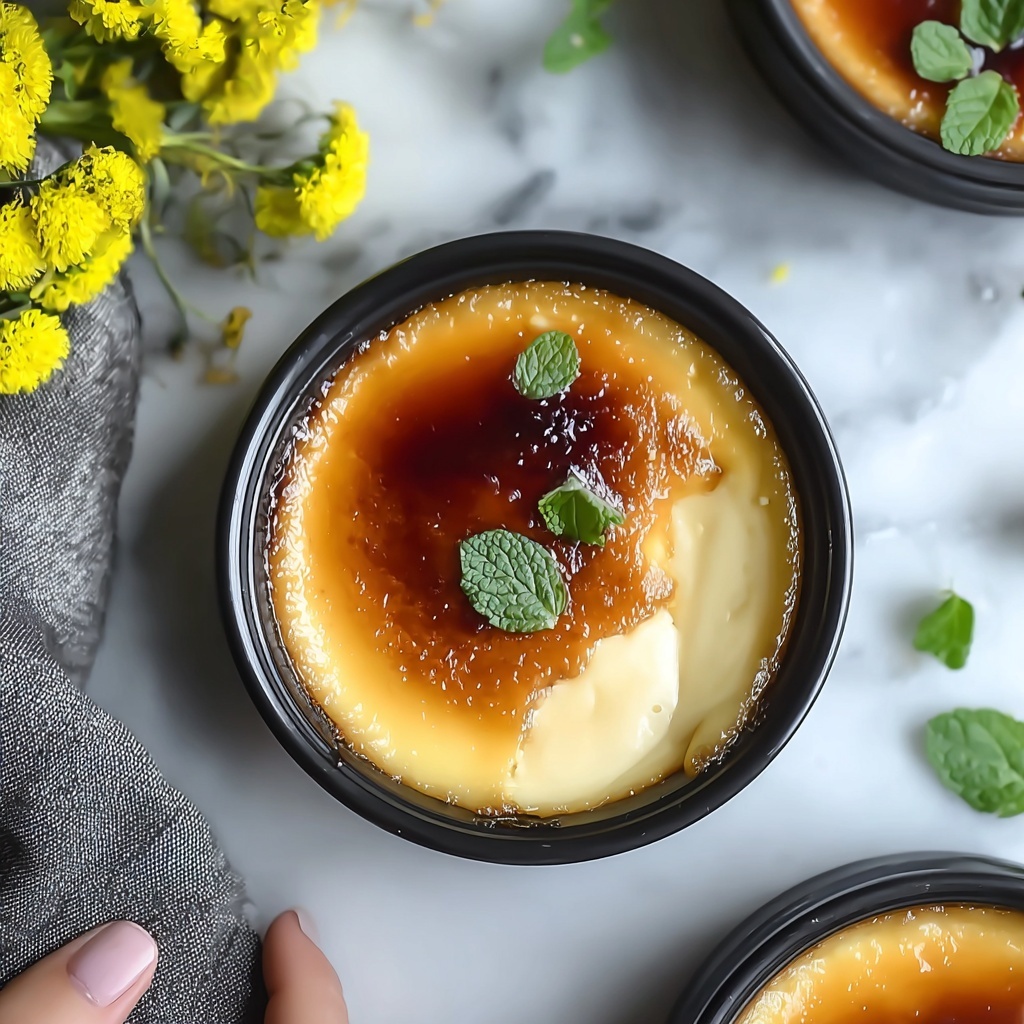
If you have ever dreamed of indulging in a luxuriously creamy, perfectly caramelized dessert, this Dreams Creme Brulee Recipe is about to become your new favorite. Rich, silky custard infused with fragrant vanilla, topped with a satisfyingly crisp caramelized sugar crust, this classic treat combines simple ingredients to create a truly unforgettable experience. Whether you’re a seasoned chef or a kitchen novice, making this dreamy dessert at home is easier than you think.
Ingredients You’ll Need
All the magic of this Dreams Creme Brulee Recipe comes down to a handful of high-quality ingredients that each play a starring role in flavor, texture, and that unforgettable golden finish.
- Heavy cream: This provides the creamy, luscious base for the custard, giving it that indulgent mouthfeel.
- Vanilla bean: Splitting and scraping this adds a natural, aromatic vanilla essence that transforms the custard.
- Large egg yolks: Rich in fat and protein, yolks set the custard perfectly without curdling.
- Granulated sugar: Used in the custard to sweeten lightly and balance richness.
- Light brown sugar: Perfect for that caramelized crunchy top, offering a subtle molasses note.
- Salt: Just a pinch to enhance all the flavors and add depth.
How to Make Dreams Creme Brulee Recipe
Step 1: Preheat and Prepare
Start by heating your oven to 325°F (163°C). This temperature is ideal for gently cooking the custard to tender perfection without cracking or curdling.
Step 2: Infuse the Cream
Pour the heavy cream into a medium saucepan, then split your vanilla bean lengthwise and scrape out the tiny, fragrant seeds. Add both the seeds and pod to the cream. Bringing this mixture to a simmer extracts every bit of vanilla flavor that makes the custard sing.
Step 3: Steep for Full Flavor
Once the cream simmers, remove it from heat and let the vanilla steep for at least 10 minutes. This slow infusing step ensures a deep, rich aroma without bitterness.
Step 4: Whisk the Egg Mixture
While the cream cools slightly, combine the egg yolks, granulated sugar, brown sugar, and salt in a bowl. Whisk until smooth and slightly pale, which helps create that velvety texture in your finished custard.
Step 5: Combine with Hot Cream
Remove the vanilla pod from the cream, then slowly pour the warm cream into the egg mixture, whisking constantly. This gradual blending prevents scrambling and results in a silky custard base.
Step 6: Strain and Fill Ramekins
Straining the custard through a fine sieve removes any tiny bits of cooked egg or vanilla pod, guaranteeing an ultra-smooth texture. Pour the custard evenly into ramekins, filling them almost to the brim for that perfect portion size.
Step 7: Prepare the Water Bath
Place the ramekins inside a large baking dish, then pour hot water into the dish until it reaches halfway up the ramekins. This water bath gently conducts heat, cooking the custard evenly and preventing cracking.
Step 8: Bake to Custard Perfection
Bake for 40 to 45 minutes. You want the custards set around the edges but with a slight jiggle in the center—this tells you they are creamy inside and perfectly cooked.
Step 9: Cool and Chill
Remove the ramekins from the water bath and let them cool to room temperature. Then refrigerate for at least two hours or overnight. This cooling step lets the custard fully set and develop even more richness.
Step 10: Caramelize the Sugar Topping
Just before serving, sprinkle a light, even layer of light brown sugar on the custard tops. Use a kitchen torch to melt and caramelize the sugar, creating a thin, delightfully crisp crust. Watch as it bubbles and browns, adding a dramatic finishing touch.
How to Serve Dreams Creme Brulee Recipe
Garnishes
A few fresh berries, a sprig of mint, or a dusting of powdered sugar can elevate your Dreams Creme Brulee Recipe presentation. These simple touches add bursts of freshness and visual appeal without overpowering the rich custard.
Side Dishes
Pair your creme brulee with light accompaniments like fresh fruit salad, a crisp cookie, or even a cup of espresso. These balance the sweetness and enhance the creamy dessert experience.
Creative Ways to Present
Consider serving your creme brulee in colorful ramekins or elegant glass cups to make it extra special. You might also try layering small portions with crushed biscotti or flavored whipped cream for a playful twist on the classic.
Make Ahead and Storage
Storing Leftovers
Once baked and cooled, your Dreams Creme Brulee Recipe custards keep well covered in the refrigerator for up to three days. Keep the caramelized sugar crust separate to retain its crunch by caramelizing just before serving.
Freezing
Freezing is not ideal for creme brulee because the custard texture can become grainy upon thawing, and the caramelized topping loses its crispness. For best results, enjoy this dessert fresh or properly chilled in the fridge.
Reheating
If your custard loses its crisp caramel top, simply sprinkle a bit more sugar and torch it again briefly. Avoid reheating the custard itself, as gentle chilling preserves the perfect creamy texture.
FAQs
Can I use vanilla extract instead of a vanilla bean?
Yes, if you don’t have a vanilla bean on hand, a teaspoon of high-quality vanilla extract works well. The bean offers a more intense and natural flavor, but extract is a convenient substitute.
What if my custard cracks during baking?
Cracking often happens if the oven temperature is too high or the water bath doesn’t provide even heat. Make sure to maintain the oven at 325°F and have enough water surrounding the ramekins for gentle cooking.
How do I know when the creme brulee is done?
The custard should be mostly set with just a slight wobble in the center when you gently shake the ramekin. It will continue to firm up as it cools and chills.
Can I prepare this dessert ahead of time?
Absolutely! One of the beauties of this Dreams Creme Brulee Recipe is that you can make it a day or two in advance, chill it overnight, and caramelize the sugar top just before serving.
What’s the best way to caramelize the sugar on top?
A kitchen torch is the best tool for caramelizing because it gives you control and creates a perfectly even, crisp crust without heating the custard underneath.
Final Thoughts
There is something truly special about making and savoring your own Dreams Creme Brulee Recipe. This timeless dessert offers a sensational blend of creamy custard and crackling sugar topping that everyone will adore. I truly hope you enjoy making it as much as I do sharing it with you—your kitchen is about to become a little sweeter and a lot more magical.
Print
Dreams Creme Brulee Recipe
- Prep Time: 0h 15m
- Cook Time: 0h 45m
- Total Time: 3h 0m
- Yield: 4 to 6 servings
- Category: Dessert
- Method: Baking
- Cuisine: French
- Diet: Vegetarian
Description
This classic Crème Brûlée recipe features a silky smooth vanilla custard base topped with a perfectly caramelized sugar crust. Infused with real vanilla bean, this elegant dessert is baked in a water bath for a creamy texture and finished with a crisp, golden sugar topping created using a kitchen torch. Ideal for special occasions or an indulgent treat, it combines rich flavors with a delightful contrast of textures.
Ingredients
Custard
- 2 cups heavy cream
- 1 vanilla bean
- 5 large egg yolks
- 1/2 cup granulated sugar
- 1/4 teaspoon salt
Topping
- 1/4 cup light brown sugar
Instructions
- Preheat Oven: Preheat your oven to 325°F (163°C) to prepare for baking the custards in a water bath.
- Prepare Cream and Vanilla: In a medium saucepan, add the heavy cream and the split vanilla bean (both the seeds and the pod) to infuse the cream with vanilla flavor.
- Heat Cream: Place the saucepan over medium heat and bring the cream mixture to a simmer, stirring occasionally to combine the flavors.
- Steep Vanilla: Once simmering, remove the cream from heat and let it steep with the vanilla bean pod for 10 minutes to enhance the vanilla taste.
- Mix Egg Yolks and Sugar: In a mixing bowl, whisk together the egg yolks, granulated sugar, brown sugar, and salt until the mixture is smooth and slightly pale.
- Combine Cream and Eggs: Remove the vanilla pod from the cream, then gradually whisk the hot cream into the egg yolk mixture to temper the eggs and avoid curdling.
- Strain Custard: Strain the custard mixture through a fine-mesh sieve into a clean bowl to remove any solids for a smooth texture.
- Fill Ramekins: Pour the custard into 4 to 6 ramekins, filling them nearly to the top for even cooking.
- Prepare Water Bath: Place the ramekins in a deep baking dish and add hot water halfway up the sides of the ramekins to create a gentle cooking environment.
- Bake Custards: Bake in the preheated oven for 40 to 45 minutes until the custards are set but still slightly jiggly in the center.
- Cool Custards: Remove the ramekins from the water bath and allow them to come to room temperature.
- Refrigerate: Chill the custards in the refrigerator for at least 2 hours or overnight to fully set the custard.
- Add Sugar Topping: Before serving, sprinkle a thin, even layer of light brown sugar on top of each custard.
- Caramelize Sugar: Using a kitchen torch, carefully melt and caramelize the sugar by moving the flame in small circles about 2 inches above the surface until golden and crisp.
- Serve: Let the crème brûlée cool for a few minutes to harden the sugar crust, then serve and enjoy.
Notes
- Make sure to temper the eggs by gradually adding hot cream to prevent curdling and ensure a smooth custard.
- The water bath helps the custards cook gently and evenly, preventing cracking and overcooking.
- If you don’t have a kitchen torch, you can broil the sugar topping for a minute or two, watching closely to prevent burning.
- The custards can be made a day ahead and refrigerated until ready to serve, making this recipe perfect for entertaining.


