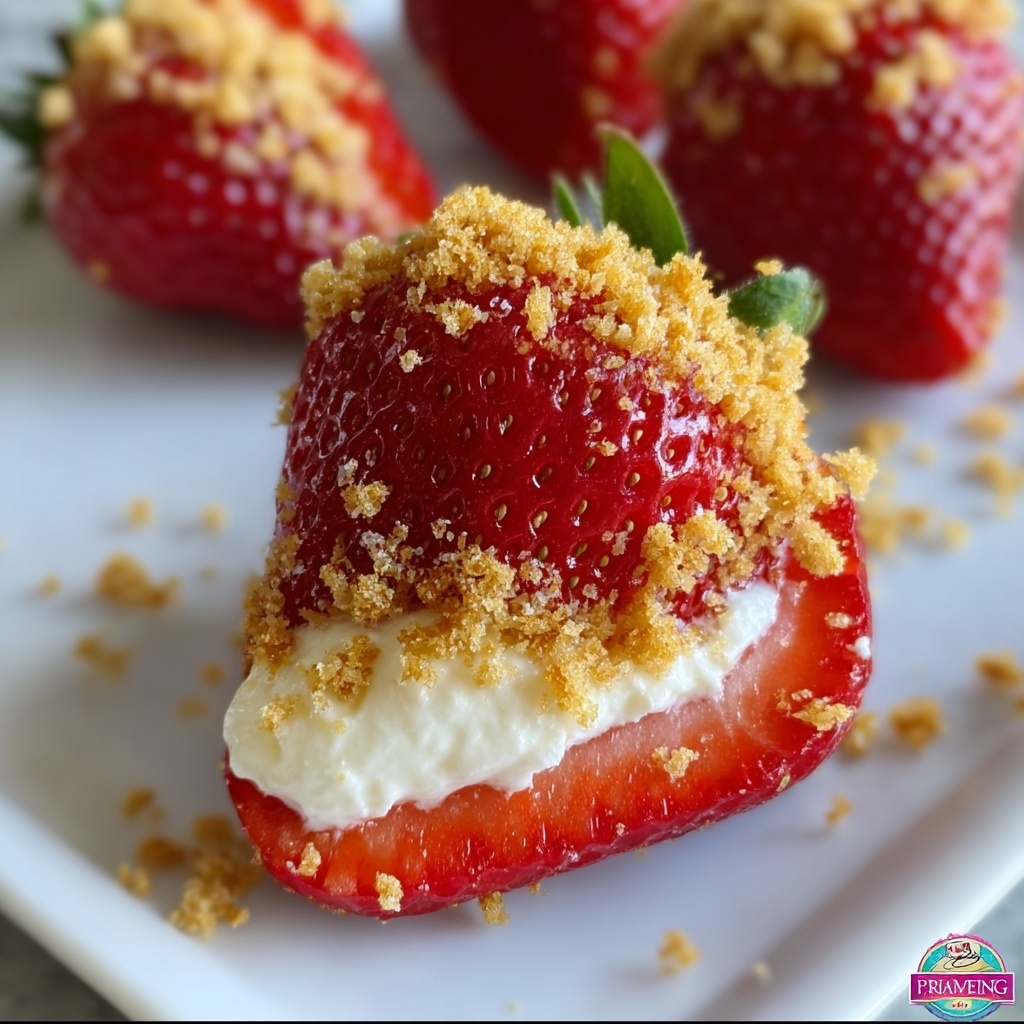
If you are looking for a fun, fresh, and utterly delightful treat, this Deviled Strawberries with Cheesecake Filling Recipe has got you covered. Imagine juicy, vibrant strawberries transformed into little edible works of art, each filled with a luscious, creamy cheesecake filling that’s sweet with a hint of tang. These bite-sized gems are not only easy to make but also make an impressive addition to any party spread or a fancy snack to treat yourself. With every forkful, you’ll enjoy the perfect balance of fresh fruit, rich cream cheese, and a hint of citrusy brightness that makes this recipe absolutely irresistible.
Ingredients You’ll Need
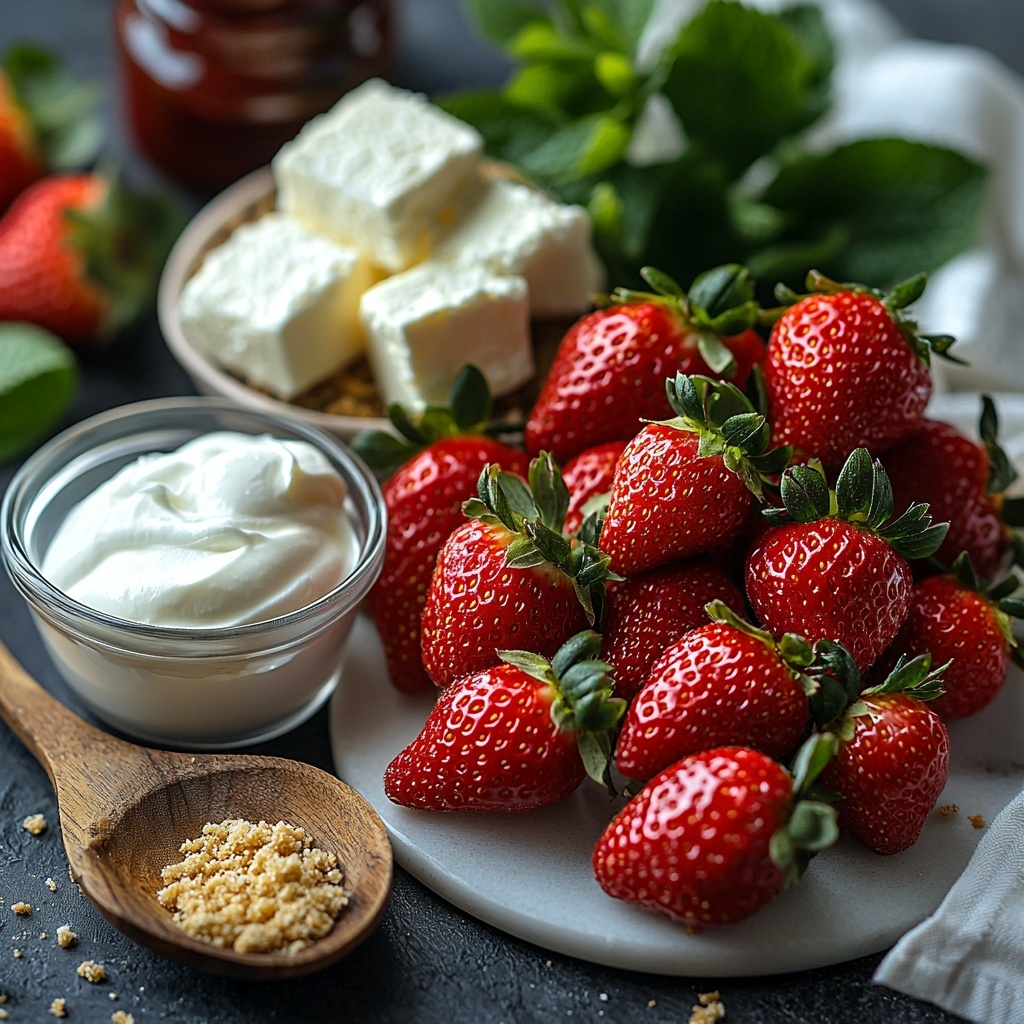
To whip up these delightful deviled strawberries, you’ll be using simple ingredients that combine to create a masterpiece of flavor and texture. Each component has a role, from the freshness of the strawberries to the silky smoothness of the cheesecake filling, and the subtle crunch of graham cracker crumbs for that perfect finish.
- 18-24 large strawberries: Choose firm, ripe strawberries for the best juicy texture and vibrant color.
- 1 cup heavy whipping cream: Whipping this to stiff peaks creates that airy, fluffy texture that balances the richness of the cream cheese filling.
- 1 (8 oz) package cream cheese (softened): This is the star of the cheesecake filling, providing creaminess and tang.
- 1/3 cup sour cream: Adds a lovely tang and extra smoothness to the filling.
- 2/3 cup white granulated sugar: Sweetens the filling just enough without overpowering the fruit’s natural sweetness.
- 1 tsp vanilla extract: Gives a warm, fragrant note that elevates the whole dessert.
- 1 tbsp fresh lemon juice (optional): Brightens the flavor and adds a touch of freshness to cut through the rich filling.
- 1/2 cup graham cracker crumbs: Sprinkled on top, these add a subtle crunch and a hint of buttery goodness.
How to Make Deviled Strawberries with Cheesecake Filling Recipe
Step 1: Prepare the Strawberries
Start by carefully removing the stems from the strawberries and slicing each berry in half. Using a melon baller or a small spoon, gently hollow out each half to create a little cavity perfect for stuffing with our cheesecake filling. This step might take a bit of patience, but it’s worth it for the perfect bite.
Step 2: Whip the Heavy Cream
In a clean bowl, use an electric mixer to whip the heavy cream until it forms stiff peaks. This whipped cream will lighten the dense cream cheese mixture, making the filling airy and luscious. Be sure not to overbeat so it stays smooth and fluffy.
Step 3: Blend the Filling Ingredients
In a separate bowl, combine the softened cream cheese, sour cream, sugar, vanilla extract, and optional lemon juice. Beat these together until the mixture is silky smooth with no lumps, creating that classic cheesecake flavor base you’ll love.
Step 4: Fold in the Whipped Cream
Gently fold the whipped cream into the cream cheese mixture. This step is crucial to keep the filling light and fluffy. Use a spatula and fold carefully to maintain as much air as possible.
Step 5: Fill the Strawberries and Garnish
Transfer your cheesecake filling into a piping bag or use a small spoon to fill each hollowed strawberry half generously. Once filled, sprinkle the tops with the graham cracker crumbs to add a little crunch and that hint of sweetness, emulating the classic cheesecake crust.
Step 6: Chill and Serve
Place your filled strawberries in the refrigerator for at least 30 minutes before serving. Chilling allows the flavors to meld wonderfully and the filling to set just right, ensuring every bite is refreshing and indulgent.
How to Serve Deviled Strawberries with Cheesecake Filling Recipe
Garnishes
While the graham cracker crumbs add a simple crunch, you can also get creative by adding a drizzle of melted chocolate, fresh mint leaves, or a few tiny berries on top. These garnishes not only elevate the presentation but introduce new flavor layers that complement the creamy filling beautifully.
Side Dishes
These deviled strawberries shine on their own but also pair wonderfully with light, fresh accompaniments. Consider serving them alongside a crisp green salad, a bowl of mixed berries, or even a scoop of vanilla ice cream for a fun dessert platter that’s perfectly balanced in flavor and texture.
Creative Ways to Present
For parties or special occasions, arrange your Deviled Strawberries with Cheesecake Filling Recipe on a decorative platter lined with fresh greens or edible flowers. You can also serve them in individual mini cupcake liners or on small dessert spoons for an elegant, bite-sized presentation that guests will adore.
Make Ahead and Storage
Storing Leftovers
If you have any leftovers (which might be hard to resist), store them in an airtight container in the refrigerator. They will keep well for up to 2 days, maintaining their fresh, creamy texture without the strawberries getting soggy.
Freezing
Freezing deviled strawberries is not recommended as the texture of the fresh strawberries and creamy filling will be compromised once thawed. For best results, enjoy these treats fresh within a couple of days.
Reheating
This dessert is best served cold, so reheating isn’t necessary. If the filling softens too much after sitting out, just pop the strawberries back into the fridge briefly to firm up again before serving.
FAQs
Can I use frozen strawberries for this recipe?
Fresh strawberries are best for this recipe because they hold their shape and texture well. Frozen strawberries tend to release water when thawed, which can make the filling soggy.
Is it possible to make the cheesecake filling dairy-free?
It is possible by substituting cream cheese and sour cream with dairy-free versions and using a coconut-based whipping cream alternative, though it might alter the traditional flavor and texture slightly.
Can I prepare the cheesecake filling in advance?
Yes, you can prepare the filling a day ahead and keep it chilled in the refrigerator. Just fold in the whipped cream right before filling the strawberries for the best texture.
How do I prevent the strawberries from leaking juice?
Choose firm strawberries and hollow them out gently. Chilling the strawberries after filling helps keep them firm and reduces leaking.
Can I use other fruits instead of strawberries?
Absolutely! Small hollow fruits like raspberries or halved grapes can be great alternatives, though the texture and flavor will vary from the classic strawberry experience.
Final Thoughts
This Deviled Strawberries with Cheesecake Filling Recipe is a deliciously unique way to enjoy strawberries that’s perfect for any occasion. Whether you’re looking to impress guests or treat yourself to a sweet, creamy bite, these little beauties deliver on freshness, flavor, and fun. Grab your ingredients and give this recipe a go — I promise these deviled strawberries will become a new favorite in your dessert lineup!
Print
Deviled Strawberries with Cheesecake Filling Recipe
- Prep Time: 15 minutes
- Cook Time: 0 minutes
- Total Time: 15 minutes plus chilling time (about 30 minutes)
- Yield: 24 servings
- Category: Dessert
- Method: No-Cook
- Cuisine: American
- Diet: Vegetarian
Description
Delightfully sweet and creamy Deviled Strawberries made with a luscious cheesecake filling. Fresh strawberries are hollowed and filled with a smooth mixture of cream cheese, whipped cream, sour cream, and vanilla, topped with crunchy graham cracker crumbs. This easy no-bake dessert is perfect for parties, gatherings, or a light indulgence.
Ingredients
Strawberries
- 18–24 large strawberries
Cheesecake Filling
- 1 cup heavy whipping cream
- 1 (8 oz) package cream cheese, softened
- 1/3 cup sour cream
- 2/3 cup white granulated sugar
- 1 tsp vanilla extract
- 1 tbsp fresh lemon juice (optional)
Topping
- 1/2 cup graham cracker crumbs
Instructions
- Prepare the Strawberries: Cut off the stems of the 18-24 large strawberries and slice each strawberry in half. Using a melon baller or small spoon, carefully hollow out the center of each strawberry half to create a cavity for the filling.
- Whip the Cream: In a mixing bowl, whip 1 cup of heavy whipping cream using a hand mixer or stand mixer until stiff peaks form. This will provide a light and fluffy texture to the cheesecake filling.
- Make the Cheesecake Mixture: In a separate bowl, blend together 8 ounces of softened cream cheese, 1/3 cup sour cream, 2/3 cup sugar, 1 teaspoon vanilla extract, and 1 tablespoon fresh lemon juice (optional) until smooth and creamy with no lumps.
- Combine Whipped Cream and Cheesecake Mixture: Gently fold the whipped cream into the cream cheese mixture using a spatula, mixing carefully to keep the filling light and airy without deflating the whipped cream.
- Fill the Strawberries: Use a piping bag or small spoon to fill each hollowed-out strawberry half with the cheesecake filling, making sure each cavity is generously stuffed but not overflowing.
- Add the Topping: Sprinkle ½ cup of graham cracker crumbs over the filled strawberries for a crunchy texture contrast and extra flavor.
- Chill and Serve: Place the filled strawberries in the refrigerator and chill for at least 30 minutes before serving. Chilling allows the flavors to meld and the filling to firm up for the best taste and presentation.
Notes
- Use fresh, ripe strawberries for the best flavor and texture.
- The lemon juice is optional but adds a subtle tanginess to balance the sweetness.
- To make piping easier, chill the filling before filling the strawberries if it seems too soft.
- These are best served the same day they are made but can be stored in the refrigerator for up to 24 hours.
- For a gluten-free option, substitute graham cracker crumbs with gluten-free crumbs or toasted nuts.


