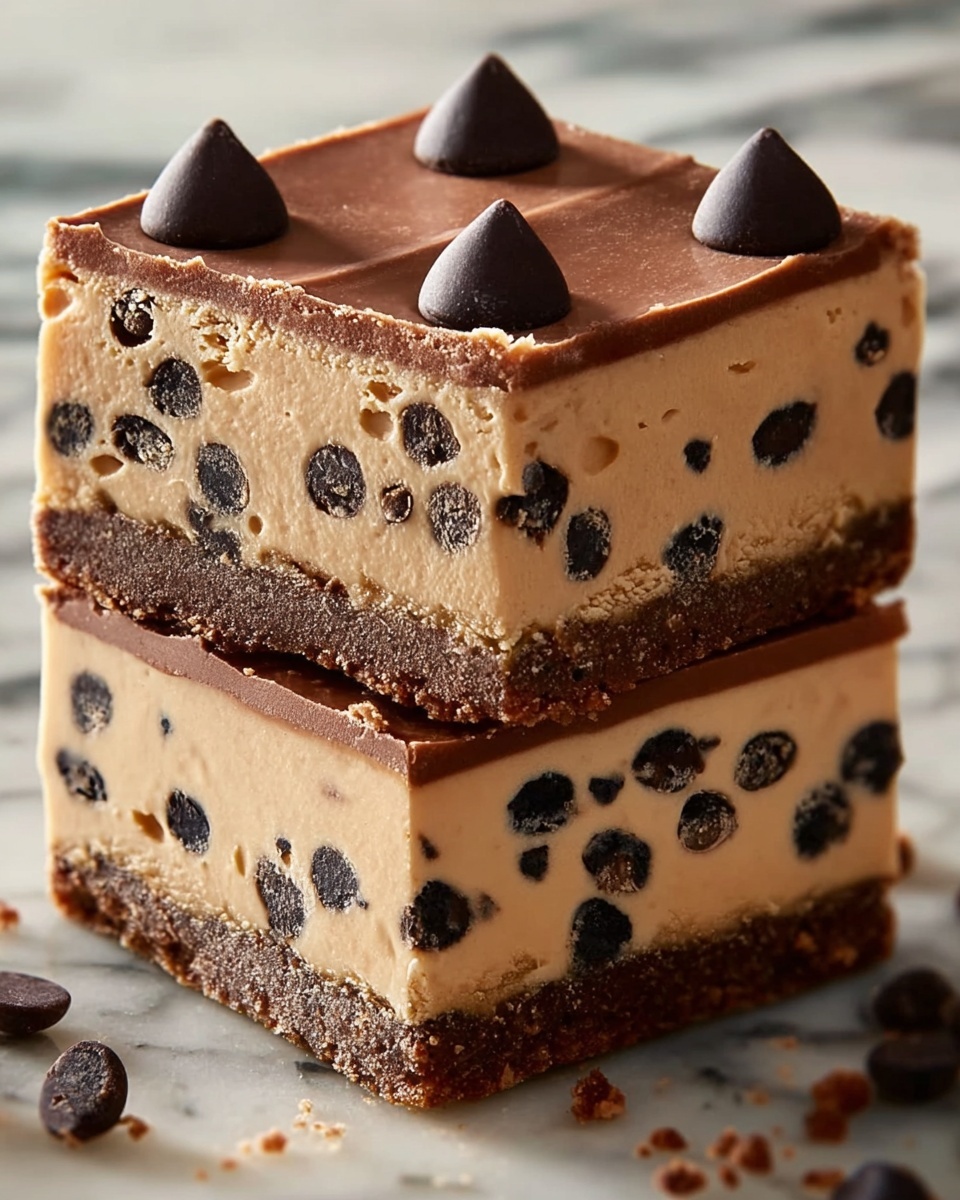
There is something absolutely irresistible about a treat that lets you enjoy the nostalgic taste of raw cookie dough without any worries. This Chocolate Chip Cookie Dough Bars Recipe marries that beloved childhood indulgence with the satisfyingly rich flavor of dark chocolate, creating a dessert that’s as playful as it is decadent. Soft, buttery, and studded with mini chocolate chips inside a luscious chocolate coating, these bars are perfect for sharing or savoring all to yourself on a cozy afternoon.
Ingredients You’ll Need
The beauty of this recipe lies in its simplicity, with everyday ingredients that come together to build layers of flavor and texture. Each one plays a crucial role: from the heat-treated flour that ensures safety, to the brown sugar adding depth, and the velvety dark chocolate coating bringing it all home.
- 1 cup all-purpose flour (heat-treated): This step ensures the flour is safe to eat while keeping the dough tender.
- 1/2 cup unsalted butter (softened): Adds rich, creamy texture and flavor.
- 1/3 cup brown sugar: Provides a deep caramel-like sweetness and moistness.
- 1/4 cup granulated sugar: Balances sweetness with a light crunch.
- 2 tablespoons milk: Helps bind ingredients for a smooth dough.
- 1/2 teaspoon vanilla extract: Infuses warmth and enhances all flavors.
- 1/2 teaspoon salt: Elevates sweetness and rounds out the flavor profile.
- 1 cup mini chocolate chips: The little bursts of chocolate that make every bite exciting.
- 200 g dark chocolate (for coating): Adds a glossy, bittersweet shell, balancing the sweet dough inside.
How to Make Chocolate Chip Cookie Dough Bars Recipe
Step 1: Make the Flour Safe
First things first, preheat your oven to 350°F (175°C). Spread the flour evenly on a baking sheet and bake it for 5 minutes. This heat-treatment step is essential because it makes the flour safe to consume raw, so you can enjoy that classic cookie dough experience worry-free. Let it cool completely before using it in the dough.
Step 2: Cream the Butters and Sugars
In a mixing bowl, get to work creaming the softened unsalted butter with both the brown and granulated sugars. This step is where the magic starts, as beating them together creates a light, fluffy base that will give your bars their melt-in-your-mouth texture.
Step 3: Add the Liquids and Flavor
Now stir in the milk, vanilla extract, and salt. These ingredients help unite the dough and heighten the flavors, giving the bars that familiar and comforting cookie dough taste you crave.
Step 4: Combine with Flour and Mini Chocolate Chips
Slowly add the cooled, heat-treated flour to the mixture. Gently fold everything together until your dough is smooth and perfectly combined. Don’t forget to fold in the mini chocolate chips last; these little gems bring delightful chocolate pops throughout your bars.
Step 5: Shape and Chill the Dough
Line a loaf pan with parchment paper, then press your cookie dough evenly into the pan. Pop the pan into the refrigerator for about 30 minutes to let the dough firm up. This step makes it easier to cut your bars later and helps maintain their shape when coated in chocolate.
Step 6: Melt the Dark Chocolate
While the dough chills, melt your dark chocolate gently in the microwave or over a double boiler, stirring until smooth. This luscious chocolate will be the perfect shell for your cookie dough bars, adding elegance and rich flavor.
Step 7: Cut and Coat the Bars
After chilling, lift the cookie dough out of the pan using the parchment paper, then cut it into bars. Dip each bar into the melted dark chocolate, ensuring every bite gets a silky chocolate coat. Place the coated bars on a tray lined with parchment paper for easy cleanup.
Step 8: Add Extra Chocolate Chips (Optional)
If you love chocolate as much as I do, sprinkle a bit of extra mini chocolate chips on top before the chocolate sets. It makes them look extra fancy and adds even more chocolatey goodness.
Step 9: Chill and Set
Finally, chill the bars in the refrigerator for about 20 minutes. This step solidifies the chocolate coating, letting your bars set beautifully so they’re ready to be enjoyed. Once firm, they’re perfect for slicing, serving, and going back for seconds.
How to Serve Chocolate Chip Cookie Dough Bars Recipe
Garnishes
While these bars are divine on their own, a light dusting of flaky sea salt or a few colorful sprinkles can add an eye-catching finish and a surprise flavor twist. Fresh mint leaves or a drizzle of caramel sauce also make beautiful and tasty garnishes.
Side Dishes
Pair these bars with a glass of cold milk or a scoop of vanilla ice cream for a classic dessert combo. For a grown-up twist, serve alongside a cup of rich coffee or a warm chai latte to balance the sweetness.
Creative Ways to Present
For parties, arrange your bars on a pretty platter with fresh berries and edible flowers to impress your guests. Wrapping individual bars in wax paper tied with twine makes a charming edible gift or party favor.
Make Ahead and Storage
Storing Leftovers
These bars keep beautifully in an airtight container in the refrigerator for up to a week. Keeping them chilled preserves the chocolate coating’s shine and the chewy cookie dough texture inside.
Freezing
If you want to make a batch ahead, you can freeze the bars after they’ve been coated and chilled. Wrap each bar individually in plastic wrap and place them in a freezer-safe container. They will keep for up to 2 months. Thaw in the refrigerator before enjoying for best taste and texture.
Reheating
Because these bars are meant to be enjoyed cold or at room temperature, reheating is not necessary. However, if you like your chocolate a bit melty, simply let the bar sit at room temperature for 10 minutes before eating.
FAQs
Can I use raw flour in this recipe?
Eating raw flour can be unsafe due to bacteria, so this recipe includes heat-treating the flour to make it safe for raw consumption while maintaining that cookie dough texture.
Why do I need to chill the dough before coating?
Chilling firms up the dough so it’s easier to handle and cut into clean bars. It also helps maintain their shape when you dip them into the melted chocolate coating.
What kind of chocolate is best for coating?
Dark chocolate works perfectly because its slight bitterness balances the sweet cookie dough. You can also use semi-sweet or even milk chocolate depending on your preference.
Can I make these bars dairy-free?
Yes! Substitute the butter with a plant-based alternative and use a non-dairy milk. Make sure your chocolate coating is dairy-free as well.
How long do these bars last?
Stored properly in the fridge, these cookie dough bars stay fresh for about one week. They also freeze well for longer storage.
Final Thoughts
I hope you feel just as excited as I do to make this Chocolate Chip Cookie Dough Bars Recipe your new favorite treat. It’s such a joy to have that safe, raw cookie dough feeling combined with the richness of dark chocolate all in one bite. Whether for special occasions or whenever a sweet craving strikes, these bars never fail to delight. Give them a try and see how quickly they disappear!
Print
Chocolate Chip Cookie Dough Bars Recipe
- Prep Time: 20 minutes
- Cook Time: 5 minutes
- Total Time: 55 minutes
- Yield: 8 to 10 bars
- Category: Dessert
- Method: Baking
- Cuisine: American
Description
These Chocolate Chip Cookie Dough Bars are a decadent treat featuring safe-to-eat cookie dough coated in rich dark chocolate. Perfectly chewy and loaded with mini chocolate chips, they require no baking beyond heat-treating the flour and offer an indulgent, easy-to-make dessert with a creamy chocolate coating.
Ingredients
For the Cookie Dough
- 1 cup all-purpose flour (heat-treated for safety)
- 1/2 cup unsalted butter (softened)
- 1/3 cup brown sugar
- 1/4 cup granulated sugar
- 2 tablespoons milk
- 1/2 teaspoon vanilla extract
- 1/2 teaspoon salt
- 1 cup mini chocolate chips
For the Chocolate Coating
- 200 g dark chocolate (for coating)
Instructions
- Heat-Treat the Flour: Preheat the oven to 350°F (175°C). Spread the flour evenly on a baking sheet and bake for 5 minutes to eliminate any bacteria and make it safe for raw consumption. Allow the flour to cool completely before use.
- Cream Butter and Sugars: In a mixing bowl, beat the softened butter, brown sugar, and granulated sugar together until the mixture is smooth and fluffy. This step ensures a creamy and light dough texture.
- Add Liquids and Salt: Mix in the milk, vanilla extract, and salt thoroughly until well incorporated. These ingredients add moisture and enhance the flavor of the cookie dough.
- Combine Flour and Chocolate Chips: Gradually add the cooled heat-treated flour to the mixture, stirring until the dough is smooth and uniform. Gently fold in the mini chocolate chips, distributing them evenly throughout the dough.
- Chill the Dough: Line a loaf pan with parchment paper and press the cookie dough evenly into the pan’s base. Place the pan in the refrigerator for 30 minutes to allow the dough to firm up, making it easier to cut and handle.
- Melt the Dark Chocolate: Melt the dark chocolate either in a microwave in short bursts, stirring frequently, or over a double boiler until smooth, to prepare for coating the bars.
- Cut and Coat the Bars: Remove the chilled cookie dough from the pan and cut it into 8 to 10 bars. Dip each bar into the melted chocolate, ensuring each is coated evenly. Place the coated bars on a parchment-lined tray.
- Optional Topping: Before the chocolate coating sets, sprinkle additional mini chocolate chips on top of the bars for extra texture and decoration.
- Final Chill: Place the chocolate-coated bars in the refrigerator for 20 minutes to allow the chocolate to fully harden. Serve chilled and enjoy this delicious treat!
Notes
- Heat-treating the flour is essential to make this cookie dough safe to eat raw.
- You can substitute milk with any plant-based milk for a dairy-free version, but it may slightly alter texture.
- Use high-quality dark chocolate for the coating to ensure smoothness and rich flavor.
- Store leftover bars in an airtight container in the refrigerator for up to 5 days.
- For variation, try adding chopped nuts or a pinch of cinnamon to the dough.
