
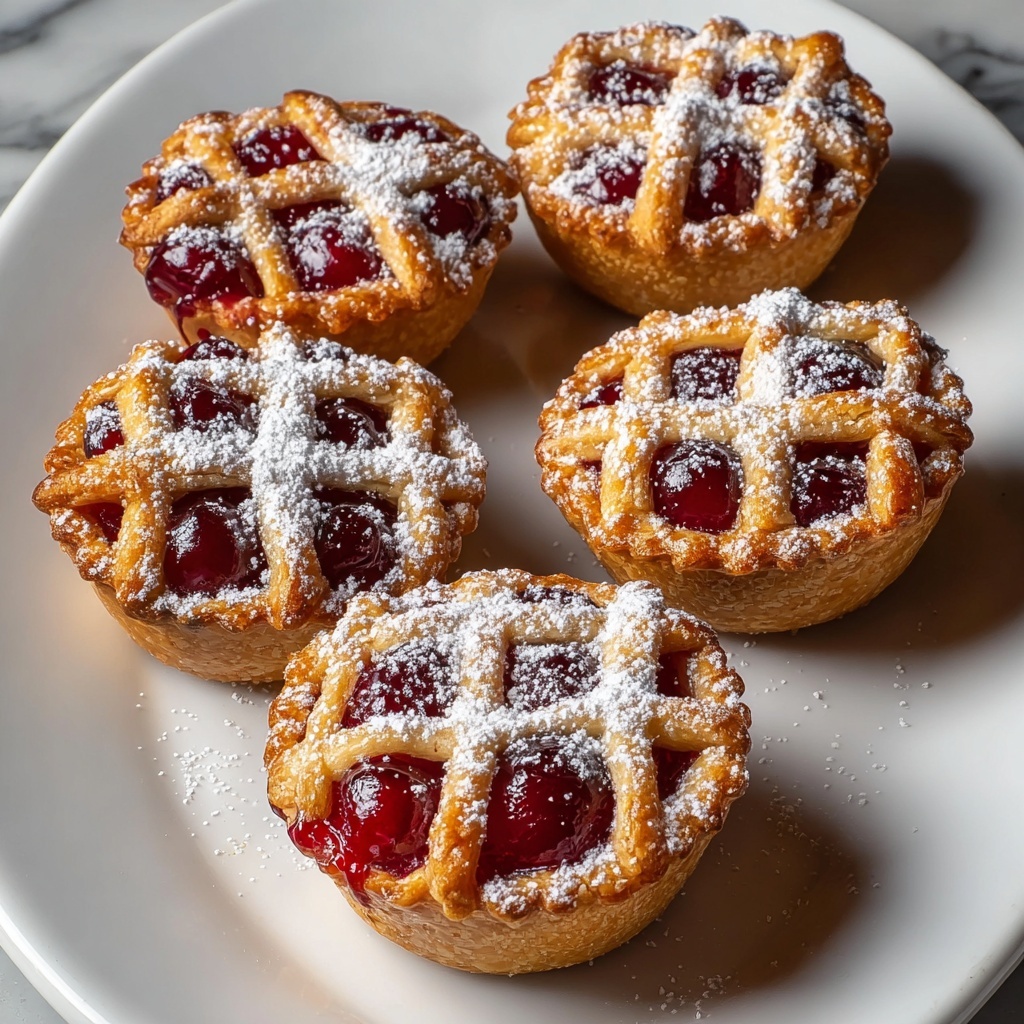
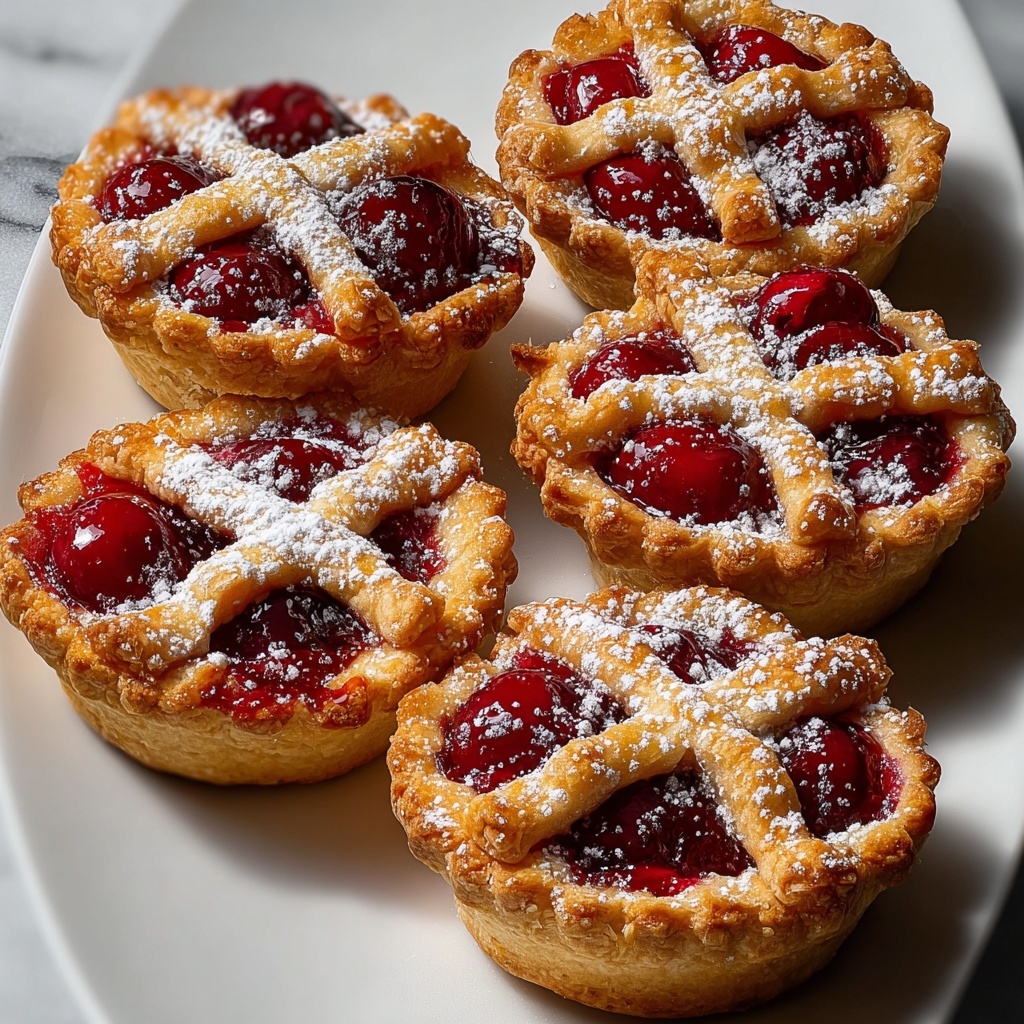
If you’re on the lookout for a delightful treat that’s bursting with sweet and tangy cherry flavor in every bite, this Cherry Pie Bites Recipe is your new best friend. These little pockets of joy bring all the comfort and nostalgia of a classic cherry pie but with the fun and convenience of a handheld snack. Perfect for parties, afternoon tea, or just whenever you want a quick dessert that impresses, these cherry pie bites combine flaky, buttery crusts with luscious cherry filling for a dessert that’s as charming as it is delicious.
Ingredients You’ll Need
The magic of this Cherry Pie Bites Recipe lies in its simplicity—just a few key ingredients come together to make something truly special. Every component plays a vital role, from the flaky pie crust that provides the perfect texture to the juicy cherry filling that delivers that burst of sweet and tart goodness.
- Refrigerated pie crusts: Using pre-made crusts saves time without sacrificing that buttery, flaky base essential to the bites.
- Cherry pie filling: This canned filling is perfectly sweetened and packed with whole cherries for an authentic pie experience.
- Egg: Combined with milk for the egg wash, it helps give the crusts a beautiful golden shine and a slight crispness.
- Milk: Simply enough to thin out the egg wash for even brushing and a golden finish.
- Granulated sugar (optional): Just a sprinkle on top adds a delicate crunch and enhances the sweetness.
How to Make Cherry Pie Bites Recipe
Step 1: Prepare Your Oven and Baking Sheet
Start by preheating your oven to 400°F (200°C) and lining a baking sheet with parchment paper. This step ensures your cherry pie bites bake evenly and don’t stick, making cleanup a breeze.
Step 2: Roll Out the Pie Crusts
Take the refrigerated pie crusts and gently roll them out on a lightly floured surface. This helps the crust become nice and supple, making it easier to cut and fold without tearing.
Step 3: Cut Circles for the Bites
Using a round cookie cutter about 3 inches in diameter, cut out circles from the rolled dough. Each crust should yield around 12 to 16 circles, giving you plenty of little bites to enjoy or share.
Step 4: Add Cherry Filling
Place a spoonful of cherry pie filling—about 3 to 4 cherries—right in the center of each dough circle. Be mindful not to overfill so the bites seal nicely and don’t leak while baking.
Step 5: Fold and Seal the Edges
Fold each circle over the filling to create a perfect semi-circle, then press the edges firmly with a fork. This not only seals the filling inside but also adds a charming crimped design to your bites.
Step 6: Brush with Egg Wash
Mix the egg and milk to make a smooth egg wash, then brush it on the tops of each pie bite. This egg wash is the secret behind that gorgeous golden-brown crust and a slightly glossy finish.
Step 7: Add Sugar for Crunch (Optional)
If you love a bit of extra sweetness and texture, sprinkle a little granulated sugar over the tops. It adds a delightful crunch that complements the soft crust and juicy filling beautifully.
Step 8: Vent the Pie Bites
Make a small slit on the top of each pie bite with a sharp knife. This little steam vent helps prevent sogginess and keeps the crust crisp while the cherries cook inside.
Step 9: Arrange and Bake
Space the prepared pie bites evenly on your parchment-lined baking sheet to ensure they bake evenly. Pop them into the preheated oven and bake for 12 to 15 minutes until they’re golden brown and irresistibly crisp.
Step 10: Cool and Enjoy
Once baked, allow the cherry pie bites to cool slightly. This resting time helps the filling set just enough to be perfectly gooey without being messy, making every bite a pure pleasure.
How to Serve Cherry Pie Bites Recipe
Garnishes
Serving your cherry pie bites with a light dusting of powdered sugar or a dollop of whipped cream can elevate the presentation and add extra layers of sweetness. Fresh mint leaves also make a wonderful edible garnish, giving a pop of color and a hint of freshness to balance the richness.
Side Dishes
These pie bites pair beautifully with a scoop of vanilla ice cream or a small cup of rich coffee or tea. Whether you’re after an indulgent dessert or a cozy afternoon snack, the temperature contrast between warm pies and cool ice cream brings an unbeatable experience.
Creative Ways to Present
Arrange your cherry pie bites on a rustic wooden board or a pretty tiered dessert stand to impress guests. For parties or gatherings, serve them alongside fresh berries or a small bowl of cherry sauce for dipping. They also make delightful additions to a dessert platter mixed with other mini pies or tarts.
Make Ahead and Storage
Storing Leftovers
If you have any cherry pie bites left, store them in an airtight container at room temperature for up to two days. This keeps the crust crisp and the filling fresh, though they’re usually too tempting to last that long!
Freezing
You can freeze the pie bites after baking and cooling by placing them in a single layer on a baking sheet until solid, then transferring to a freezer bag. Frozen cherry pie bites keep well for up to two months and are perfect for quick desserts on demand.
Reheating
To revive the flaky crust and warm the cherries, pop the pie bites in a preheated oven at 350°F (175°C) for about 8 minutes. Avoid microwaving when possible since it can make the crust soggy; reheating in the oven maintains that wonderful crisp texture.
FAQs
Can I use fresh cherries instead of canned filling?
Fresh cherries can be used, but you will need to prepare a filling by cooking them with sugar and cornstarch until thickened. The canned filling is convenient and provides a perfectly balanced sweet-tart flavor for this recipe.
What size cookie cutter is best for making the pie bites?
A 3-inch diameter cookie cutter works well to create bite-sized portions that are easy to handle and bake evenly. Larger cutters can work, but the bites may be less manageable as finger food.
Can I make these cherry pie bites vegan or gluten-free?
Yes! Use vegan pie crusts and substitute the egg wash with plant-based milk brushed on top. For gluten-free, opt for a gluten-free pie crust and ensure your cherry filling doesn’t contain gluten ingredients.
How do I prevent the pie bites from leaking during baking?
Be sure not to overfill each bite and press the edges firmly with a fork to seal. Also, venting the top with a small slit helps steam escape, preventing bursts and leaks.
Can I double or triple the recipe for a larger group?
Absolutely! This recipe scales easily. Just keep an eye on the baking time, as more bites on the sheet might require slight adjustments to ensure even cooking.
Final Thoughts
There’s something truly special about sharing warm, perfectly baked cherry pie bites with friends and family. This Cherry Pie Bites Recipe is not only a crowd-pleaser but also incredibly simple to make, with ingredients you probably already have on hand. Whether it’s a holiday dessert, a quick treat, or something to impress guests, these little pies deliver comfort, joy, and flavor in each bite. Give it a try—you might just find yourself making them over and over again!
Print
Cherry Pie Bites Recipe
- Prep Time: 0h 20m
- Cook Time: 0h 15m
- Total Time: 0h 35m
- Yield: 24-32 pie bites
- Category: Dessert
- Method: Baking
- Cuisine: American
Description
These Cherry Pie Bites are delightful mini treats featuring flaky pie crust filled with luscious cherry pie filling. Perfect for parties, snacks, or a sweet dessert, they bake up golden and crisp with a sweet sugary crunch on top.
Ingredients
Pie Bites
- 1 package refrigerated pie crusts (2 crusts per package)
- 1 can (21 ounces) cherry pie filling
Egg Wash
- 1 egg
- 1 tablespoon milk
Optional Topping
- 2 tablespoons granulated sugar
Instructions
- Preheat Oven: Preheat your oven to 400°F (200°C) and line a baking sheet with parchment paper to prevent sticking and ensure easy cleanup.
- Roll Out Dough: On a lightly floured surface, roll out the refrigerated pie crusts to smoothen and prepare for cutting.
- Cut Circles: Using a 3-inch round cookie cutter, cut out 12-16 circles from each crust, depending on dough thickness.
- Add Filling: Place about 3-4 cherries (a small spoonful) of cherry pie filling in the center of each dough circle, taking care not to overfill to avoid leakage.
- Fold and Seal: Fold each circle over the filling to form a semi-circle and press the edges firmly with a fork to seal and prevent the filling from spilling out during baking.
- Prepare Egg Wash: In a small bowl, beat the egg with 1 tablespoon of milk to create a glossy egg wash, then brush it evenly over the tops of each pie bite.
- Sprinkle Sugar: Optionally, sprinkle a pinch of granulated sugar on the top of each pie bite to add sweetness and a crunchy texture.
- Make Steam Slits: Carefully cut a small slit on the top of each pie bite with a sharp knife to allow steam to escape and avoid sogginess.
- Arrange Pie Bites: Place the prepared pie bites on the lined baking sheet, spacing them apart to allow even baking.
- Bake: Bake in the preheated oven for 12-15 minutes until the crust turns golden brown and crisp.
- Cool and Serve: Remove the pie bites from the oven and let them cool slightly before serving to enjoy their full flavor and texture.
Notes
- Use a lightly floured surface to prevent sticking when rolling dough.
- Do not overfill the pie bites to avoid bursting during baking.
- The egg wash helps create a shiny golden crust.
- Sugar topping is optional but adds a nice crunch and extra sweetness.
- Let pie bites cool slightly as the filling will be very hot right out of the oven.
- Store leftovers in an airtight container at room temperature for up to 2 days or refrigerate to extend freshness.


