
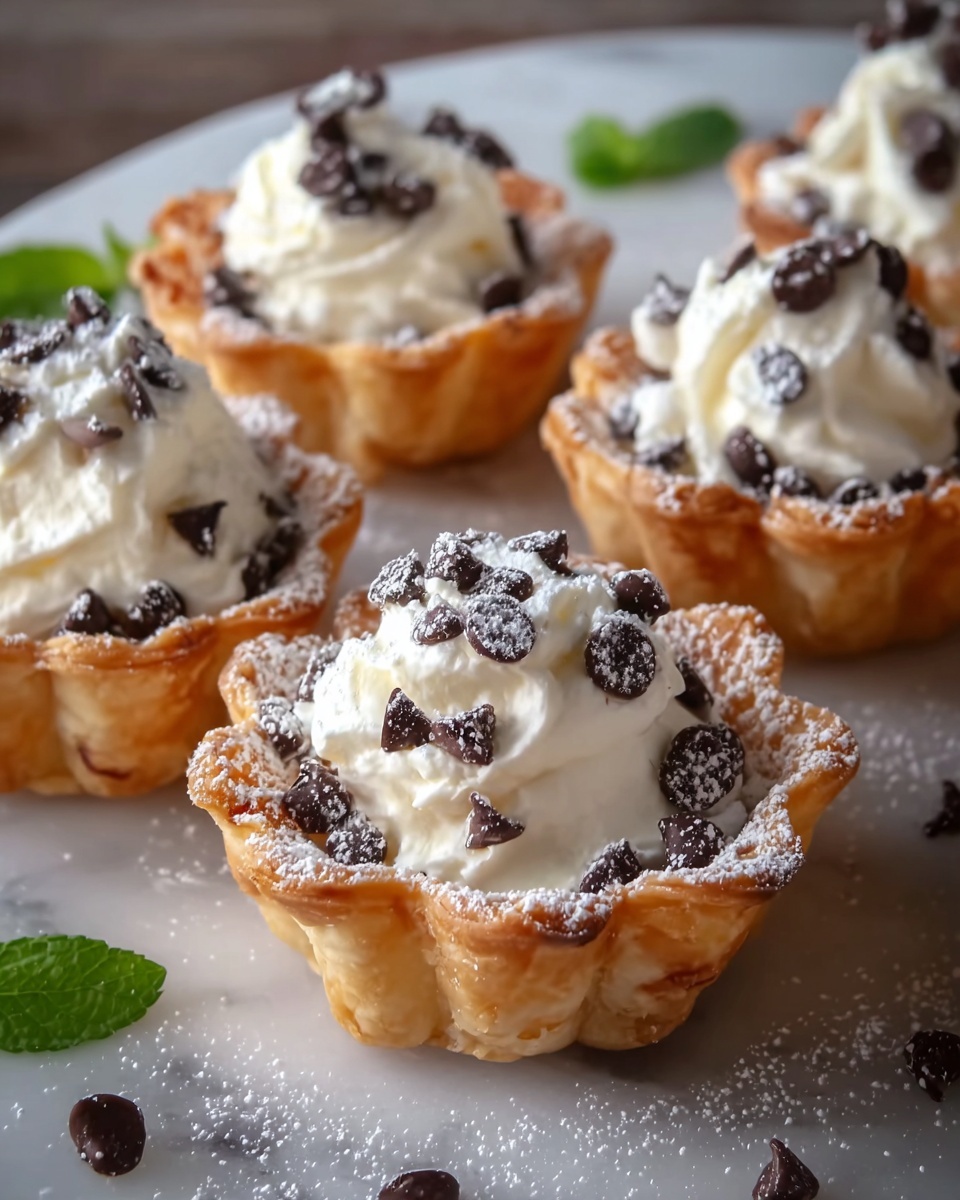
If you adore the classic Italian treat but crave a fresh twist, this Cannoli Cups Recipe is your new best friend. Imagine crisp, golden mini pie crust cups filled with a luscious, sweet ricotta cream, speckled with mini chocolate chips. It’s an easy, crowd-pleasing dessert that brings all the charm and flavor of traditional cannoli without the fuss of deep-frying tubular shells. These delightful little cups are perfect for parties, an elegant dinner treat, or whenever you want to impress with minimal effort yet maximum deliciousness.
Ingredients You’ll Need
This Cannoli Cups Recipe calls for simple, pantry-friendly ingredients that each play a vital role. From the flaky pie crust creating that perfect crispy shell to the creamy, sweet filling that melts in your mouth, every component balances taste and texture beautifully.
- Refrigerated pie crusts (15 oz, 2 crusts): Convenient and buttery, these make the perfect crisp cup shells.
- Whole milk ricotta cheese (1 ½ cups): The star of the filling, smooth and creamy with a mild tang.
- Powdered sugar (¾ cup plus extra for dusting): Adds just the right touch of sweetness and a delicate finish.
- Vanilla extract (½ teaspoon): Infuses warmth and depth into the ricotta filling.
- Ground cinnamon (¼ teaspoon): Offers a subtle, aromatic spice that complements the sweetness perfectly.
- Mini chocolate chips (⅓ cup): Little bursts of chocolate throughout the creamy filling.
- Heavy cream or milk (1 tablespoon): Keeps the filling luscious and smooth.
- Non-stick cooking spray: Ensures the pie crust cups release easily from the muffin pan.
How to Make Cannoli Cups Recipe
Step 1: Prepare the Pie Crust Cups
Start by preheating your oven to 425°F (220°C). Unroll the refrigerated pie crusts and use a 3-inch round cookie cutter to cut out circles. Gently press each circle into the cups of a mini muffin pan, shaping them into little cup forms. To avoid any puffing during baking, prick the bottom of each cup with a fork. Lightly spray them with non-stick cooking spray to ensure they come out cleanly once baked.
Step 2: Bake the Cups
Bake these formed cups for 10 to 12 minutes or until they turn a beautiful, golden brown. This short bake time guarantees crispy, flaky crusts without burning. Once done, remove them from the oven and let them cool completely before popping them out of the pan. You want your cups sturdy and ready to hold that delicious filling without breaking.
Step 3: Make the Ricotta Filling
While the cups cool, focus on the filling. In a medium bowl, combine the whole milk ricotta cheese, powdered sugar, vanilla extract, ground cinnamon, and heavy cream or milk. Stir or whisk until the mixture is completely smooth and creamy. For a silkier texture, you can strain the ricotta through cheesecloth or a sieve before mixing. Fold in the mini chocolate chips delicately, ensuring even distribution without breaking them up.
Step 4: Fill the Cups
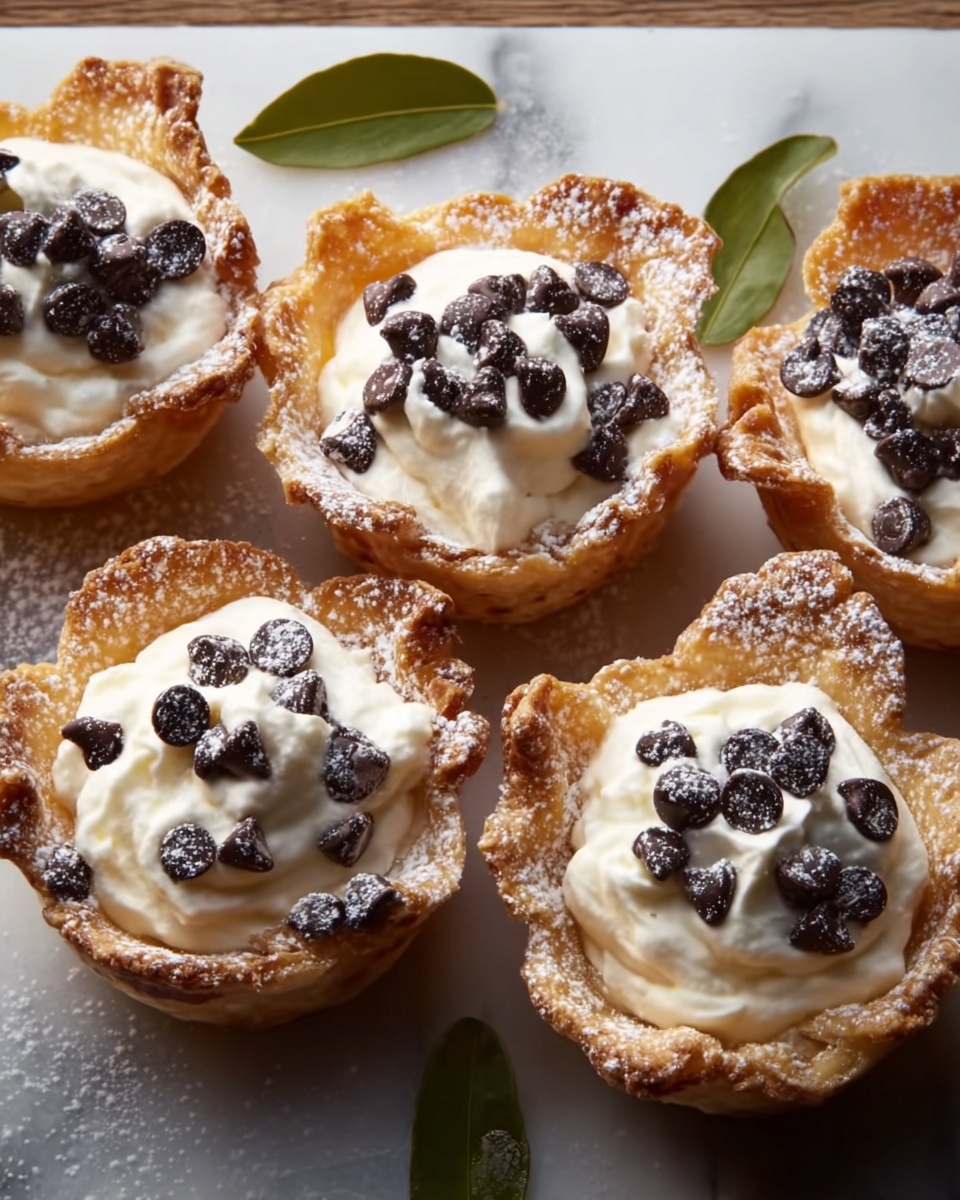
Once your pie crust cups are completely cooled, spoon or pipe the ricotta filling into each cup. The creamy filling paired with the crispy shell creates that perfect bite we all crave in a cannoli. For a finishing touch, dust the tops with a little extra powdered sugar to add a pretty, professional look and just a hint more sweetness.
How to Serve Cannoli Cups Recipe
Garnishes
Enhancing this Cannoli Cups Recipe is incredibly fun. Consider sprinkling chopped pistachios or tiny shards of candied orange peel on top for a boost of color, texture, and rich flavor. Fresh mint leaves or a drizzle of melted chocolate can also make these mini desserts look and taste even more special.
Side Dishes
These mini cannoli cups are sweet and satisfying enough to stand on their own, but if you want to complement the experience, serve them alongside a strong espresso or a sweet dessert wine like Vin Santo for an authentic Italian flair. Fresh berries on the side can add a refreshing contrast to the rich, creamy filling.
Creative Ways to Present
Elevate your presentation by arranging the Cannoli Cups Recipe on a rustic wooden board or a sleek white platter for contrast. Placing them in mini paper liners or colorful cupcake wrappers turns them into irresistible party bites. You can even thread toothpicks through them and present them as fun, handheld treats for gatherings.
Make Ahead and Storage
Storing Leftovers
If you happen to have any leftovers, the filling and cups are best stored separately to keep the crust crisp. Place the baked pie crust cups in an airtight container at room temperature for up to two days. Store the ricotta filling refrigerated and assemble fresh before serving again.
Freezing
You can freeze the baked pie crust cups in a sealed container for up to one month, but the filling is not ideal for freezing due to texture changes. For easy entertaining, freeze the shells ahead of time and thaw them at room temperature when you’re ready to fill and serve.
Reheating
If you need to refresh the crust’s crispness after storage, briefly warm the empty cups in a preheated oven at 350°F (175°C) for about 5 minutes. Allow them to cool before adding the filling to avoid melting or sogging the creamy center.
FAQs
Can I use regular cream cheese instead of ricotta?
While cream cheese can be used, the texture and flavor will be quite different. Ricotta brings a lighter, slightly grainier creaminess that is traditional for cannoli fillings, whereas cream cheese is denser and tangier.
How long can I keep the filled cannoli cups in the refrigerator?
Once filled, it’s best to consume the cannoli cups within 24 hours as the crust may start to soften from the filling. For the crispiest experience, fill just before serving.
Can I make these cups gluten-free?
Absolutely! Substitute the refrigerated pie crust with a gluten-free pie crust dough. Just ensure the dough can be rolled and baked similarly to maintain that crisp cup shape.
Are there any nut-free variations?
This Cannoli Cups Recipe itself is naturally nut-free, but if you opt to add toppings like pistachios or candied peel, simply omit those or replace with nut-free options like mini chocolate chips or colorful sprinkles.
Can I prepare the filling in advance?
Yes, the ricotta filling can be made a day ahead and stored tightly covered in the refrigerator. Give it a quick stir before filling your cups to restore smoothness.
Final Thoughts
Making this Cannoli Cups Recipe is such a joy because it’s straightforward yet yields a dessert that feels luxurious and festive. Whether you’re sharing them with friends at a party or indulging in a solo sweet moment, these crispy, creamy delights come together with minimal fuss but endless smiles. Give this recipe a whirl and discover just how effortlessly Italian dessert magic can happen right in your own kitchen!
Print
Cannoli Cups Recipe
- Prep Time: 15 minutes
- Cook Time: 12 minutes
- Total Time: 27 minutes
- Yield: 24 mini cups
- Category: Dessert
- Method: Baking
- Cuisine: Italian-American
- Diet: Vegetarian
Description
Delight in these easy-to-make Cannoli Cups, featuring crispy baked pie crust mini cups filled with a creamy ricotta and chocolate chip filling. This Italian-American dessert offers a perfect blend of textures and flavors, ideal for parties or a sweet treat anytime.
Ingredients
Pie Crust Cups
- 1 package (15 oz) refrigerated pie crusts (2 crusts)
- Non-stick cooking spray
Ricotta Filling
- 1 ½ cups whole milk ricotta cheese
- ¾ cup powdered sugar (plus more for dusting)
- ½ teaspoon vanilla extract
- ¼ teaspoon ground cinnamon
- ⅓ cup mini chocolate chips
- 1 tablespoon heavy cream or milk
Instructions
- Prepare the crust cups: Preheat the oven to 425°F (220°C). Unroll the pie crusts and use a round cookie cutter (about 3 inches) to cut out circles. Gently press each circle into the cups of a mini muffin pan to form cup shapes. Prick the bottoms with a fork to prevent puffing during baking. Lightly spray each cup with non-stick cooking spray.
- Bake the cups: Place the muffin pan in the preheated oven and bake for 10-12 minutes, or until the crust cups are golden brown. Remove from the oven and allow them to cool completely in the pan before carefully removing each cup.
- Make the ricotta filling: In a medium mixing bowl, combine the ricotta cheese, powdered sugar, vanilla extract, ground cinnamon, and heavy cream. Stir or whisk until smooth and well blended. Fold in the mini chocolate chips gently to distribute them evenly throughout the filling.
- Assemble the cannoli cups: Once the crust cups have cooled, use a spoon or a piping bag to fill each cup generously with the ricotta mixture. After filling, lightly dust the tops with additional powdered sugar for a beautiful finish and added sweetness.
Notes
- For a smoother filling, strain the ricotta cheese through cheesecloth or a fine mesh sieve before mixing.
- Add chopped pistachios or candied orange peel to the filling for added texture and flavor variety.
- Ensure crust cups are completely cool before filling to prevent the ricotta from melting.

