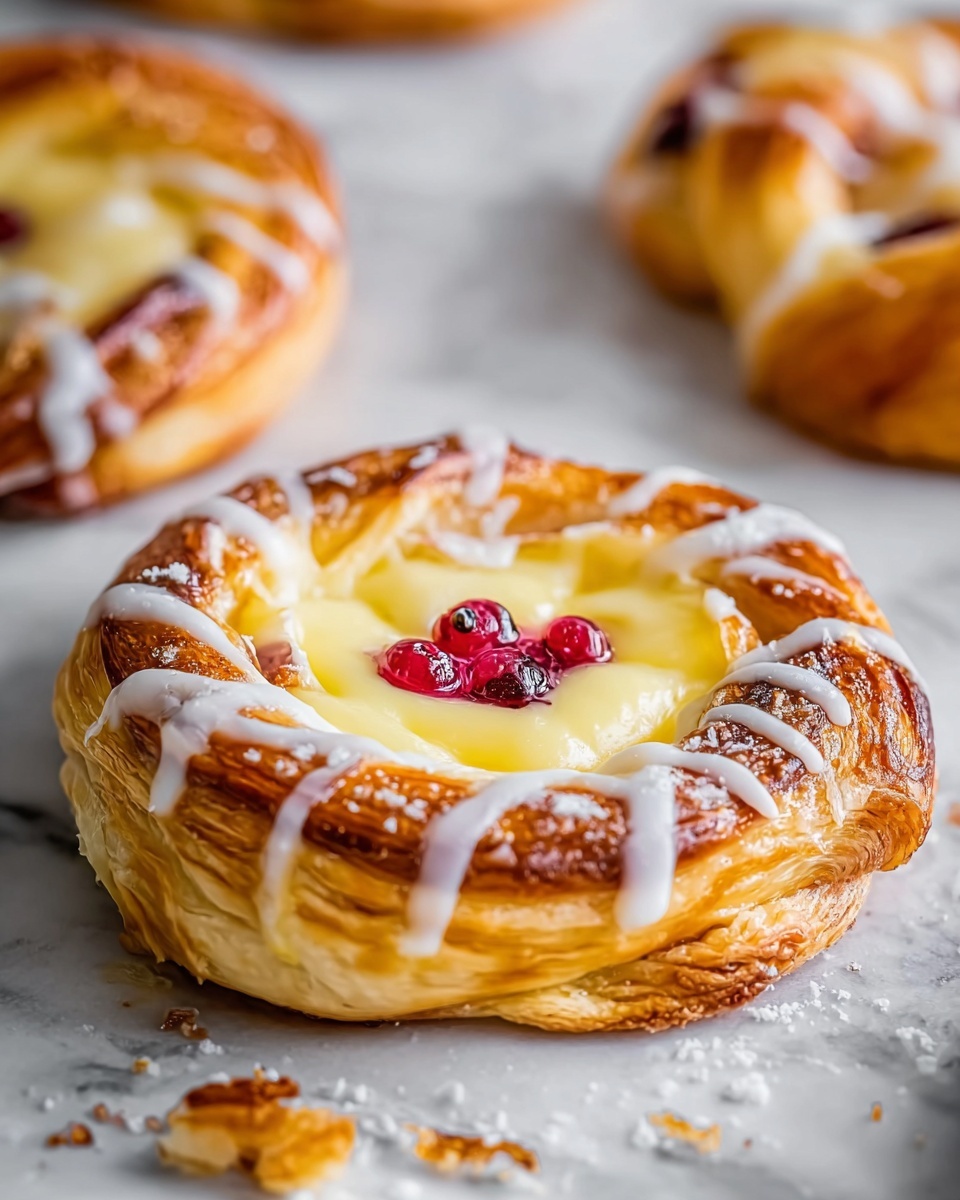
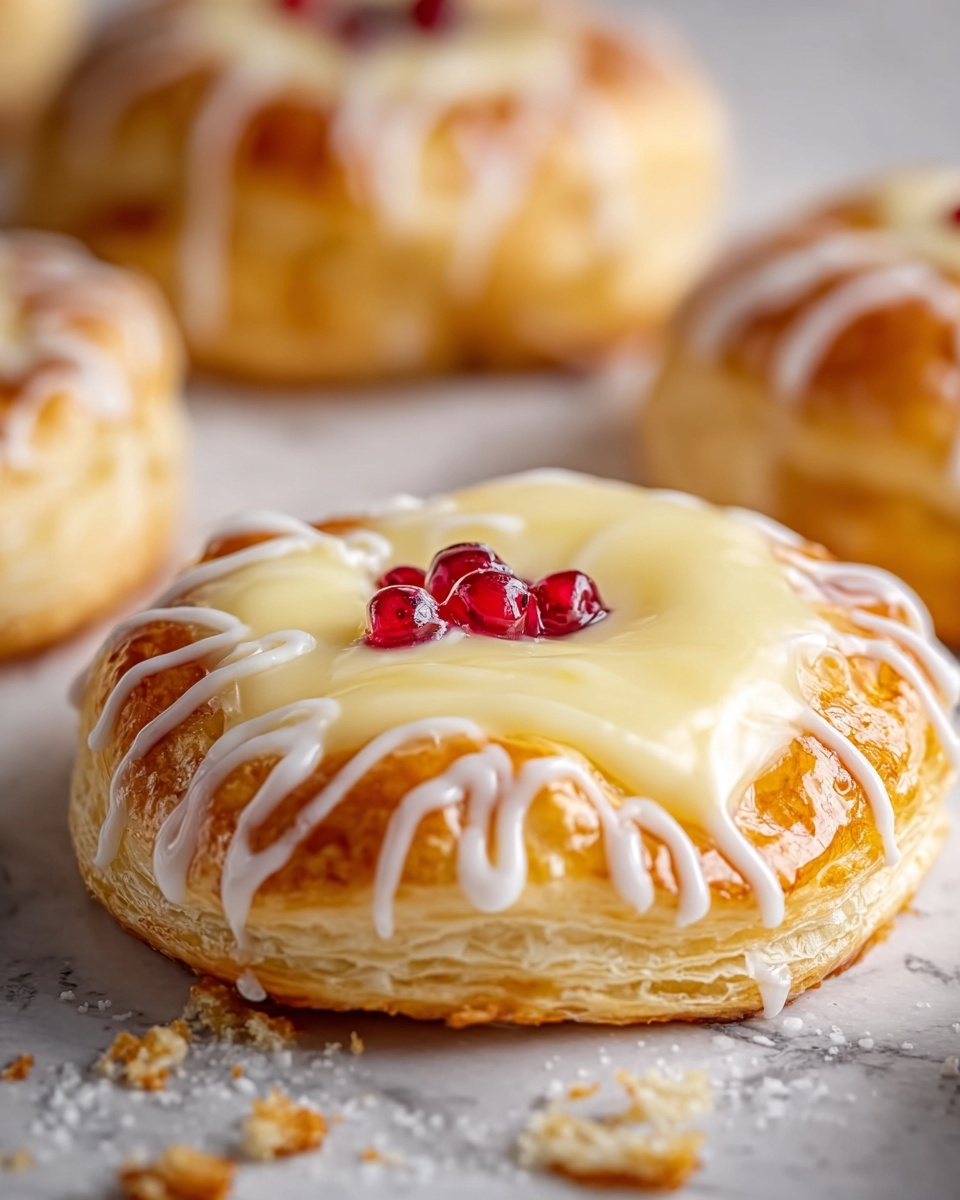
If you have a soft spot for warm, flaky pastries oozing with creamy filling, then you are absolutely going to love this Simple Homemade Cheese Danish Recipe. It’s the perfect blend of buttery, tender dough and tangy-sweet cream cheese that feels both indulgent and comforting. Whether you’re starting your morning with it or serving it at a cozy brunch, this Danish brings that bakery magic right into your own kitchen with straightforward ingredients and easy steps. Trust me, once you try it, it might just become your new favorite pastry to share with friends and family.
Ingredients You’ll Need
Ingredients You’ll Need
Each ingredient in this Danish recipe is simple but plays a vital role in creating that perfect balance of flavor and texture. From the flaky, buttery dough to the creamy, subtly sweet filling, every element adds its own magic.
- 2 cups All-purpose flour: This is the base for the dough, providing structure while keeping it tender.
- 1/4 cup Granulated sugar: Sweetens the dough just enough without overpowering the cheese.
- 1/2 teaspoon Salt: Balances the dough’s sweetness and enhances flavor depth.
- 1 tablespoon Baking powder: Helps the dough rise slightly for a light, cakey texture.
- 1/2 cup Unsalted butter: Used cold and cut into pieces, it creates those dreamy flaky layers.
- 1/2 cup Milk: Brings all the dry ingredients together into smooth dough.
- 8 ounces Cream cheese: Softened to a creamy consistency, it forms the rich filling.
- 1/4 cup Vanilla sugar: Adds gentle sweetness and delicate vanilla flavor to the filling.
- 1 large Egg yolk: Binds the filling, giving it a luscious texture.
- Powdered sugar: For dusting the finished Danishes and adding a pretty touch.
- Glaze (milk and sugar mixture): Optional drizzle that adds shine and extra sweetness.
How to Make Simple Homemade Cheese Danish Recipe
Step 1: Preheat the Oven
Start by setting your oven to 375°F (190°C). This ensures it’s perfectly hot and ready, so your Danish bakes evenly and develops that gorgeous golden crust.
Step 2: Combine Dry Ingredients
In a large mixing bowl, whisk together the all-purpose flour, granulated sugar, salt, and baking powder. This mixture forms the foundation of your dough, ensuring every bite has the right chew and sweetness.
Step 3: Cut in the Butter
Add the cold, cubed unsalted butter to the dry ingredients. Using your fingers or a pastry cutter, work the butter into the flour until it resembles coarse crumbs. This step is key to creating that flaky, layered texture once baked.
Step 4: Mix in the Milk
Gradually pour in the milk, stirring gently to bring the dough together. If it feels too dry or crumbly, add a splash more milk, but be careful not to overwork it.
Step 5: Knead the Dough
Turn the dough out onto a floured surface and gently knead it just until smooth. Avoid excessive kneading to keep your pastry light and tender.
Step 6: Roll Out the Dough
Using a rolling pin, flatten the dough into a rectangle about 1/4 inch thick. Even thickness helps the Danish cook uniformly and look picture-perfect.
Step 7: Prepare the Cream Cheese Filling
In a separate bowl, beat the softened cream cheese until smooth and creamy. Stir in the vanilla sugar and egg yolk until fully combined. This filling is rich, slightly sweet, and packed with vanilla flavor.
Step 8: Shape the Danish
Cut the rolled dough into squares or triangles. Place a dollop of the cream cheese filling in the center of each piece, then fold the corners over to seal in all that delicious creaminess.
Step 9: Prepare for Baking
Arrange your filled Danishes on a parchment-lined baking sheet to prevent sticking. Brush the tops lightly with a beaten egg to create a beautiful glossy finish.
Step 10: Bake Until Golden
Bake the Danishes in your preheated oven for 20 to 25 minutes, or until they turn a stunning golden brown. The aroma at this stage is simply irresistible.
Step 11: Finishing Touches
Allow your cheese Danishes to cool on a wire rack before dusting with powdered sugar or drizzling with the sweet milk glaze. This final touch brings a delicate sweetness and makes each one look as good as they taste.
How to Serve Simple Homemade Cheese Danish Recipe
Garnishes
A light dusting of powdered sugar makes the Danish look like it’s fresh from a fancy bakery, while a drizzle of glaze adds a gorgeous shine and subtle sweetness. You could also sprinkle some toasted almonds or fresh berries for extra flair.
Side Dishes
This cheese Danish pairs wonderfully with a steaming cup of coffee or a freshly brewed pot of tea. Add fresh fruit or a small bowl of yogurt on the side for a balanced and delightful breakfast or brunch spread.
Creative Ways to Present
For special occasions, arrange your Danishes on a beautiful serving plate with flower petals or greenery around. You can also serve them warm with a scoop of vanilla ice cream or a drizzle of fruit compote to impress your guests.
Make Ahead and Storage
Storing Leftovers
Store any leftover Danishes in an airtight container at room temperature for up to 2 days. This keeps the pastry fresh and the filling creamy without drying out.
Freezing
You can freeze these Danishes after baking by wrapping each one individually in plastic wrap and placing them in a freezer-safe bag. They’ll keep well for up to a month, perfect for preparing ahead of time.
Reheating
To enjoy them fresh from the oven again, reheat frozen or stored Danishes at 350°F (175°C) for about 8 to 10 minutes, or until warm and slightly crisp. Avoid microwaving to keep the pastry flaky.
FAQs
Can I use cream cheese substitutes for the filling?
Yes, you can try mascarpone or ricotta for a different but still creamy and delicious filling. Keep in mind the texture and sweetness might vary slightly.
Is it necessary to use cold butter in the dough?
Absolutely! Cold butter ensures the dough stays flaky and buttery by creating those lovely layers during baking.
Can I make this Danish dairy-free?
With some adjustments like using plant-based butter and cream cheese alternatives, you can create a dairy-free version, but it might affect the texture and flavor.
How long does the Simple Homemade Cheese Danish Recipe take from start to finish?
Including preparation and baking, you can expect about 40 minutes total, making it a relatively quick and rewarding pastry to make at home.
What’s the best way to shape the Danishes?
Cutting the dough into triangles or squares and folding corners over the filling both work well. Choose whichever shape you find easiest or most visually appealing.
Final Thoughts
Making this Simple Homemade Cheese Danish Recipe is such a joyful experience, especially when you pull those golden, creamy pastries out of the oven. It’s humble enough to whip up on a weeknight but special enough to serve for celebrations. I encourage you to try this recipe—you’ll discover how simple ingredients and a little love can create something truly magical, turning your kitchen into a cozy bakery delight in no time.
Print
Simple Homemade Cheese Danish Recipe
- Prep Time: 15 minutes
- Cook Time: 25 minutes
- Total Time: 40 minutes
- Yield: 8 servings
- Category: Breakfast Pastry
- Method: Baking
- Cuisine: American
Description
This Simple Homemade Cheese Danish recipe features a flaky, buttery pastry filled with a creamy sweetened cream cheese mixture. Perfect for breakfast or a delightful snack, the cheese Danish balances a tender dough with a rich filling, topped with a light glaze or powdered sugar for added sweetness.
Ingredients
Pastry Dough
- 2 cups All-purpose flour
- 1/4 cup Granulated sugar
- 1/2 teaspoon Salt
- 1 tablespoon Baking powder
- 1/2 cup Unsalted butter (cold, cut into small pieces)
- 1/2 cup Milk
Cheese Filling
- 8 ounces Cream cheese (softened)
- 1/4 cup Vanilla sugar
- 1 large Egg yolk
Toppings
- Powdered sugar (for dusting)
- Glaze (made from milk and sugar)
- 1 beaten egg (for brushing tops)
Instructions
- Preheat the oven: Preheat your oven to 375°F (190°C) to ensure it is hot and ready when ready to bake your cheese Danish.
- Combine dry ingredients: In a large mixing bowl, whisk together the all-purpose flour, granulated sugar, salt, and baking powder until evenly mixed, forming the base of your dough.
- Cut in the butter: Add the cold, small pieces of unsalted butter to your dry mixture. Use your fingers or a pastry cutter to incorporate the butter until the mixture looks like coarse crumbs, which contributes to a flaky texture.
- Add milk and form dough: Slowly pour in the milk while mixing to bring the dough together. Adjust with a little more milk if the dough is too dry. Be careful not to overwork the dough.
- Knead the dough: Turn the dough onto a floured surface and gently knead it until smooth, preparing it for rolling.
- Roll out the dough: Using a rolling pin, roll the dough into a rectangle approximately 1/4 inch thick, ready for cutting and filling.
- Prepare cheese filling: In a separate bowl, beat the softened cream cheese until smooth. Add the vanilla sugar and egg yolk, mixing until creamy and well combined to create the filling.
- Shape the Danish: Cut the rolled dough into squares or triangles. Place a dollop of the cheese filling in the center of each piece, then fold the corners over the filling to seal it gently.
- Prepare for baking: Place the filled pastries on a parchment-lined baking sheet. Brush the tops with beaten egg to give them a shiny, golden finish after baking.
- Bake: Bake in the preheated oven for 20-25 minutes or until the Danish are puffed up and golden brown, indicating they are cooked through.
- Cool and finish: Remove the pastries from the oven and cool on a wire rack. Just before serving, dust with powdered sugar or drizzle with a milk and sugar glaze for added sweetness and shine.
Notes
- Use cold butter to achieve a flaky pastry texture.
- If dough is sticky, sprinkle a little extra flour while kneading.
- Vanilla sugar enhances the flavor but can be replaced with a teaspoon of vanilla extract if unavailable.
- Ensure the cream cheese is softened to avoid lumps in the filling.
- Glaze can be adjusted in sweetness by varying the sugar amount.
- Serve fresh for best texture; leftovers can be reheated briefly in the oven.


