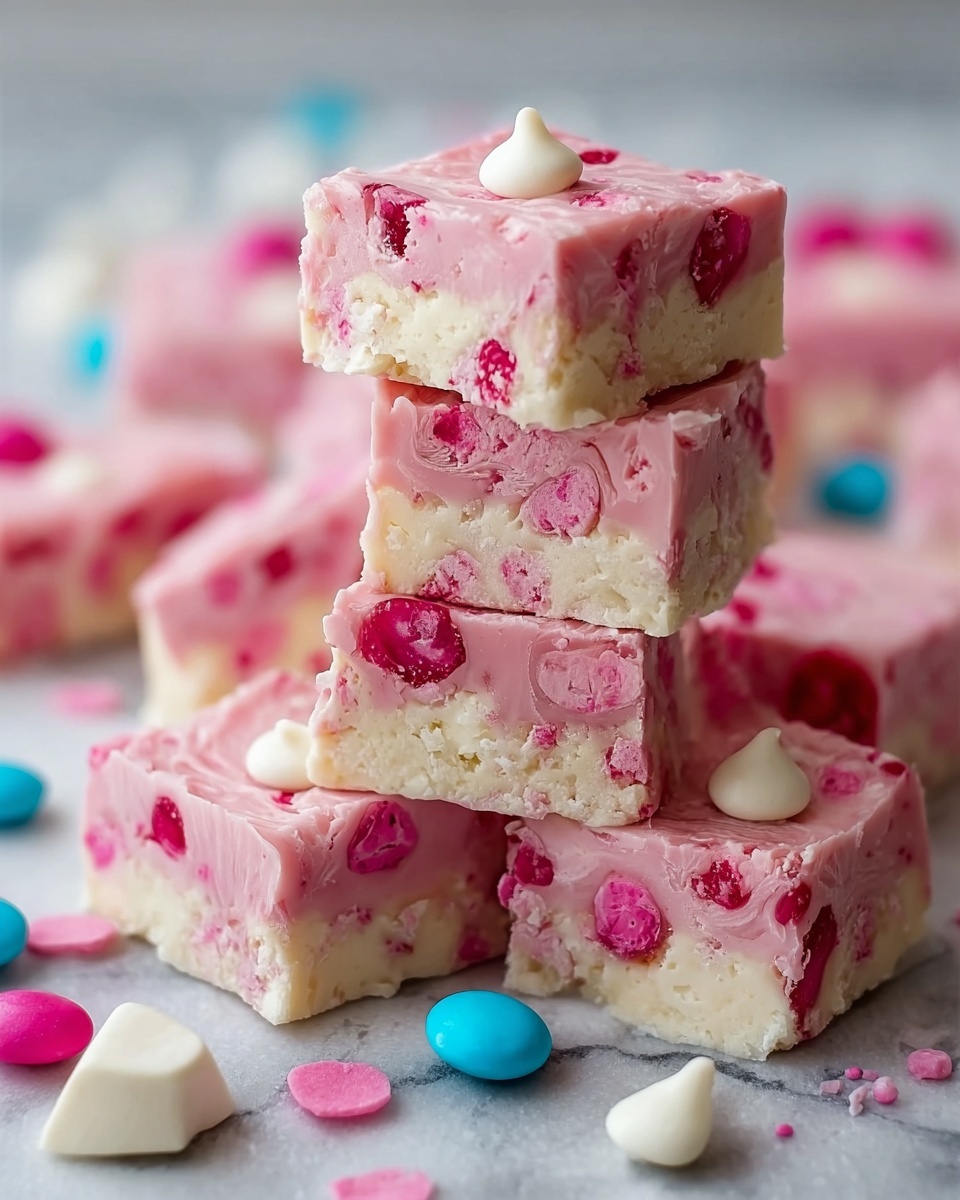
If you’re craving a sweet treat that feels like a nostalgic dream wrapped in a pink cloud, this Bubblegum Cloud Fudge Recipe is pure magic. Imagine creamy white chocolate mingling effortlessly with the chewy delight of mini marshmallows, all kissed by a playful bubblegum flavor and a dash of rosy color. It’s the perfect blend of whimsy and indulgence, making each bite a fluffy, melt-in-your-mouth experience. Whether you’re treating yourself or wowing guests, this fudge is bound to become a fast favorite.
Ingredients You’ll Need
The beauty of this fudge lies in its simplicity — each ingredient plays a crucial role in crafting that perfect balance of flavor, texture, and visual charm. Nothing complicated, just straightforward components that come together to create a truly special dessert.
- White chocolate chips: Use high-quality chips for a silky, smooth base with rich sweetness.
- Sweetened condensed milk: This adds luscious creaminess and a velvety texture to the fudge.
- Bubblegum flavoring: A whimsical twist that gives the fudge its signature fun and nostalgic taste.
- Pink gel food coloring: Just a few drops bring that delightful pastel pink hue that makes the fudge look as delicious as it tastes.
- Mini marshmallows: For soft, chewy bursts in every bite, giving the fudge its “cloud-like” texture.
- Sprinkles or edible glitter (optional): These add sparkle and extra festive flair when you want to make the fudge pop visually.
How to Make Bubblegum Cloud Fudge Recipe
Step 1: Prepare Your Baking Dish
Start by lining an 8×8-inch baking dish with parchment paper. This simple step is key for removing the fudge effortlessly once it sets. Get this ready before you dive into melting your sweet ingredients to keep everything smooth and efficient.
Step 2: Melt the Base Ingredients
In a medium saucepan over low heat, combine your white chocolate chips and sweetened condensed milk. Stir constantly to ensure the chocolate melts evenly without burning, blending into a creamy, glossy mixture that forms the luscious foundation of your fudge.
Step 3: Add Flavor and Color
Remove your pan from heat and stir in the bubblegum flavoring along with the pink gel food coloring. This step transforms the vanilla-like chocolate base into a dreamy, cloud-like concoction bursting with sweet bubblegum character and a pretty pink blush.
Step 4: Fold in the Marshmallows
Gently fold mini marshmallows into the mixture, incorporating them without deflating their fluffy texture. These little pillows add that signature cloud softness and chewy surprise with every bite.
Step 5: Set and Chill
Pour your fudge mixture into the prepared dish and spread it out evenly. If you want to make it extra festive, sprinkle on some edible glitter or colorful sprinkles now. Then pop the dish into the fridge for at least three hours until firm and ready to slice.
How to Serve Bubblegum Cloud Fudge Recipe
Garnishes
While the fudge itself is already a stunner, adding a few extra sprinkles, edible glitter, or even tiny pastel candy pearls on top brings a delightful touch of whimsy. It’s perfect for parties or to brighten up an ordinary afternoon snack.
Side Dishes
This fudge pairs wonderfully with light accompaniments like fresh berries or a scoop of vanilla bean ice cream, balancing its sweetness and adding fresh textures to each bite. It also shines alongside a cup of creamy hot chocolate or a cold glass of milk.
Creative Ways to Present
Try serving your Bubblegum Cloud Fudge Recipe in little pastel cupcake liners or on decorative plates adorned with edible flowers. You could also stack squares into a cute tower or gift-wrap small portions in cellophane tied with ribbons for irresistible homemade gifts.
Make Ahead and Storage
Storing Leftovers
Keep any leftover fudge stored in an airtight container in the refrigerator to maintain its creamy texture and fresh flavor. It should stay perfect for up to one week, so you can enjoy that sweet burst whenever the mood strikes.
Freezing
If you want to keep the fudge longer, freezing is a great option. Just wrap individual squares tightly in plastic wrap and place them in a sealed freezer bag. When you’re ready, thaw them overnight in the fridge for best results without sacrificing that fluffy texture.
Reheating
This fudge is best enjoyed cool or at room temperature, so reheating isn’t typically necessary. However, if you want it a little softer, allow the fudge to sit at room temperature for 10-15 minutes before serving rather than applying heat directly.
FAQs
Can I use regular vanilla extract instead of bubblegum flavoring?
While vanilla extract will work technically, bubblegum flavoring is what gives this fudge its unique and playful character. If you skip it, the fudge will taste more like plain white chocolate but still be delicious.
How pink will the fudge be with just a few drops of pink gel food coloring?
The fudge will achieve a soft pastel pink shade that’s visually appealing without being overpowering. You can always add more drops gradually to intensify the color to your preference.
Is it necessary to use mini marshmallows?
Mini marshmallows are best for creating that distinctive cloud-like, chewy texture. Larger marshmallows might not distribute as evenly and could affect the fudge’s softness.
Can this fudge be made vegan or dairy-free?
This recipe depends on white chocolate chips and sweetened condensed milk, which usually contain dairy. However, you might experiment with plant-based alternatives, but keep in mind it could change the texture and flavor.
How long does the fudge take to set?
The fudge needs to chill in the refrigerator for at least three hours to become firm enough to cut cleanly. For best results, leaving it slightly longer won’t harm its taste or texture.
Final Thoughts
Now that you know all the secrets behind this dreamy, sweet treat, I can’t wait for you to try the Bubblegum Cloud Fudge Recipe yourself. It’s a perfect blend of nostalgia, fun, and gourmet delight that will brighten any day or celebration. Go ahead, whip up a batch, and prepare to fall in love with every fluffy, velvety bite!
Print
Bubblegum Cloud Fudge Recipe
- Prep Time: 10 minutes
- Cook Time: 5 minutes
- Total Time: 3 hours 15 minutes
- Yield: 16 squares
- Category: Dessert
- Method: Stovetop
- Cuisine: American
- Diet: Vegetarian
Description
This Bubblegum Cloud Fudge is a fun and delightful treat featuring creamy white chocolate infused with bubblegum flavor and tinted pink for a whimsical appearance. Soft mini marshmallows add a chewy texture, while optional sprinkles or edible glitter top it off for a festive look. Perfect for parties or a sweet indulgence, this no-bake fudge sets in the refrigerator and is sure to please kids and adults alike.
Ingredients
Fudge Base
- 2 cups white chocolate chips
- 1 (14 oz) can sweetened condensed milk
- 1 teaspoon bubblegum flavoring
- a few drops of pink gel food coloring
Add-ins
- 1 cup mini marshmallows
- Optional: sprinkles or edible glitter for topping
Instructions
- Prepare the dish: Line an 8×8-inch baking dish with parchment paper and set aside to prevent sticking when the fudge sets.
- Melt the chocolate mixture: In a medium saucepan over low heat, combine white chocolate chips and sweetened condensed milk. Stir continuously to ensure the chocolate melts evenly and the mixture becomes smooth and fully combined.
- Add flavor and color: Remove the pan from heat. Stir in the bubblegum flavoring and a few drops of pink gel food coloring until the mixture is evenly tinted and flavored.
- Fold in marshmallows: Gently fold the mini marshmallows into the fudge mixture so they are distributed without melting.
- Pour and decorate: Pour the fudge mixture into the prepared baking dish and spread it out evenly. Sprinkle optional sprinkles or edible glitter on top for extra festive sparkle.
- Set the fudge: Refrigerate the fudge for at least 3 hours or until it is firm and set completely.
- Serve: Once set, lift the fudge out using the parchment paper and cut it into 16 squares. Serve and enjoy!
Notes
- Use high-quality white chocolate chips for the best creamy texture and flavor.
- Adjust the amount of pink gel food coloring to achieve your preferred shade of pink.
- This fudge can be stored in an airtight container in the refrigerator for up to one week.

