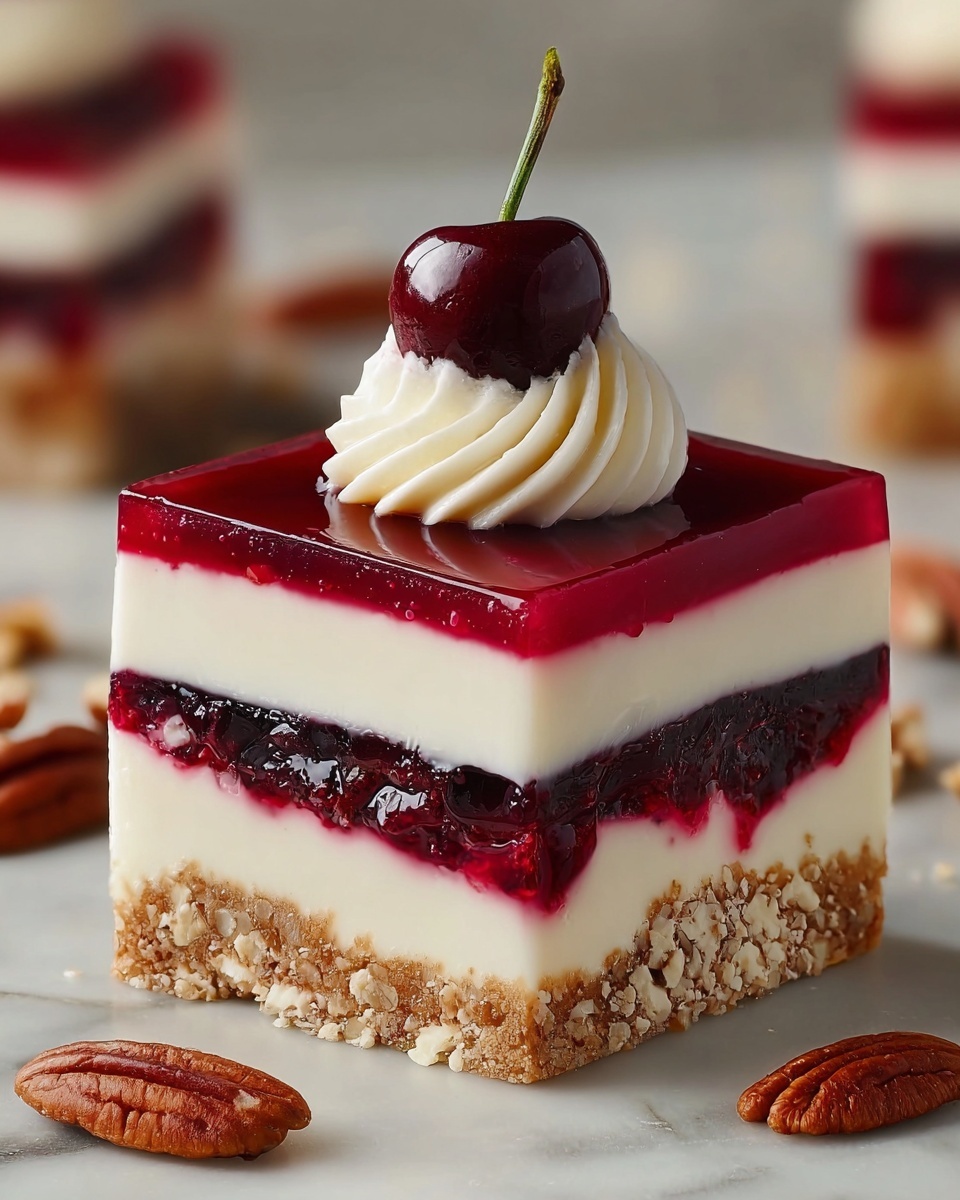
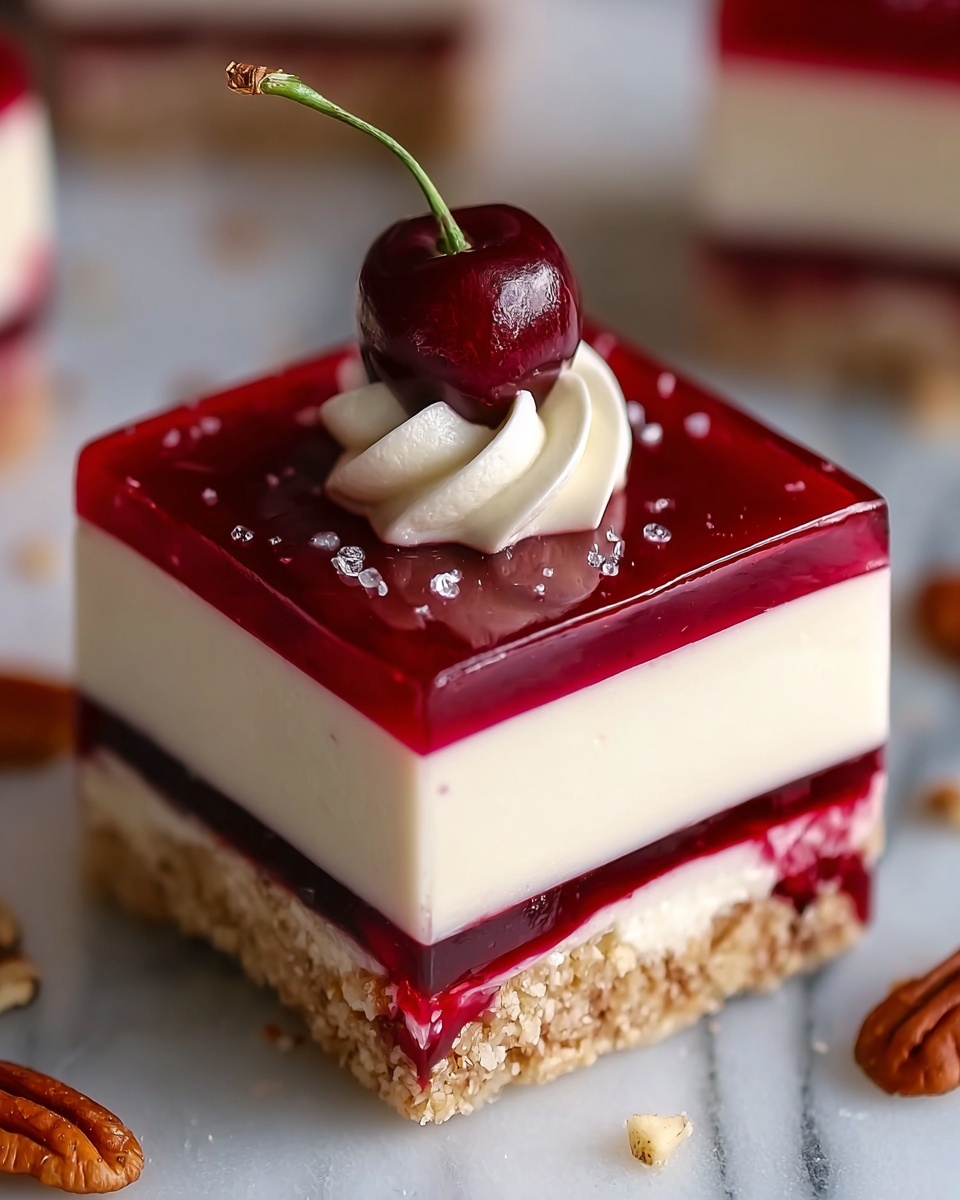
If you’re looking for a dessert that’s as delightful as it is effortless, this No-Bake Cherry Cheesecake Bars Recipe should be your new go-to. Imagine a buttery graham cracker crust, layered with a silky, fluffy cream cheese filling, and crowned with a vibrant, juicy cherry topping. It’s a perfect treat for any occasion, especially when you want to impress without turning on the oven. These bars bring together the tangy sweetness and creamy textures in one gorgeous, easy-to-slice bar that will surely become a favorite in your dessert rotation.
Ingredients You’ll Need
Each ingredient in this recipe plays a vital role, coming together to create the perfect balance of taste, texture, and vibrant color. The simplicity of these components makes this no-bake dessert both approachable and irresistible.
- Graham cracker crumbs: The crunchy, slightly sweet base that forms the sturdy crust.
- Granulated sugar: Adds just enough sweetness to balance the crust.
- Unsalted butter (melted): Binds the crust ingredients while adding richness.
- Cream cheese (softened): The creamy, tangy heart of the cheesecake layer, softened for easy mixing.
- Powdered sugar: Sweetens the cream cheese filling without any graininess.
- Vanilla extract: Adds depth and warmth to the cheesecake flavor.
- Whipped topping (such as Cool Whip): Lightens the filling, making it fluffy and airy.
- Cherry pie filling: The luscious, fruity topping that finishes the bars with a pop of color and sweetness.
How to Make No-Bake Cherry Cheesecake Bars Recipe
Step 1: Prepare the crust
Start by combining the graham cracker crumbs, granulated sugar, and melted butter in a medium bowl. Stir until the crumbs are evenly coated and the mixture holds together when pressed. Press this mixture firmly into the bottom of an 8×8-inch baking dish lined with parchment paper, creating an even crust layer. Chill it in the refrigerator for at least 15 minutes to set. For an extra firm crust, you can also bake it briefly before cooling.
Step 2: Make the cheesecake filling
In a large mixing bowl, beat the softened cream cheese until completely smooth and creamy. Add the powdered sugar and vanilla extract, mixing until everything is fully combined. The key is to get a silky base without lumps.
Step 3: Fold in the whipped topping
Gently fold the whipped topping into the cream cheese mixture. This step is crucial because it lightens the dense cream cheese, resulting in that wonderfully airy and fluffy texture that makes these bars so special.
Step 4: Assemble the bars
Spread the cheesecake filling evenly over the chilled graham cracker crust with a spatula. Then, spoon the cherry pie filling over the top and gently spread it to cover the entire surface. Try not to mix them together; the contrast of layers is part of the fun.
Step 5: Chill until set
Cover the dish and refrigerate for at least 4 hours or, even better, overnight. This resting time allows the cheesecake layer to firm up perfectly, making slicing into bars a breeze.
How to Serve No-Bake Cherry Cheesecake Bars Recipe

Garnishes
Enhance these cherry cheesecake bars with a sprinkling of finely chopped toasted almonds for crunch, a few fresh mint leaves for color, or even a dusting of powdered sugar for an elegant touch. These subtle additions can elevate the presentation and add new flavor dimensions.
Side Dishes
Serve these bars alongside a dollop of whipped cream or alongside fresh berries for a bright, refreshing contrast. A cup of rich espresso or a fruity iced tea also complements the silky sweetness perfectly, rounding out your dessert experience.
Creative Ways to Present
For parties, consider cutting the bars into mini squares and placing them on decorative mini cupcake liners. Or, layer slices in small clear jars alternating with crushed graham crackers for a fun deconstructed approach. These presentation ideas can turn a simple treat into a memorable showstopper.
Make Ahead and Storage
Storing Leftovers
Leftover No-Bake Cherry Cheesecake Bars can be kept in an airtight container in the refrigerator for up to five days. The flavors will mellow and meld together beautifully, making each bite just as delightful as the first.
Freezing
If you want to stash some away for later, freeze the bars by wrapping them tightly in plastic wrap and placing them in a freezer-safe container or bag. Freeze for up to two months for best quality. When ready to enjoy, thaw overnight in the fridge for a no-fuss treat on demand.
Reheating
Since this is a no-bake recipe with chilled components, reheating is not necessary or recommended, as it could alter the texture. Instead, serve chilled for the best taste and consistency.
FAQs
Can I use a different fruit topping instead of cherries?
Absolutely! While cherries add a classic tart sweetness, feel free to swap in blueberry, strawberry, or even mixed berry pie filling to customize the bars to your taste or seasonal fruit availability.
Is it possible to make these bars gluten-free?
Yes, by substituting the graham cracker crumbs with a gluten-free cracker or cookie crumb, you can make this recipe gluten-free without sacrificing flavor or texture.
What can I do if I don’t have whipped topping?
You can whip heavy cream with a little sugar until stiff peaks form as a fresh alternative. It will still provide that light, airy texture needed for the filling.
How firm does the filling need to be before slicing?
The filling should be chilled and firm to the touch, usually after at least 4 hours in the refrigerator. This ensures the bars hold their shape and slice cleanly.
Can I make this dessert ahead for a party?
This dessert is perfect for make-ahead occasions! Prepare it the day before and keep it refrigerated until ready to serve. It will save you time and stress on the event day.
Final Thoughts
If you want to treat yourself or impress friends with something simple, stunning, and utterly delicious, don’t hesitate to try the No-Bake Cherry Cheesecake Bars Recipe. It’s perfect for any time you crave that creamy, fruity fix without oven time. Trust me, once you make these bars, they’ll become a cherished favorite you’ll want to share again and again.
Print
No-Bake Cherry Cheesecake Bars Recipe
- Prep Time: 20 minutes
- Cook Time: 0 minutes
- Total Time: 4 hours 20 minutes
- Yield: 9 bars
- Category: Dessert
- Method: No-Cook
- Cuisine: American
- Diet: Vegetarian
Description
These No-Bake Cherry Cheesecake Bars are a delicious and easy-to-make dessert featuring a buttery graham cracker crust topped with a smooth, creamy cheesecake layer and luscious cherry pie filling. Perfect for summer gatherings or anytime you crave a refreshing, fruity treat without using the oven.
Ingredients
Crust
- 1 1/2 cups graham cracker crumbs
- 1/4 cup granulated sugar
- 1/2 cup unsalted butter, melted
Cheesecake Filling
- 16 oz cream cheese, softened
- 1/2 cup powdered sugar
- 1 teaspoon vanilla extract
- 2 cups whipped topping (like Cool Whip)
Topping
- 1 (21 oz) can cherry pie filling
Instructions
- Prepare the crust: In a medium bowl, combine graham cracker crumbs, granulated sugar, and melted butter until the mixture is well combined and crumbly. Press the mixture firmly and evenly into the bottom of an 8×8-inch baking dish lined with parchment paper to form the crust. Chill in the refrigerator for at least 15 minutes to set.
- Make the cheesecake filling: In a large mixing bowl, beat the softened cream cheese until smooth and creamy using an electric mixer or whisk. Add the powdered sugar and vanilla extract, then mix thoroughly until fully incorporated and smooth.
- Incorporate whipped topping: Gently fold the whipped topping into the cream cheese mixture, being careful not to deflate it. Fold until the mixture is light, fluffy, and evenly blended.
- Assemble the bars: Spread the cheesecake filling evenly over the chilled graham cracker crust using an offset spatula or the back of a spoon for a smooth layer.
- Add the cherry topping: Spoon the cherry pie filling evenly over the cheesecake layer and spread gently without mixing to maintain the distinct layers.
- Chill to set: Cover the baking dish and refrigerate the bars for at least 4 hours or overnight. This chilling time allows the cheesecake layer to firm up and flavors to meld.
- Serve: After chilling, remove the bars from the refrigerator and slice into 9 equal pieces. Serve chilled and enjoy this creamy, fruity dessert.
Notes
- For a firmer and crunchier crust, you can bake the crust at 350°F for 8 minutes prior to assembling the cheesecake filling. Allow the crust to cool completely before spreading the filling.
- The cherry pie filling can be substituted with blueberry, strawberry, or any preferred fruit topping for variation.
- Make sure the cream cheese is softened for easier mixing and a smoother texture in the filling.
- Use parchment paper in the baking dish for easy removal and cleanup.

