If you’re searching for a show-stopping dessert that’s surprisingly easy to make at home, the Homemade Fried Ice Cream Recipe is about to be your new go-to treat. This nostalgic classic brings together the best of crispy, golden goodness and creamy, cold vanilla in every bite, giving you that irresistible contrast of textures. You’ll be floored by the way the crunchy cinnamon cornflake shell hugs the dreamy ice cream center, all crowned with decadent toppings. Whether you’re throwing a dinner party, celebrating a special occasion, or just indulging yourself, there’s something truly magical about the first spoonful of this Homemade Fried Ice Cream Recipe — and even more so when you realize how simple it is to pull off in your own kitchen!
Ingredients You’ll Need
Gathering your ingredients for the Homemade Fried Ice Cream Recipe is half the fun — each one plays a key role in making the dessert unforgettable. From crunchy cornflakes to a pinch of cinnamon, it’s these simple elements that create layers of flavor and a texture that’s out of this world.
- Vanilla ice cream (1 pint): Go for high-quality for the best creamy flavor as the star of the show.
- Cornflakes cereal (2 cups, crushed): The secret to that super-crunchy, golden coating.
- Ground cinnamon (1 teaspoon): Lends a touch of warmth and classic flair to every bite.
- Granulated sugar (2 tablespoons): Adds a subtle sweetness that balances the spices and crunch.
- Large eggs (2): Essential for helping the crispy coating stick to your ice cream as it fries.
- Milk (1 tablespoon): Makes your egg wash extra smooth, ensuring perfect coverage.
- Vegetable oil (for frying): Neutral oil with a high smoke point is ideal for safe, even frying.
- Whipped cream (optional): A billowy finishing touch for dessert lovers everywhere.
- Honey or chocolate syrup (optional): Drizzle on for extra sweetness and dramatic flair.
- Maraschino cherries (optional): The classic garnish that makes every bowl picture-perfect!
How to Make Homemade Fried Ice Cream Recipe
Step 1: Scoop and Freeze the Ice Cream Balls
Scoop out four large, even balls of vanilla ice cream and arrange them on a parchment-lined baking sheet. Don’t rush this step — making sure the scoops are nice and firm ensures the ice cream won’t melt too quickly later. Pop the baking sheet into the freezer and let the ice cream balls freeze for at least 2 hours until they’re rock solid. This is key to success for your Homemade Fried Ice Cream Recipe!
Step 2: Prepare the Crunchy Coating
In a shallow bowl, combine your crushed cornflakes, cinnamon, and sugar. The cinnamon blends beautifully with the sugar, infusing warmth and complexity into the crispy shell. Stir everything together until your coating looks uniformly golden and fragrant — this is the delicious armor for your ice cream.
Step 3: Whisk the Egg Wash
In a separate bowl, beat together the eggs and milk until frothy. This simple mixture acts as edible “glue,” helping every nook and cranny of the ice cream ball get a thorough cornflake coating once you start breading.
Step 4: Coat the Ice Cream Balls
Roll each frozen ice cream ball in the cornflake mixture, making sure to press gently so the crumbs stick. Then, dip the ball into your egg wash, and roll it once more in the cornflake mix until every surface is covered thickly. This double-coating creates an extra crispy, protective layer that’s the hallmark of a Homemade Fried Ice Cream Recipe. Return each coated ball to the freezer for another 2 hours — let them get super hard for stress-free frying!
Step 5: Fry to Perfection
When you’re ready to serve, heat 3 inches of vegetable oil in a deep pot to 375°F (190°C). Working quickly, fry each ice cream ball for just 10 to 15 seconds, or until they’re golden and sizzling on the outside. Remove them using a slotted spoon and briefly drain on a paper towel. You’ll have a crisp, golden shell while the interior stays lusciously cold!
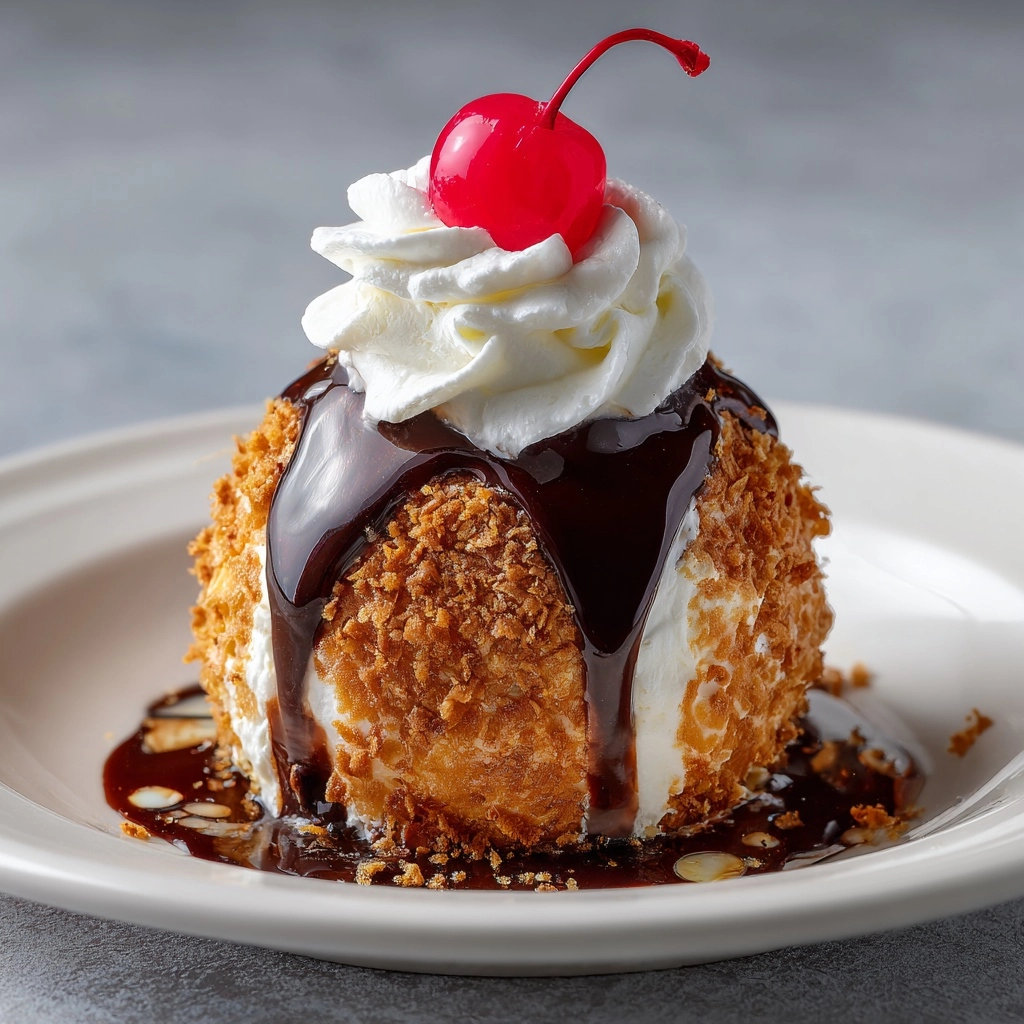
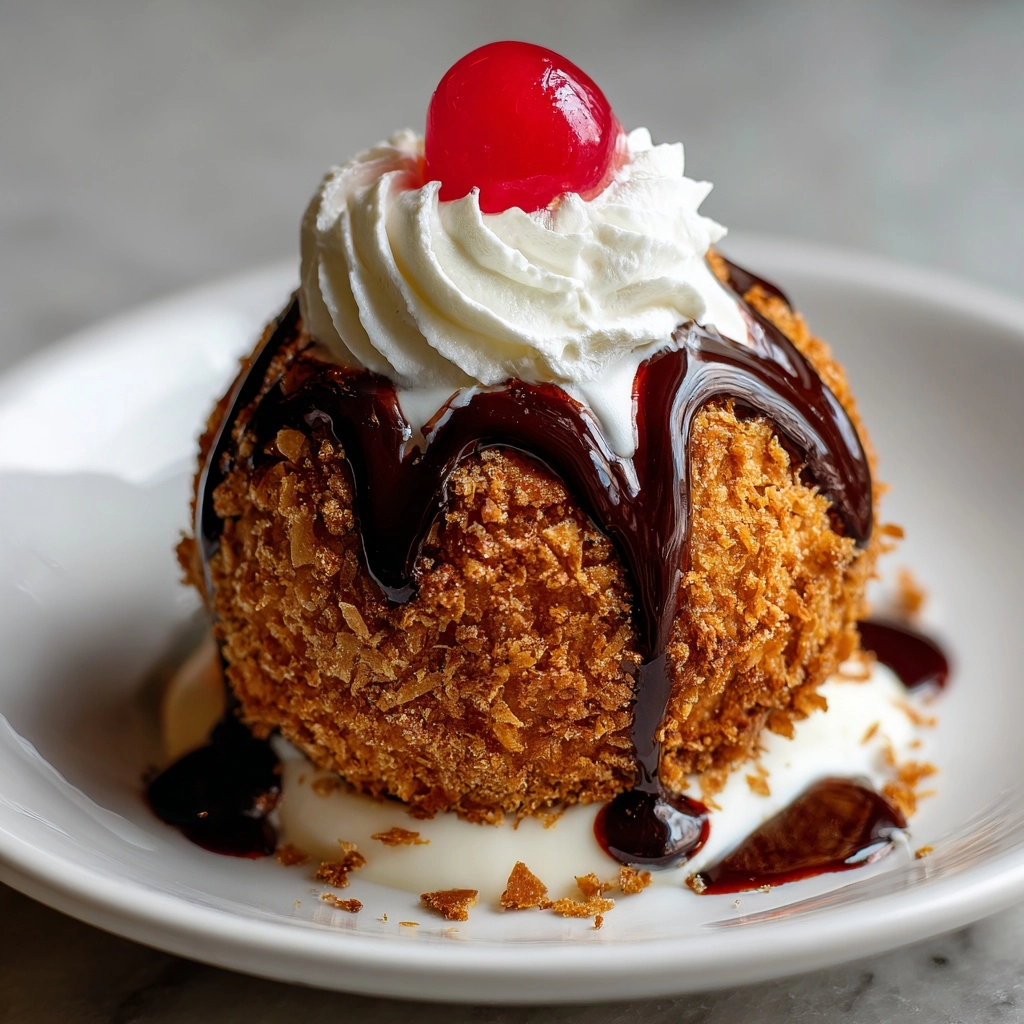
Step 6: Top and Serve
Transfer your fried ice cream to bowls or plates immediately. Let your creativity shine: add swirls of whipped cream, a drizzle of honey or chocolate syrup, and crown each with a bright cherry. Dig in right away and enjoy the sweet, warm crunch against the cold, creamy center — the unmistakable magic of a Homemade Fried Ice Cream Recipe!
How to Serve Homemade Fried Ice Cream Recipe
Garnishes
The true finishing flair for any Homemade Fried Ice Cream Recipe is in the garnishes. A swirl of billowy whipped cream, a generous drizzle of luscious honey or chocolate syrup, and a vibrant maraschino cherry on top take your dessert presentation from wonderful to unforgettable. You can also sprinkle extra cinnamon, chopped nuts, or even edible sprinkles for more festive fun.
Side Dishes
As rich and indulgent as this dessert is, it still pairs beautifully with sides. If you want to balance the sweetness, try serving with a platter of fresh fruit like sliced strawberries or mango. For a party spread, offer tiny cups of espresso or Mexican hot chocolate — the warmth is a perfect contrast to the cold, creamy delight of your fried ice cream.
Creative Ways to Present
Wow your guests by serving the Homemade Fried Ice Cream Recipe in unexpected ways! Try placing each ball in a caramel-dusted tortilla cup for a playful nod to its Mexican-American roots, or arrange on a bed of cookie crumbs for extra crunch. You can even serve on decorative skewers for a whimsical dessert buffet. Get creative, because this dessert is as fun to serve as it is to eat.
Make Ahead and Storage
Storing Leftovers
If you perchance have any leftovers (and honestly, it’s rare!), pop them back in the freezer right away. Quickly transferring to an airtight container will help preserve the crunchy coating and keep the ice cream from picking up any freezer odors.
Freezing
Your prepped, coated, but unfried ice cream balls can be frozen for up to a week before frying. As long as they’re wrapped tightly or sealed in a freezer-safe bag, the texture stays intact until you’re ready for a quick hot oil bath. Always freeze completely solid before attempting to fry so the centers stay chilly.
Reheating
The joy of a Homemade Fried Ice Cream Recipe is that it’s only fried for seconds, so reheating isn’t usually necessary. If you must crisp them up, a very quick flash in a hot oven (400°F for 2 to 3 minutes) might restore some crunch to the coating, but keep in mind the ice cream inside will begin to melt quickly.
FAQs
Can I use a different ice cream flavor?
Absolutely! While classic vanilla is a favorite for this Homemade Fried Ice Cream Recipe, you can try chocolate, coffee, or even a fruity flavor for a fun twist. Just make sure the ice cream is extra firm before coating and frying!
Is there a substitute for cornflakes in the coating?
If you’re not a cornflakes fan or just looking for variety, crushed graham crackers or cookie crumbs work beautifully. They give a different texture and flavor profile but still provide that essential crispy crunch everyone raves about.
How do I prevent the ice cream from melting while frying?
The trick is freezing your coated balls until they are rock-hard and making sure the oil is at the correct temperature (375°F). Fry for just 10 to 15 seconds — it’s enough to crisp up the outside while keeping the inside cold and creamy.
Can this recipe be made gluten-free?
Yes! Simply opt for gluten-free cornflakes and double-check all ingredient labels to ensure gluten isn’t hiding elsewhere. You’ll still get the signature crunch while making the Homemade Fried Ice Cream Recipe suitable for gluten-free guests.
What’s the best oil for frying ice cream?
Vegetable oil is ideal due to its neutral flavor and high smoke point. You can also use canola or sunflower oil, but avoid olive oil or butter, which can burn or impart unwanted flavors during the quick fry.
Final Thoughts
If you’ve never tried making your own Homemade Fried Ice Cream Recipe at home, let this be your sign to give it a whirl. It’s delightfully fun, always impressive, and that hot-and-cold contrast is endlessly craveable. Gather your ingredients, let your kitchen fill with the scent of cinnamon and sugar, and treat yourself and your loved ones to this sweet, crispy comfort — you’ll never look at ice cream the same way again!