
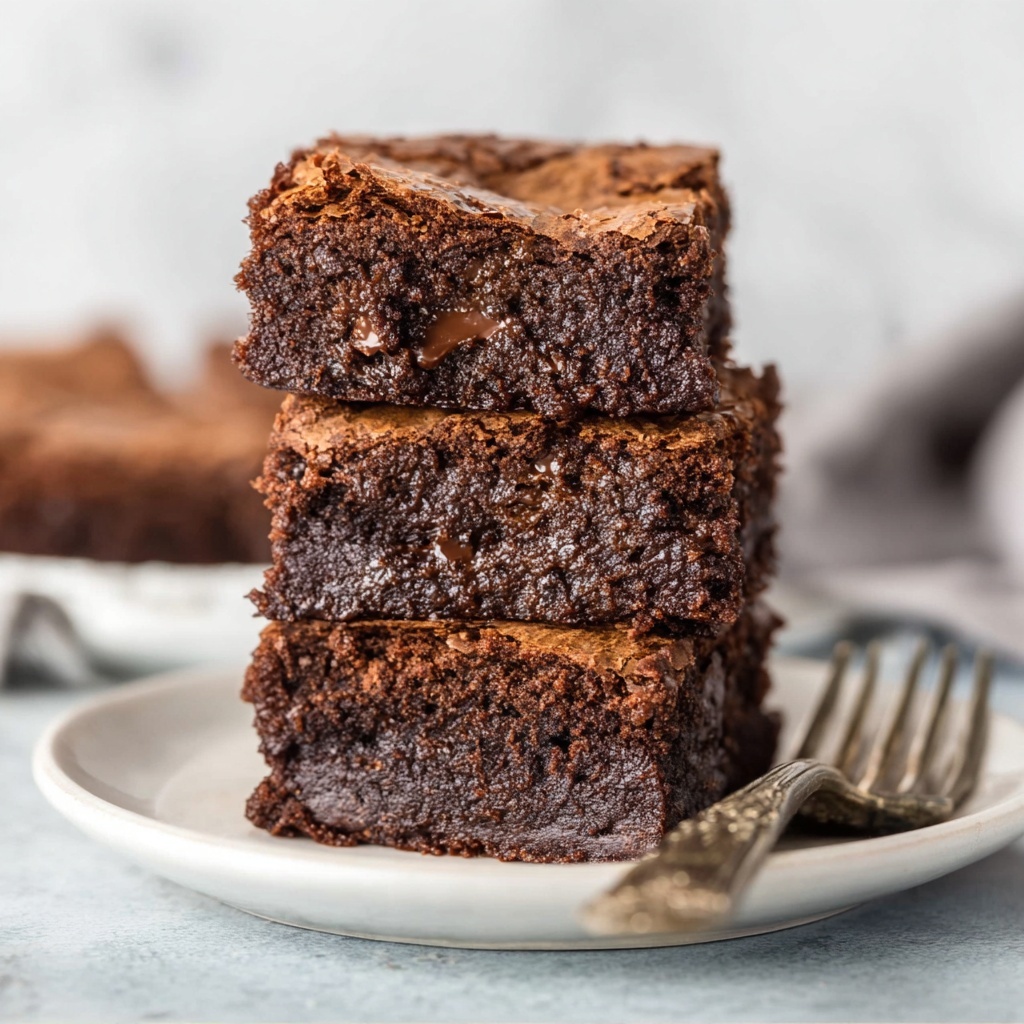
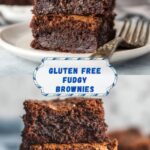
If you have a craving for chocolate but need to avoid gluten, this Gluten Free Brownies Recipe is about to become your new obsession. These brownies are rich, fudgy, and packed with deep chocolate flavor that rivals any traditional recipe, while being completely gluten free. Perfect for sharing or savoring solo, they balance a tender crumb with gooey pockets of chocolate chips, delivering a truly indulgent treat everyone can enjoy.
Ingredients You’ll Need
These simple yet essential ingredients come together harmoniously to create the perfect texture and flavor in each bite of brownie. Each one plays a crucial role, from the buttery richness to the intense chocolate kick.
- Gluten Free Flour: Provides structure without gluten, ensuring your brownies stay tender and moist.
- Coarse Kosher Salt: Enhances all the flavors by balancing sweetness and intensifying chocolate notes.
- Baking Powder: Adds just the right lift for a fudgy yet slightly cakey texture.
- Unsalted Butter: Brings richness and helps create that melt-in-your-mouth softness.
- Unsweetened Chocolate: The source of deep chocolate flavor and luscious density.
- Granulated Sugar: Sweetens perfectly and helps form the signature shiny crust on top.
- Large Eggs: Provide moisture and binding power to keep everything together.
- Pure Vanilla Extract: Adds warmth and rounds out the richness.
- Semisweet Chocolate Chips: Offer pockets of gooey chocolate delight throughout the brownies.
How to Make Gluten Free Brownies Recipe
Step 1: Preparing the Oven and Pan
Start by positioning your oven rack in the middle and preheating to 325 degrees Fahrenheit. Then, line a 13×9-inch baking pan with two sheets of aluminum foil arranged perpendicularly with enough overhang. This handy trick makes lifting the brownies out a breeze once they’re baked, so you don’t have to worry about them sticking or breaking apart.
Step 2: Mix Dry Ingredients
In a medium bowl, combine the gluten free flour, kosher salt, and baking powder. Whisking these together ensures even distribution, which helps your brownies bake evenly and develop an ideal texture.
Step 3: Melt Butter and Chocolate
Gently melt the butter in a heatproof bowl, then add the finely chopped unsweetened chocolate. Stir until your mixture becomes silky smooth. If you need, use short bursts in the microwave to help it along, stirring frequently so it doesn’t scorch.
Step 4: Add Sugar, Eggs, and Vanilla
Once the chocolate mixture is ready, gradually whisk in the sugar. Follow by adding eggs one at a time, blending thoroughly after each addition for a perfectly smooth batter. Finish by whisking in the pure vanilla extract to infuse extra depth.
Step 5: Combine Wet and Dry
Fold the flour mixture into your chocolate batter in three parts using a rubber spatula, gently mixing each time until smooth without overworking the batter. Stir in the semisweet chocolate chips last to add those irresistible melted pockets throughout.
Step 6: Bake to Perfection
Spread the batter evenly into your foil-lined pan and smooth the surface. Bake for 30 to 35 minutes, or until a toothpick inserted near the center emerges with a few moist crumbs clinging to it. This ensures your brownies stay delightfully fudgy.
Step 7: Cool and Cut
Allow your brownies to cool completely on a rack in the pan. Once cooled, lift them out using the foil overhang, and cut them into 2-inch squares to reveal those luxurious chocolate pockets within.
How to Serve Gluten Free Brownies Recipe

Garnishes
Adding a simple garnish can elevate these brownies from delicious to extraordinary. A light dusting of powdered sugar, a sprinkle of chopped nuts, or a few fresh berries on the side each add texture and brightness that complement the intense chocolate flavor beautifully.
Side Dishes
Pair your gluten free brownies with a scoop of vanilla bean ice cream or a dollop of whipped cream for a classic dessert experience. For a cozy twist, serve alongside a cup of rich coffee or a creamy hot chocolate to balance the richness perfectly.
Creative Ways to Present
Use the Gluten Free Brownies Recipe batter to make brownie parfaits layered with crème fraîche and berries in clear glasses for a stunning presentation. Or cut the brownies into small bite-size squares to serve as part of a dessert platter alongside fruit, nuts, and cheeses for a fun party spread.
Make Ahead and Storage
Storing Leftovers
Store leftover brownies in an airtight container at room temperature for up to 3 days. This keeps them moist and fudgy without drying out. If your kitchen is warm, storing them in the fridge will extend freshness for up to a week.
Freezing
You can freeze baked brownies wrapped tightly in plastic wrap and then foil for up to 3 months. Thaw them at room temperature when ready to enjoy—this is a great way to have your favorite treat on demand without any fuss.
Reheating
Warm leftover brownies in the microwave for about 15 seconds to bring back that freshly baked softness and to give chocolate chips a melty, oozy texture. You can also pop them in a warm oven wrapped in foil for 10–15 minutes if you prefer gently reheated brownies.
FAQs
Can I use a different type of gluten free flour?
Absolutely! Just make sure the flour blend you choose is suitable for baking and contains xanthan gum or another binding agent to give structure, so your brownies have the perfect texture.
Are these brownies dairy-free?
Not as written, since they call for unsalted butter and chocolate. However, you could substitute dairy-free butter and dairy-free chocolate to make the recipe vegan and dairy-free, with a slight change in texture and flavor.
How do I know when the brownies are done?
Insert a toothpick in the center after about 30 minutes of baking. It should come out with just a few moist crumbs attached for the ideal fudgy result. If it’s wet batter, they need more time.
Can I add nuts or other mix-ins?
Definitely! Chopped walnuts, pecans, or even dried cranberries can add a delightful crunch or tartness. Just fold them in with the chocolate chips before baking.
Is this recipe suitable for beginners?
Yes! The instructions are straightforward, and the process is forgiving. Plus, using foil to line the pan makes cleanup and removal simple, so it’s an excellent choice for bakers of any skill level.
Final Thoughts
This Gluten Free Brownies Recipe has everything you want in a brownie—deep chocolate flavor, fabulous texture, and easy preparation without gluten worries. Whether you’re baking for yourself, family, or friends, these brownies will bring warm smiles and happy hearts. Give them a try and discover how delicious gluten free baking can really be!
Print
Gluten Free Brownies Recipe
- Prep Time: 5 minutes
- Cook Time: 30 minutes
- Total Time: 35 minutes
- Yield: 12 brownies (cut into 2-inch squares)
- Category: Dessert
- Method: Baking
- Cuisine: American
- Diet: Gluten Free
Description
This Gluten Free Brownies recipe delivers rich, fudgy, and indulgent brownies perfect for anyone avoiding gluten. Made with a blend of gluten free flour and high-quality chocolate, these brownies are moist and packed with flavor. The easy-to-follow instructions ensure a smooth baking process, resulting in decadent brownies studded with semisweet chocolate chips for extra gooeyness.
Ingredients
Dry Ingredients
- 1¼ cups Gluten Free Flour (185 grams)
- ½ teaspoon coarse kosher salt
- ¾ teaspoon Baking Powder (3 grams)
Wet Ingredients & Mix-ins
- 12 tablespoons unsalted butter (170 grams, cut into 1 inch pieces, 1½ sticks)
- 6 ounces unsweetened chocolate (170 grams, finely chopped)
- 2¼ cups granulated sugar (450 grams)
- 4 large eggs (200 grams)
- 1 tablespoon pure vanilla extract (12 grams)
- 1 cup semisweet chocolate chips (170 grams)
Instructions
- Preheat and Prepare Pan: Adjust the oven rack to the middle position and preheat the oven to 325°F (163°C). Cover a 13×9-inch baking pan with two sheets of aluminum foil arranged perpendicular to each other, allowing for a 3-inch overhang on all sides. Spray the foil with nonstick cooking spray to prevent sticking.
- Mix Dry Ingredients: In a medium bowl, whisk together the gluten free flour, coarse kosher salt, and baking powder until well combined.
- Melt Butter and Chocolate: In a large heatproof bowl, melt the butter. Add the chopped unsweetened chocolate and stir until smooth. If needed, microwave the mixture on HIGH in 10-second intervals, stirring frequently to prevent burning, until fully melted and combined.
- Add Sugar and Eggs: Gradually whisk the granulated sugar into the chocolate mixture. Then add the eggs one at a time, whisking thoroughly after each addition. Stir in the pure vanilla extract and whisk again until smooth.
- Combine Flour Mixture: Add the dry flour mixture to the wet chocolate mixture in three additions. Gently fold with a rubber spatula after each addition until the batter is smooth and fully incorporated.
- Add Chocolate Chips: Fold the semisweet chocolate chips into the batter, distributing them evenly.
- Transfer and Smooth Batter: Pour the batter into the prepared baking pan and spread it evenly into the corners. Smooth the top surface for even baking.
- Bake: Bake in the preheated oven for 30-35 minutes, or until a toothpick inserted into the center comes out with a few moist crumbs attached, indicating fudgy brownies.
- Cool and Serve: Remove the brownies from the oven and transfer the pan to a cooling rack. Allow the brownies to cool completely to room temperature. Lift the brownies out of the pan using the foil overhang, then cut into 2-inch squares and serve.
Notes
- Make sure to line the baking pan with foil to easily lift out brownies without breaking.
- Do not overbake; remove from oven when toothpick has moist crumbs for fudgy texture.
- Use high-quality unsweetened chocolate for the richest flavor.
- Adjust baking time slightly depending on your oven’s accuracy and pan type.
- For a shiny crust, do not overmix the batter once the flour is added.