
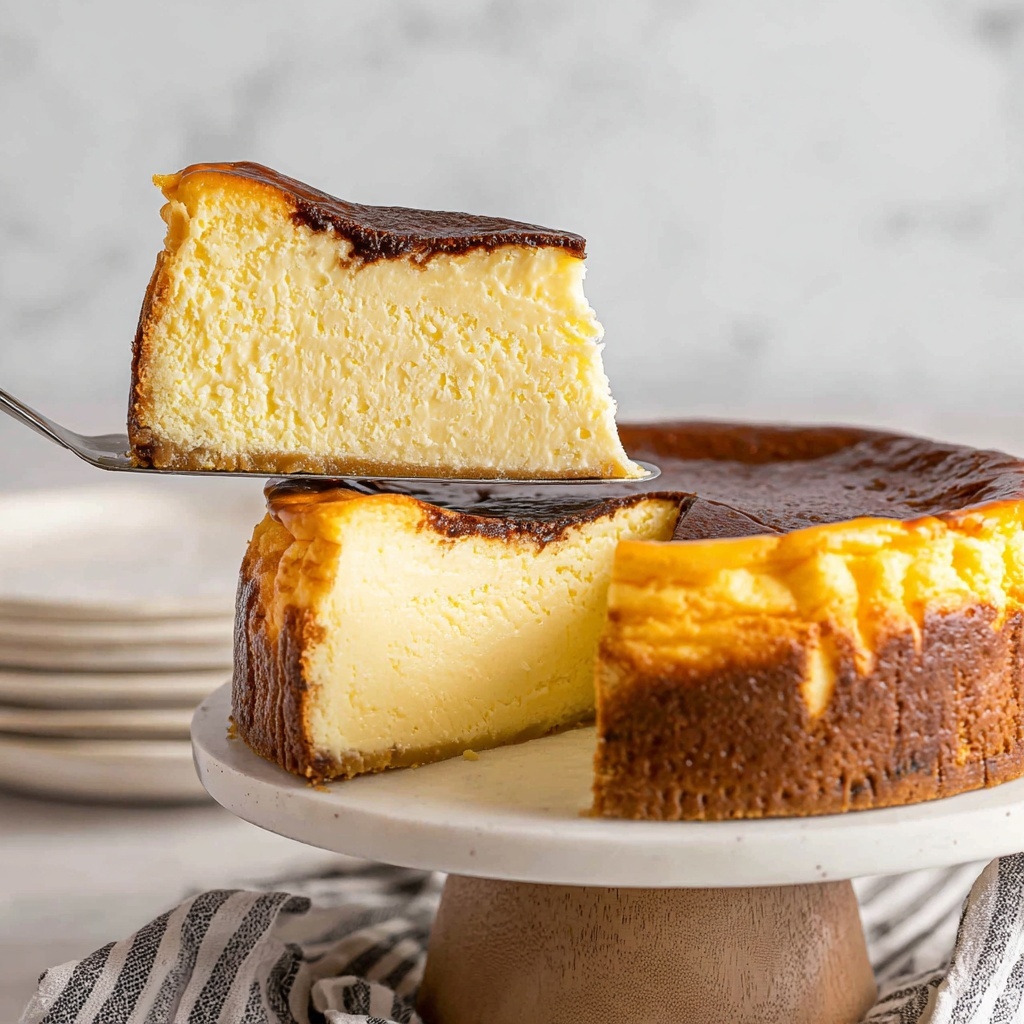
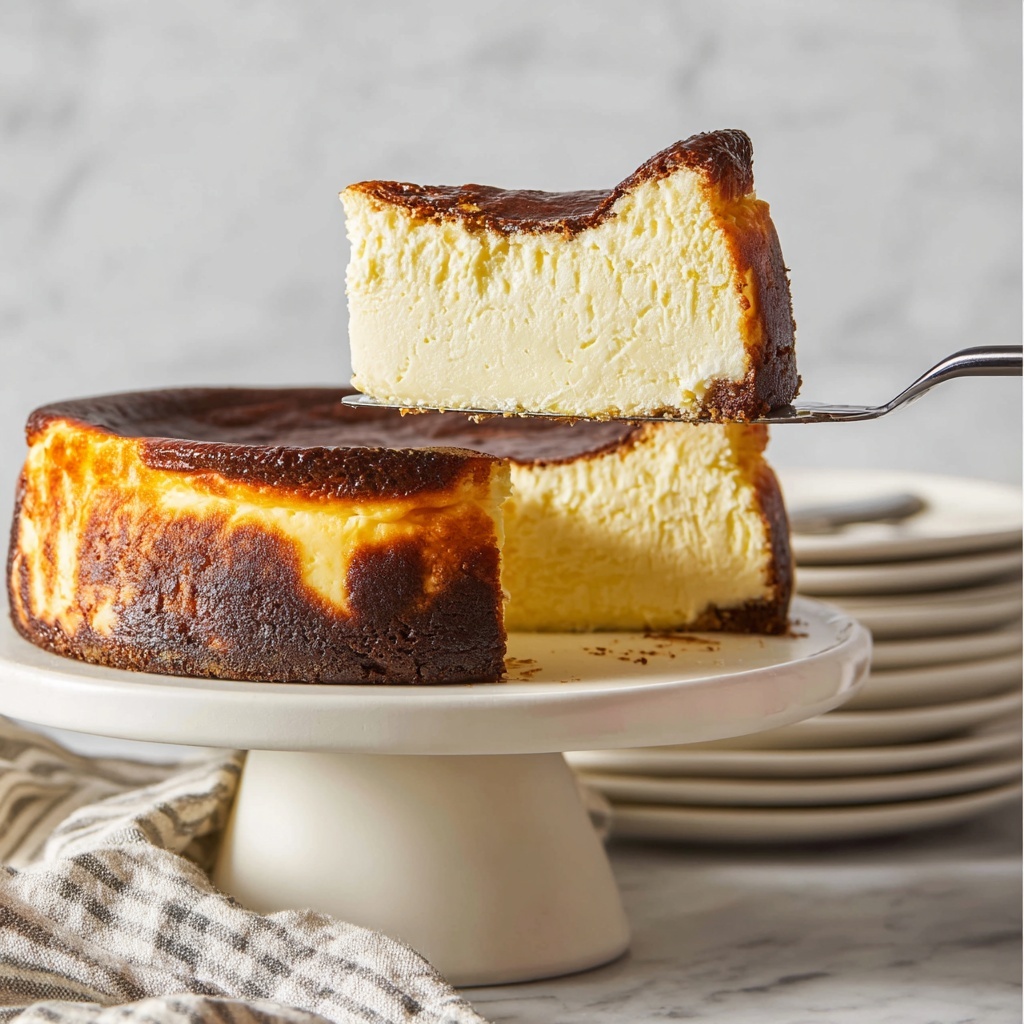
If you’ve ever tasted a dessert that feels like a warm hug wrapped in creamy, caramelized richness, then you’re in for a treat with this Burnt Basque Cheesecake Recipe. Originating from the Basque region of Spain, this cheesecake breaks away from the traditional smooth and pale styles by flaunting a deeply browned, almost burnt top that crackles slightly to reveal an irresistibly luscious interior. The melding of cream cheese, mascarpone, and a touch of sour cream creates a velvety texture that’s decadently satisfying, while the hint of lemon juice brightens the whole experience. Whether you’re a cheesecake aficionado or a curious home baker, this Burnt Basque Cheesecake Recipe promises an unforgettable slice of pure joy.
Ingredients You’ll Need
Gathering the right ingredients is the first step to nailing this Burnt Basque Cheesecake Recipe. Each component plays a crucial role in building the nuanced flavor, perfect texture, and the characteristic burnt top that sets this cheesecake apart from the usual.
- Cream cheese (32 ounces): The backbone of the cheesecake, giving it that classic creamy texture and tangy flavor.
- Granulated sugar (1⅓ cups): Balances the tang and deepens the caramelization for the signature burnt top.
- Mascarpone cheese (8 ounces): Adds richness and an extra creamy mouthfeel to the batter.
- Eggs (3 large) and egg yolks (3): Provide structure while keeping the cheesecake silky and smooth.
- Heavy cream (1⅓ cups): Boosts creaminess and gives the cheesecake its tender crumb.
- Sour cream (½ cup): Contributes a subtle tang and moistness that elevate the overall flavor profile.
- Pure vanilla extract (2 teaspoons): Infuses aromatic warmth and depth.
- Lemon juice (1 teaspoon): Brightens the batter and balances richness with a vibrant twist.
- Cornstarch (3½ tablespoons) and all-purpose flour (2 tablespoons): These gentle thickeners ensure the cheesecake sets perfectly without becoming dense or rubbery.
How to Make Burnt Basque Cheesecake Recipe
Step 1: Prep Your Pan
Start by preheating your oven to a hot 425°F. While it heats up, line a 9-inch springform pan with parchment paper, making sure to leave at least a 2-inch overhang on the sides. This overhang is essential as it helps you easily lift out the cheesecake later and gives that rustic flair to the sides when baked.
Step 2: Cream the Cheeses and Sugar
Into the bowl of your stand mixer fitted with a paddle attachment, dump the cream cheese, granulated sugar, and mascarpone. Beat them together on high speed for about 2 minutes until the mixture is smooth, fluffy, and no lumps remain. Be sure to occasionally scrape down the sides of the bowl to keep everything well combined and silky.
Step 3: Add the Eggs
Next, add the eggs and egg yolks to the bowl. Beat for 30 seconds to incorporate, but be careful not to overmix here—you want to keep the batter smooth without whipping too much air in.
Step 4: Mix in the Creams and Flavors
Pour in the heavy cream, sour cream, pure vanilla extract, and lemon juice. Mix on medium speed until everything is fully incorporated. This combination enriches the flavor and ensures a melt-in-your-mouth texture.
Step 5: Combine Dry Ingredients
Finally, sprinkle in the cornstarch and all-purpose flour. Mix just until combined to avoid overworking the batter, which helps keep the cheesecake tender.
Step 6: Pour and Smooth
Carefully pour the batter into your prepared springform pan. Use a spatula to smooth the top evenly—the surface should be glossy and thick.
Step 7: Bake the Cheesecake
Place your pan on the middle rack of the oven and bake for 45 minutes. You’ll notice the top turning a deep golden brown with dark patches forming, which is key to that “burnt” effect and intense flavor.
Step 8: Broil for Perfect Browning
Once baked, switch your oven on to broil and place the cheesecake under the broiler for about 30 seconds. Keep a close eye so that the top becomes a rich dark brown without burning black. This final touch creates the signature crackled, caramelized crust that makes this cheesecake uniquely delicious.
Step 9: Cool and Chill
Remove the cheesecake from the oven and allow it to cool completely on a wire rack. After cooling, cover and refrigerate for at least 8 hours. Chilling solidifies the structure and enhances the custardy texture before unmolding and serving.
How to Serve Burnt Basque Cheesecake Recipe
Garnishes
The best part about serving this Burnt Basque Cheesecake Recipe is keeping it simple to let the burnt, caramelized flavor shine. A light dusting of powdered sugar or a handful of fresh berries works beautifully to add visual contrast and a pop of freshness.
Side Dishes
Complement your cheesecake with a crisp side like fresh figs, tangy citrus segments, or even a scoop of homemade vanilla ice cream. These elements provide brightness and texture that balance the richness of the cake.
Creative Ways to Present
For a stunning presentation, slice the cheesecake and serve it on rustic wooden boards or minimalist white plates to highlight the deep brown top and creamy interior. Pairing slices with edible flowers or a drizzle of berry coulis adds an elegant touch that’s sure to impress guests.
Make Ahead and Storage
Storing Leftovers
Leftover cheesecake keeps best tightly covered in the refrigerator. Make sure to wrap it with plastic wrap or store in an airtight container to prevent it from absorbing other fridge odors. It will stay fresh and creamy for up to 4 days.
Freezing
This Burnt Basque Cheesecake Recipe freezes well. Wrap individual slices or the whole cake tightly in plastic wrap and then foil to protect against freezer burn. Freeze for up to 2 months. When ready to enjoy, thaw overnight in the refrigerator for best texture.
Reheating
If you prefer your cheesecake slightly softer, you can reheat slices gently in a warm oven (about 300°F) for 10 minutes—but be careful not to melt it down. Alternatively, enjoy it chilled for that classic custardy feel.
FAQs
Can I use regular cream cheese instead of mascarpone?
While cream cheese alone can work, adding mascarpone gives the cheesecake an extra layer of creaminess and a subtle richness that elevates the flavor. If you don’t have mascarpone, just use more cream cheese, but the texture might be slightly different.
Why does the cheesecake have a burnt top?
The burnt top is actually intentional and a hallmark of this Burnt Basque Cheesecake Recipe. The high baking temperature caramelizes the sugars and browns the surface deeply, creating a contrast with the creamy interior that gives the cake its unique character.
Can I make this cheesecake without a springform pan?
A springform pan is highly recommended for easy release and maintaining the cheesecake’s delicate, creamy structure. If you don’t have one, line a regular cake pan with plenty of parchment paper that extends over the edges, but removing the cake will be trickier.
What role does lemon juice play in this recipe?
Adding lemon juice balances the richness of the cheeses and heavy cream by injecting a subtle brightness. It enhances the overall flavor profile without making the cake taste lemony.
Is this cheesecake dense or light?
This Burnt Basque Cheesecake Recipe produces a custardy, slightly lighter-than-traditional cheesecake. It isn’t dense or heavy—it’s perfectly smooth with a luscious melt-in-your-mouth quality thanks to the mix of mascarpone, sour cream, and careful baking.
Final Thoughts
There’s something truly magical about the Burnt Basque Cheesecake Recipe that draws you back for just one more slice. Its combination of crackled, caramelized top and irresistibly creamy center is a testament to simple ingredients meeting bold technique. I can’t recommend baking this cheesecake enough whether you’re impressing guests or savoring it yourself. Give it a try and prepare to fall in love.
Print
Burnt Basque Cheesecake Recipe
- Prep Time: 20 minutes
- Cook Time: 45 minutes baking + 0.5 minutes broiling
- Total Time: Approximately 9 hours (includes chilling time)
- Yield: 12 servings
- Category: Dessert
- Method: Baking
- Cuisine: Spanish
Description
This Burnt Basque Cheesecake is a rich and creamy dessert with a beautifully caramelized top and a custard-like center. Made with cream cheese, mascarpone, and sour cream, it offers a perfect balance of sweetness and slight tanginess. The cheesecake is baked at a high temperature to achieve its characteristic burnt surface, then chilled to set, resulting in a decadent and smooth texture that melts in your mouth. Ideal for special occasions or a gourmet treat, this recipe yields 12 generous servings.
Ingredients
Cheesecake Batter
- 32 ounces cream cheese (908 grams, room temperature – 4 bricks)
- 1⅓ cups granulated sugar (267 grams)
- 8 ounces mascarpone cheese (227 grams, room temperature)
- 3 large eggs (150 grams, room temperature)
- 3 egg yolks (42 grams, room temperature)
- 1⅓ cups heavy cream (303 grams, room temperature)
- ½ cup sour cream (114 grams, room temperature)
- 2 teaspoons pure vanilla extract (8 grams)
- 1 teaspoon lemon juice (5 grams)
- 3½ tablespoons cornstarch (26 grams)
- 2 tablespoons all-purpose flour (15 grams)
Instructions
- Preheat the Oven: Set your oven to 425°F (220°C) and line a 9-inch springform pan with parchment paper, leaving the paper hanging about 2 inches over the sides. This will help with easy removal later on.
- Mix Cream Cheese and Sugars: In a stand mixer fitted with a paddle attachment, combine the room-temperature cream cheese, granulated sugar, and mascarpone cheese. Beat on high speed for 2 minutes until smooth and creamy, scraping down the bowl as needed to ensure even mixing.
- Add Eggs: Add the whole eggs and beat together for 30 seconds, just until incorporated and smooth.
- Incorporate Creams and Flavors: Pour in the heavy cream, sour cream, vanilla extract, and lemon juice. Mix until everything is fully combined and the batter feels silky.
- Add Starch and Flour: Finally, sprinkle in the cornstarch and all-purpose flour. Mix on low speed just until the batter is homogenous and no streaks remain. Avoid overmixing.
- Pour Batter into Pan: Transfer the cheesecake batter into the prepared pan and smooth the top with a spatula for an even surface.
- Bake Cheesecake: Place the pan in the oven and bake at 425°F (220°C) for 45 minutes. The edges will puff and brown, and the center should look soft but set.
- Broil the Top: After baking, switch your oven to broil. Broil the cheesecake for about 30 seconds, watching closely to develop a deep golden-brown, burnt top that is not blackened.
- Cool Completely: Remove the cheesecake from the oven and set it on a cooling rack to cool down to room temperature, allowing it to settle and develop texture.
- Chill in Fridge: Once cooled, cover the cheesecake and refrigerate for at least 8 hours or overnight to chill and firm up.
- Unmold and Serve: After chilling, carefully release the springform pan sides and remove the cheesecake for slicing and serving. Enjoy the creamy, burnt top delight!
Notes
- Ensure all dairy ingredients and eggs are at room temperature for smooth batter and even baking.
- The lemon juice adds subtle acidity that balances richness; do not omit unless allergy/intolerance.
- Be careful not to over broil; burnt should be dark golden brown, not black.
- Using parchment paper that hangs well above the pan allows for easy removal of the cheesecake without cracking.
- The cheesecake’s texture will be custard-like and creamy, not fully firm like a traditional baked cheesecake.
- Chilling for at least 8 hours is essential for best texture and flavor development.

