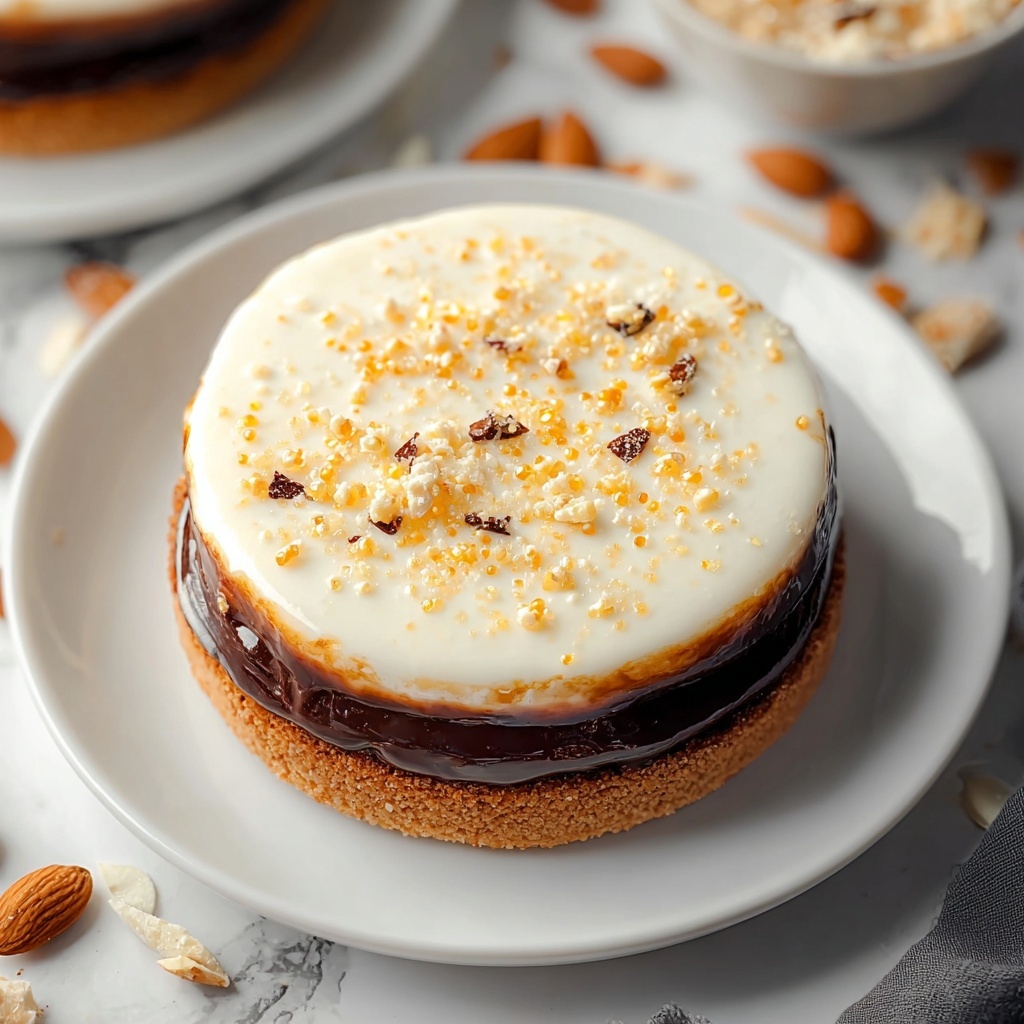
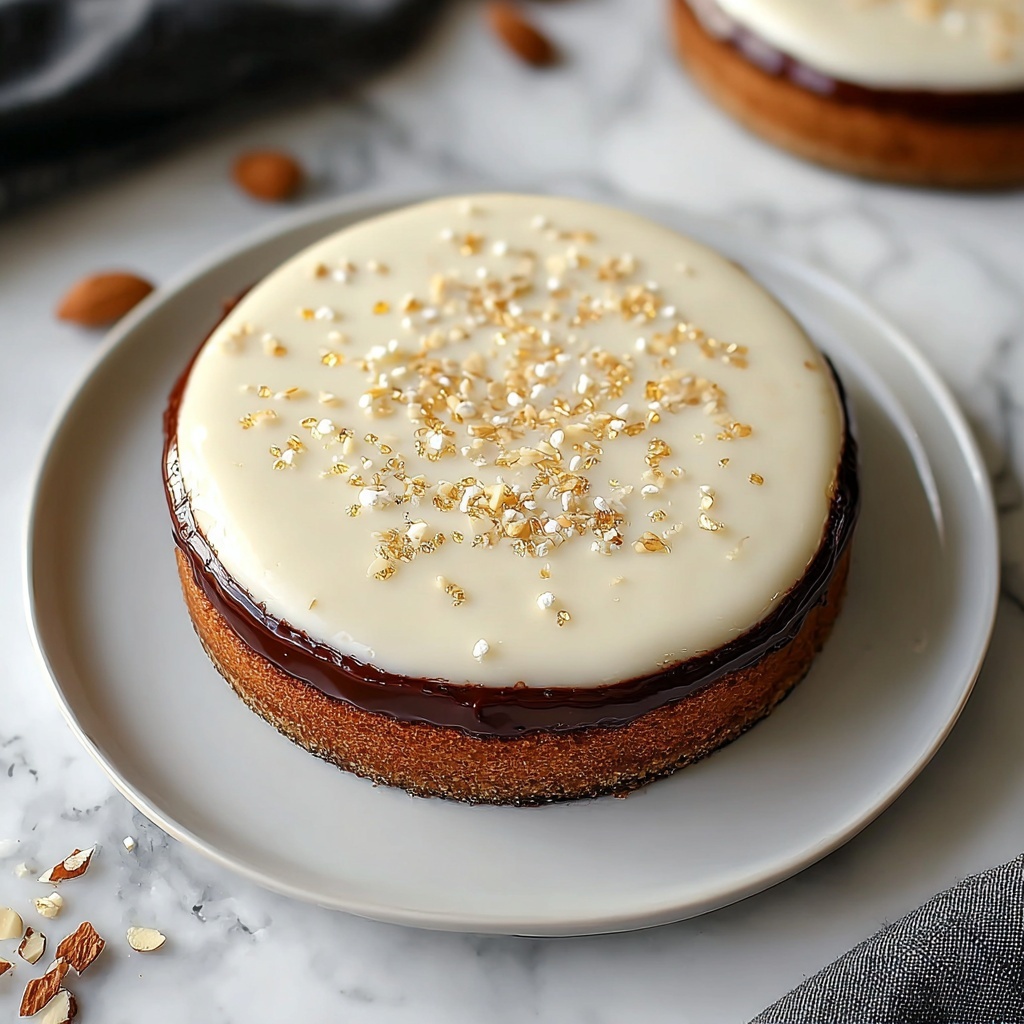
If you love the classic dessert with a twist, then you are going to fall head over heels for this Boston Cream Pie Cookies Recipe. These cookies capture all the rich, luscious flavors of the beloved Boston Cream Pie but in a fun, handheld form that’s perfect for sharing or treating yourself. Each bite has the perfect balance of buttery cookie dough topped with a smooth, glossy chocolate glaze, making them absolutely irresistible. Whether you’re baking for a special occasion or just because, this recipe will quickly become one of your favorites to whip up.

Ingredients You’ll Need
The ingredients for this Boston Cream Pie Cookies Recipe are straightforward and easy to find, yet every single one plays a crucial role in creating the perfect texture and flavor. From the creamy butter to the silky chocolate glaze, these ingredients work together to bring the Boston Cream Pie experience straight to your cookie jar.
- 2 1/2 cups all-purpose flour: The foundation of your cookies, ensuring a tender crumb.
- 1 teaspoon baking powder: Adds just the right lift for a soft, yet sturdy cookie.
- 1/2 teaspoon salt: Balances the sweetness and enhances flavor depth.
- 1 cup unsalted butter, softened: Key for rich flavor and a melt-in-your-mouth texture.
- 1 cup granulated sugar: Sweetens the dough perfectly without overpowering.
- 2 large eggs: Bind the ingredients and add moisture for a soft bite.
- 2 teaspoons vanilla extract: Brings warmth and rounds out the buttery notes.
- 1/4 cup whole milk: Adds moisture and helps achieve the right dough consistency.
- 1/2 cup heavy cream: Essential for making a smooth and luscious chocolate glaze.
- 4 ounces semi-sweet chocolate: Creates that glossy, rich topping everyone loves.
- 1 tablespoon light corn syrup: Ensures the glaze stays silky and shiny when set.
How to Make Boston Cream Pie Cookies Recipe
Step 1: Get Ready to Bake
Start by preheating your oven to 350°F (175°C). Line two baking sheets with parchment paper to prevent sticking and make cleanup a breeze. Preparation is key to a smooth baking experience.
Step 2: Combine Dry Ingredients
In a medium bowl, whisk together your all-purpose flour, baking powder, and salt. This ensures even distribution, so every cookie bakes perfectly fluffy and flavorful.
Step 3: Cream Butter and Sugar
In a large mixing bowl, use an electric mixer on medium speed to cream the softened butter and granulated sugar until the mixture turns light and fluffy. This step—about 3 to 4 minutes—introduces air that will make your cookies tender and lovely.
Step 4: Add Eggs One by One
Add the eggs one at a time to the creamed butter and sugar, beating well after each addition. This helps maintain the airy texture while fully incorporating moisture.
Step 5: Stir in Vanilla Extract
Mix in the vanilla extract until it is fully blended in, adding a warm, sweet aroma that makes the dough irresistible even before baking.
Step 6: Mix Dry and Wet Ingredients
Gradually add the flour mixture to the wet ingredients, mixing on low speed just until combined. Don’t overmix here; you want to keep the dough light and soft.
Step 7: Add Milk and Bring Dough Together
Pour in the whole milk and continue mixing until your dough is smooth with no dry patches. This extra splash of milk ensures the perfect cookie texture that is both tender and strong enough to hold the glaze.
Step 8: Portion the Cookies
Using about a tablespoon for each cookie, scoop the dough onto your prepared baking sheets. Space them about 2 inches apart to allow for gentle spreading during baking.
Step 9: Bake Until Golden
Bake for 12 to 15 minutes, or until the cookies’ edges turn lightly golden and a toothpick inserted comes out clean. The scent wafting through your kitchen will be heavenly!
Step 10: Cool Cookies
Let the cookies rest on the baking sheets for 5 minutes, then transfer them to wire racks to cool completely. This cooling step is vital for the glaze to set smoothly.
Step 11: Prepare the Chocolate Glaze
In a heatproof bowl, place the semi-sweet chocolate and light corn syrup. The corn syrup will give your glaze that perfect shine and smooth texture everyone adores.
Step 12: Heat the Cream
Warm the heavy cream in a small saucepan over medium heat just until it begins to simmer. Then pour it right over the chocolate-corn syrup mixture to melt the chocolate evenly.
Step 13: Whisk to Glossy Perfection
Let the mixture sit for 2 to 3 minutes to soften, then whisk until completely smooth and glossy. This luscious glaze is what makes these cookies so special.
Step 14: Glaze the Cookies
Once the cookies are fully cooled, spread or drizzle the chocolate glaze on top of each one, covering them evenly. This final touch transforms them into elegant treats that taste like a dream.
Step 15: Let the Glaze Set
Allow the chocolate glaze to set for about 15 to 20 minutes before serving to ensure it’s nice and firm yet silky when you bite into it.
How to Serve Boston Cream Pie Cookies Recipe
Garnishes
Add a sprinkle of finely crushed vanilla wafers or a dusting of powdered sugar on the glazed top for an elegant finish that enhances the classic flavors beautifully.
Side Dishes
Serve these cookies with a cup of rich coffee, black tea, or even a glass of cold milk. The creamy, chocolatey cookie pairs perfectly with a warm or cool beverage for a delightful snack break.
Creative Ways to Present
For parties, arrange these Boston Cream Pie Cookies Recipe treats on a tiered dessert tray alongside fresh berries and mini cream puffs to create a stunning dessert spread that will wow your guests.
Make Ahead and Storage
Storing Leftovers
Store any leftover cookies in an airtight container at room temperature for up to 3 days. This keeps the cookies soft and the chocolate glaze intact without becoming sticky.
Freezing
You can freeze unglazed cookies by placing them in a single layer on a baking sheet first, then transferring them to an airtight freezer-safe container. Freeze for up to 2 months and glaze after thawing for fresh taste.
Reheating
If you prefer a slightly warm cookie, gently reheat in a low oven (about 300°F) for 5 minutes, but be careful not to melt the glaze too much—this way you get that fresh-baked warmth with a perfectly firm chocolate topping.
FAQs
Can I use dark chocolate instead of semi-sweet for the glaze?
Absolutely! Dark chocolate will give a richer, more intense chocolate flavor. Just be aware it will be less sweet, so adjust your preference accordingly.
Is it possible to make these cookies dairy-free?
You can substitute the butter with a dairy-free margarine and use a plant-based milk, while opting for a dairy-free heavy cream alternative to make the glaze. The texture may vary slightly but still delicious!
How long do the cookies stay fresh?
If stored properly in an airtight container at room temperature, these cookies maintain their freshness for 3 days. For longer storage, freezing is the best option.
Can I double this Boston Cream Pie Cookies Recipe?
Yes, you can easily double the ingredients to bake a larger batch. Just be sure to give yourself enough baking sheets and oven space for even baking.
What can I do if the glaze is too thick?
If your glaze feels too thick, gently warm it and whisk in a teaspoon of warm cream or milk to loosen it up for a smoother spread.
Final Thoughts
This Boston Cream Pie Cookies Recipe is truly a delightful way to enjoy a beloved classic dessert in a fresh new format. Rich, buttery, and topped with that shimmering chocolate glaze, these cookies are perfect to share with friends, family, or savor on your own. Don’t hesitate to bake a batch—you’ll be amazed at just how quickly they disappear and how often you’ll find yourself coming back for more!
Print
Boston Cream Pie Cookies Recipe
- Prep Time: 20 minutes
- Cook Time: 12 minutes
- Total Time: 32 minutes
- Yield: About 24 cookies
- Category: Dessert
- Method: Baking
- Cuisine: American
Description
Boston Cream Pie Cookies combine the classic flavors of the beloved dessert into a delightful cookie form. These tender, vanilla-infused cookies are topped with a glossy chocolate glaze that emulates the signature chocolate topping of Boston Cream Pie. Perfect for fans of creamy, chocolate-covered treats, this recipe is approachable and yields deliciously rich cookies with a smooth, decadent finish.
Ingredients
Dry Ingredients
- 2 1/2 cups all-purpose flour
- 1 teaspoon baking powder
- 1/2 teaspoon salt
Wet Ingredients
- 1 cup unsalted butter, softened
- 1 cup granulated sugar
- 2 large eggs
- 2 teaspoons vanilla extract
- 1/4 cup whole milk
Chocolate Glaze
- 1/2 cup heavy cream
- 4 ounces semi-sweet chocolate
- 1 tablespoon light corn syrup
Instructions
- Preheat Oven: Preheat your oven to 350°F (175°C) and line two baking sheets with parchment paper to prepare for baking the cookies.
- Mix Dry Ingredients: In a medium bowl, whisk together the all-purpose flour, baking powder, and salt until well combined to ensure even distribution throughout the dough.
- Cream Butter and Sugar: Using an electric mixer on medium speed, cream the softened butter and granulated sugar until light and fluffy, about 3 to 4 minutes, which helps create a tender cookie texture.
- Add Eggs: Incorporate the eggs one at a time into the butter-sugar mixture, mixing well after each addition to maintain a smooth batter.
- Add Vanilla: Stir in the vanilla extract until fully combined for flavor enhancement.
- Combine Wet and Dry Ingredients: Gradually add the flour mixture to the wet ingredients, mixing on low speed just until combined to avoid overworking the dough.
- Add Milk: Mix in the whole milk until the dough comes together smoothly with no dry spots, ensuring a pliable cookie dough.
- Portion Cookies: Scoop the dough using about a tablespoon for each cookie onto the prepared baking sheets, spacing them approximately 2 inches apart to allow for spreading.
- Bake Cookies: Bake in the preheated oven for 12 to 15 minutes or until the edges are lightly golden and a toothpick inserted in the center is clean, indicating doneness.
- Cool Cookies: Remove the cookies from the oven and let them cool on the baking sheets for 5 minutes before transferring to wire racks to cool completely, preventing breakage.
- Prepare Chocolate Glaze: Place the semi-sweet chocolate and light corn syrup in a heatproof bowl, ready to be combined with cream.
- Heat Cream: Warm the heavy cream in a small saucepan over medium heat until it just begins to simmer, then pour it over the chocolate and corn syrup mixture to soften the chocolate.
- Mix Glaze: Let the mixture sit for 2 to 3 minutes, then whisk until completely melted and smooth, forming a glossy chocolate glaze.
- Glaze Cookies: Once the cookies have cooled, drizzle or spread the chocolate glaze evenly over each cookie for a rich topping.
- Set Glaze: Allow the chocolate glaze to set for 15 to 20 minutes at room temperature before serving to ensure a firm finish.
Notes
- Make sure the butter is softened to room temperature for easy creaming with sugar.
- Do not overmix the dough after adding flour to keep the cookies tender.
- Spacing cookies about 2 inches apart prevents them from merging during baking.
- Let cookies cool completely before glazing to prevent melting the chocolate glaze.
- The glaze can be stored in the refrigerator and remelted gently if it hardens before use.
- If preferred, substitute semi-sweet chocolate with dark or milk chocolate for different flavor profiles.


